Archive for baron harrowthorne

A Short Knight, pt. 3: The Grand Finale

Posted in 40k, Chaos, Conversions, paintjob, World Eaters with tags , , , , , , , , , , , , , , , , , , , on November 13, 2018 by krautscientist

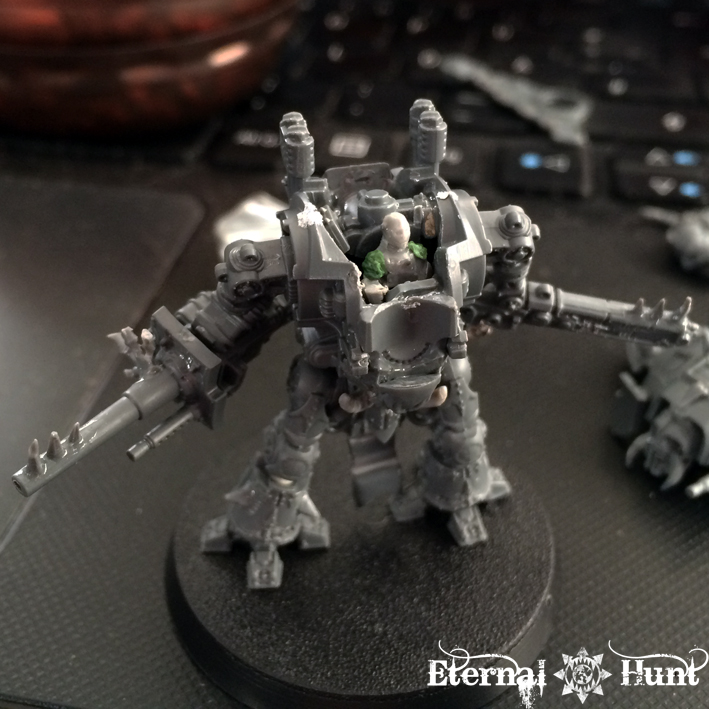
Welcome everyone to the third and final part of my recent Chibi-Knight project! This has been such a fun little endeavour, and today you finally get to take a look at the finished model, so here goes:

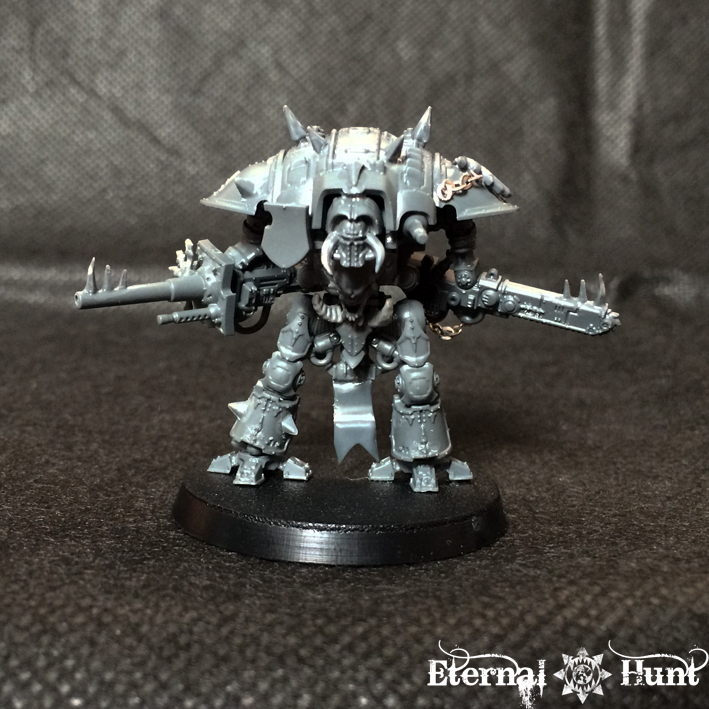
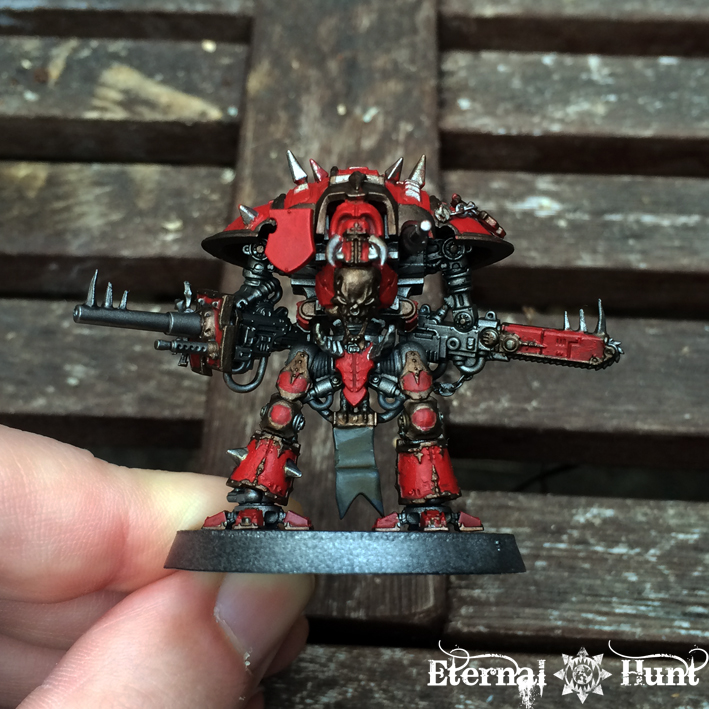
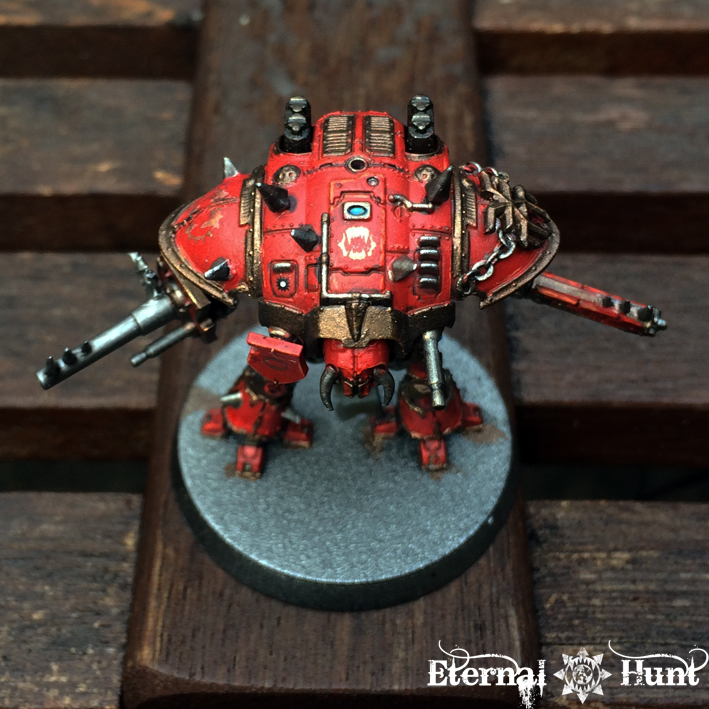
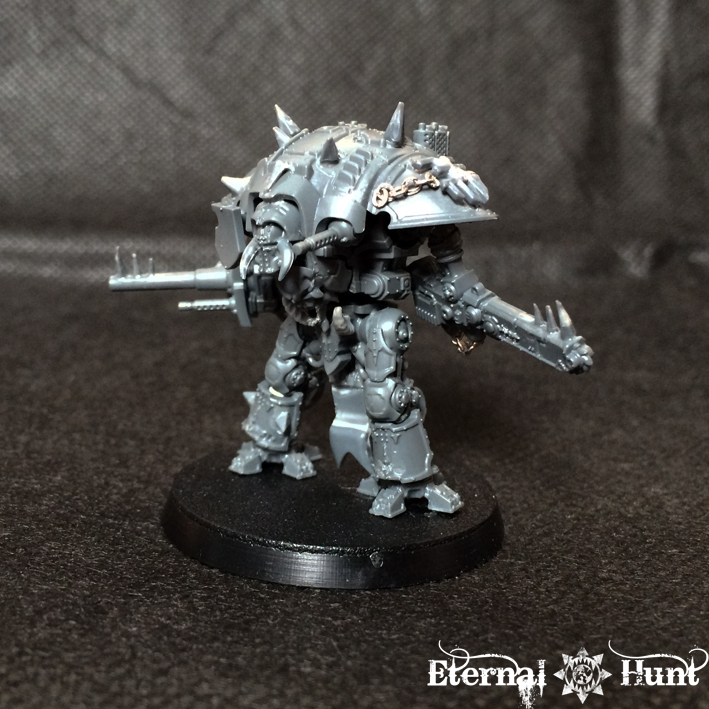
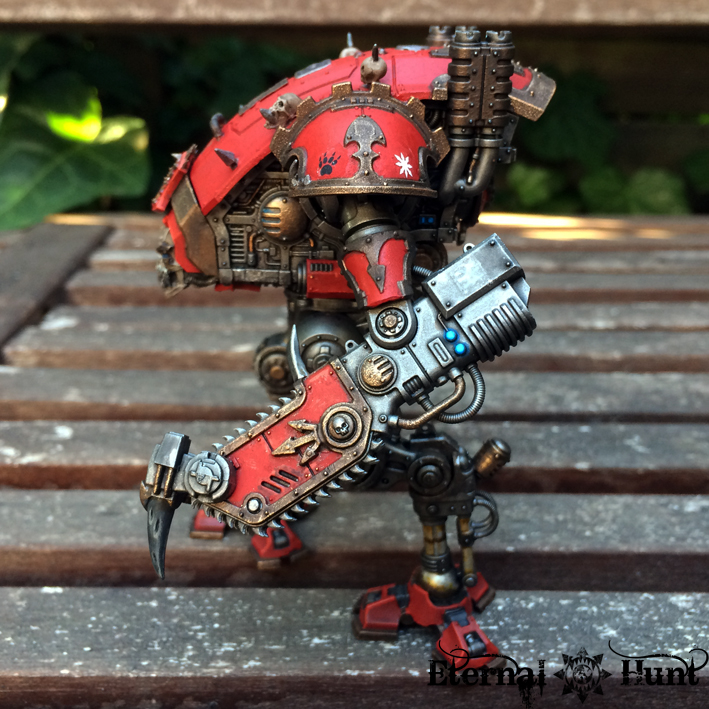
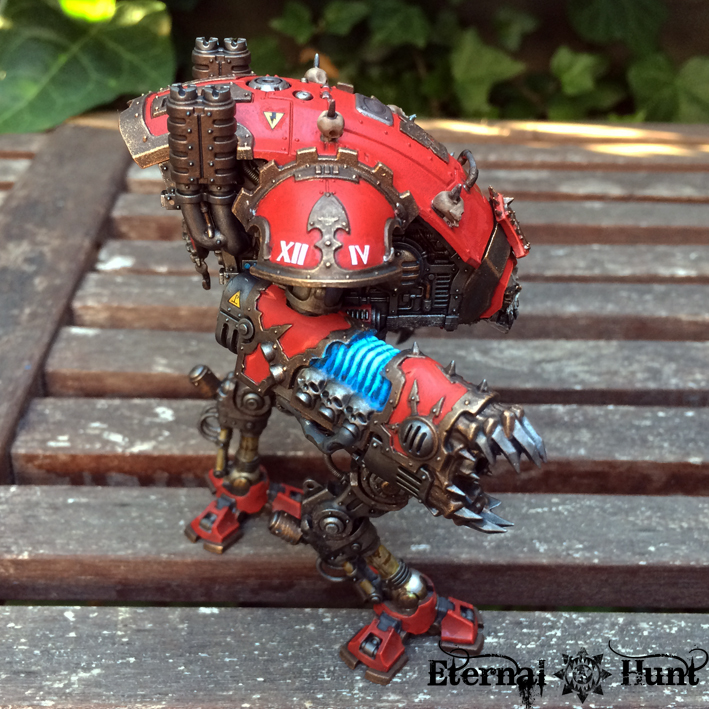
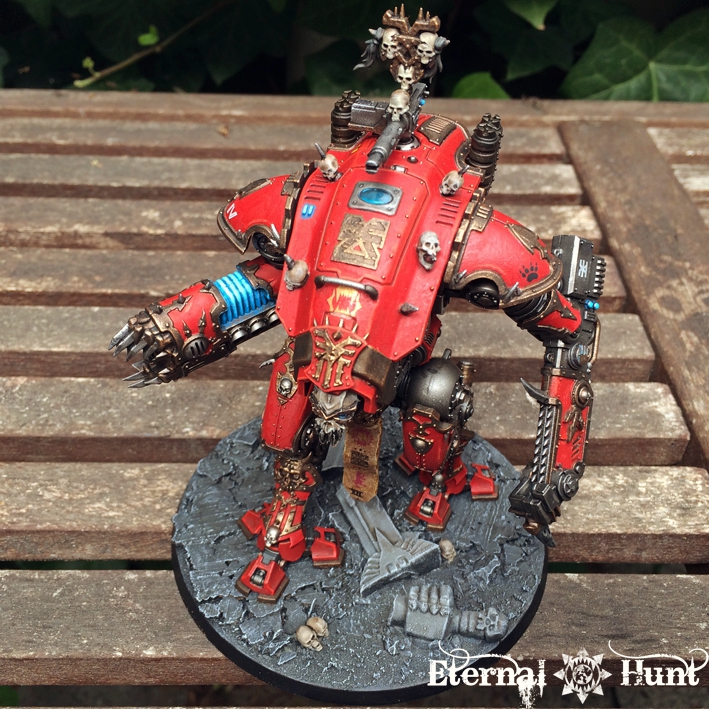
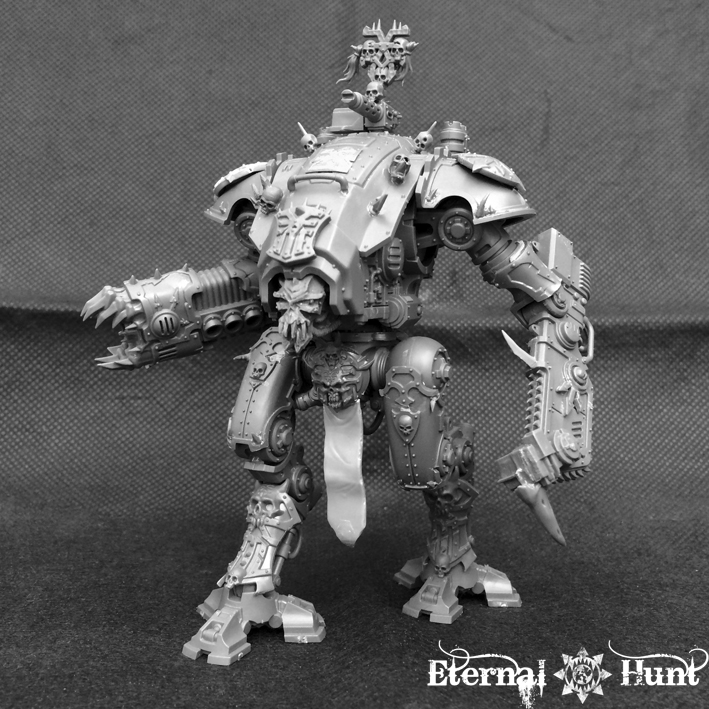
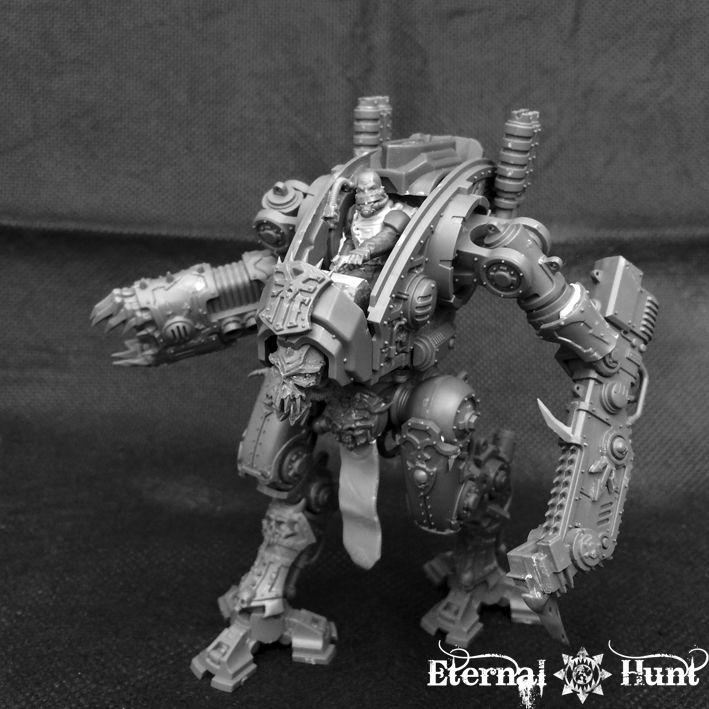
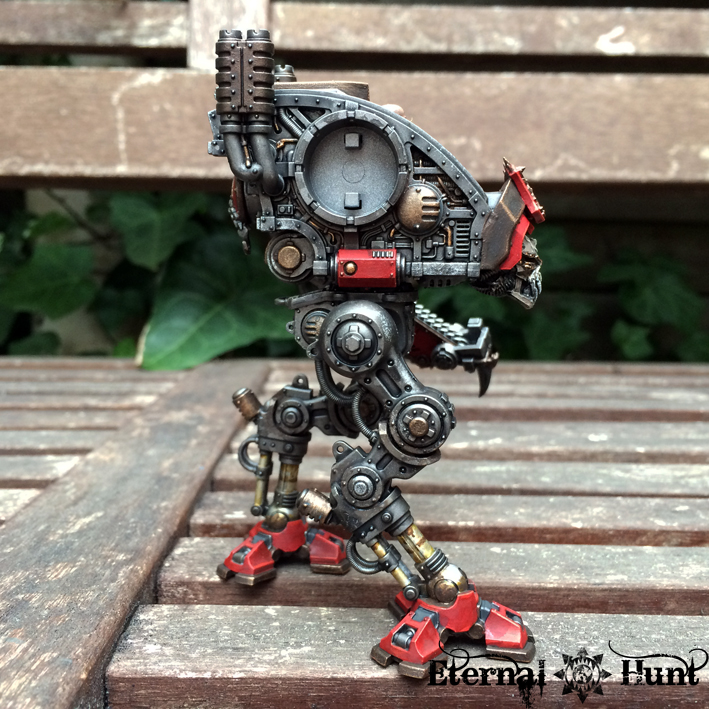
The paintjob for the actual Knight was actually just about finished last time. So here’s where we left off:

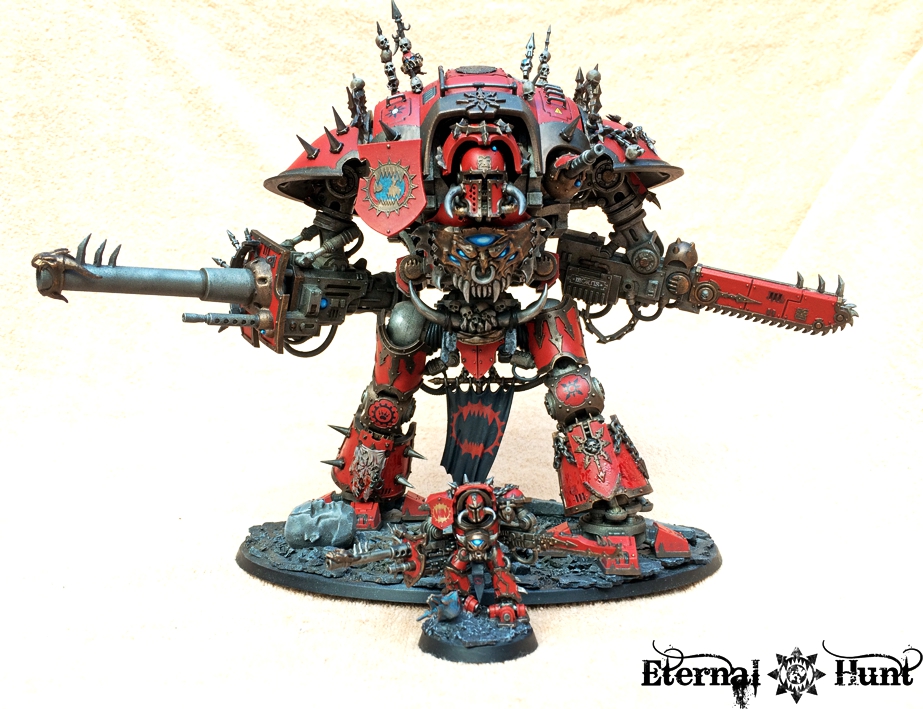
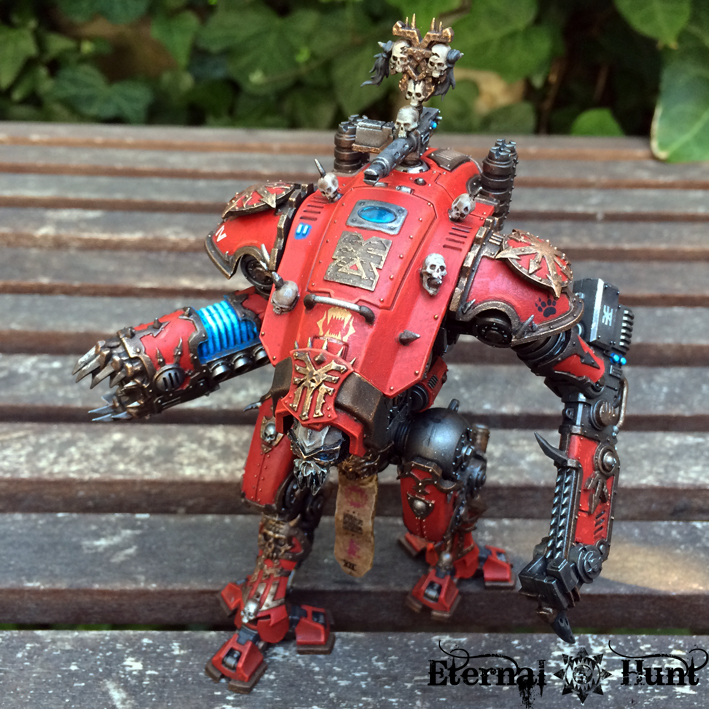
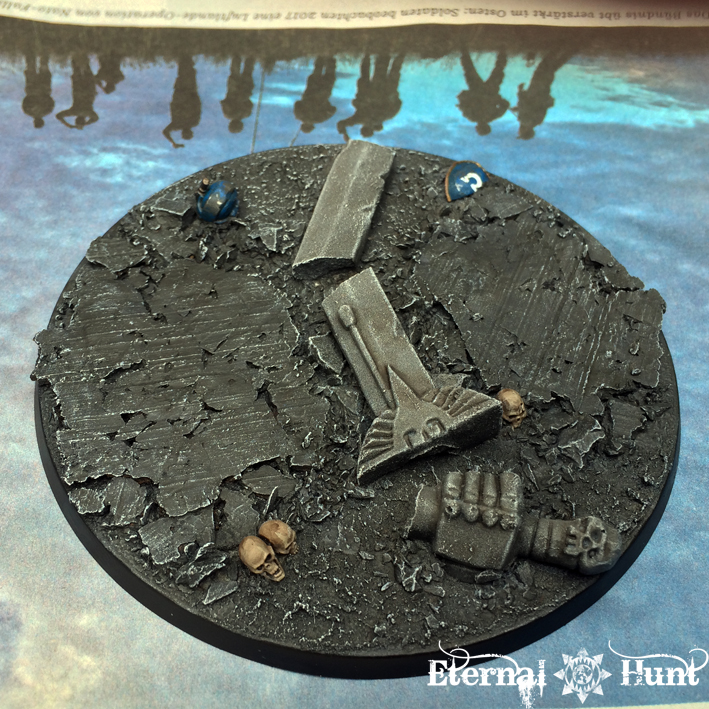
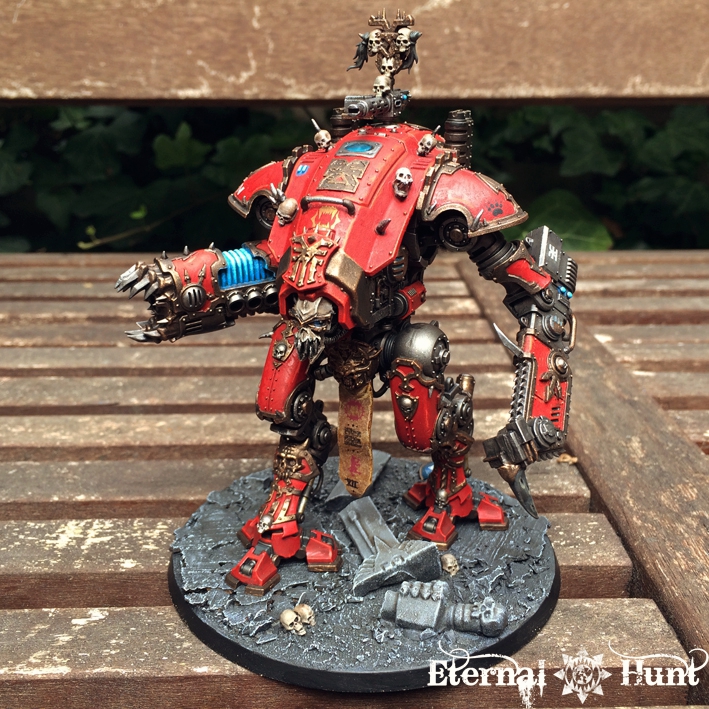
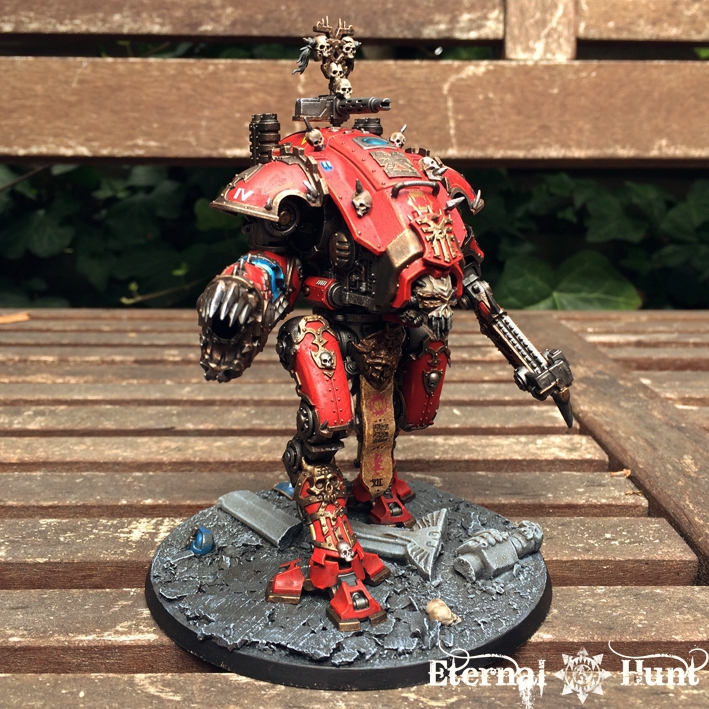
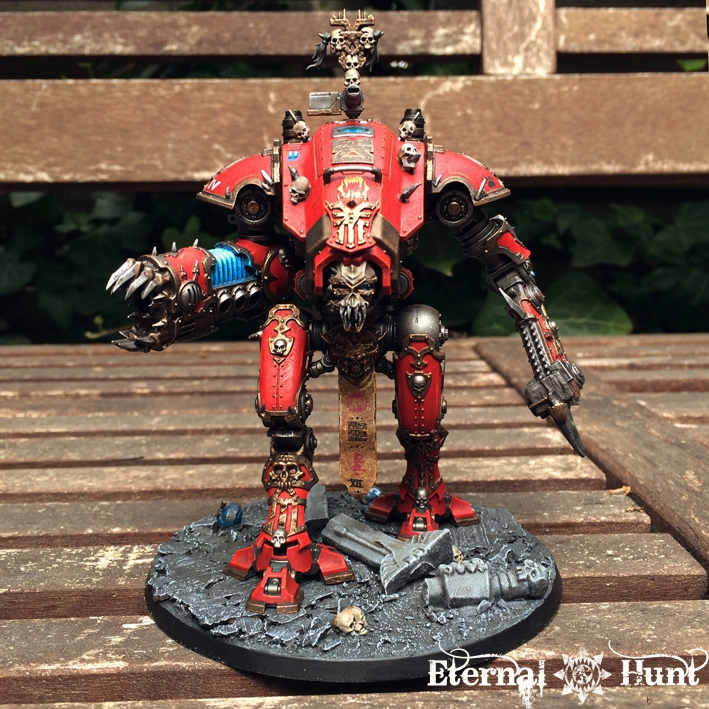
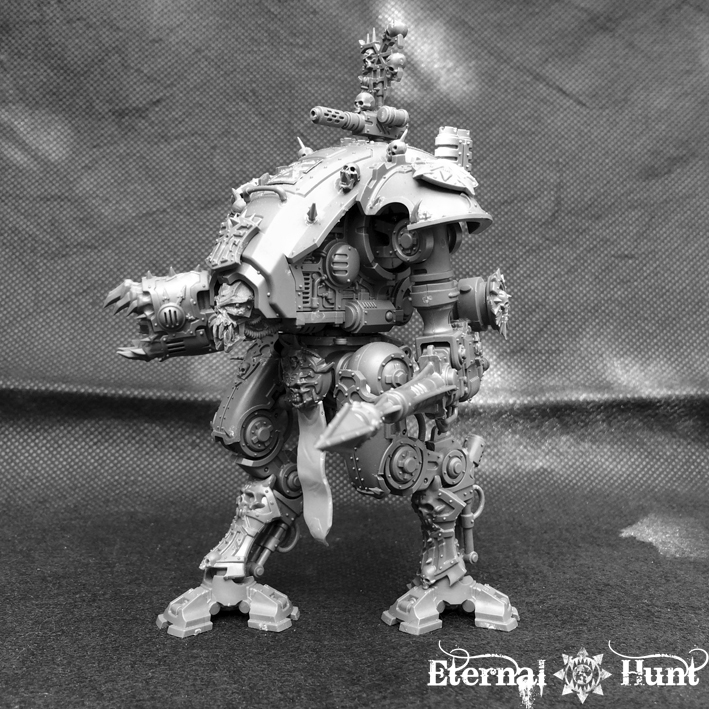
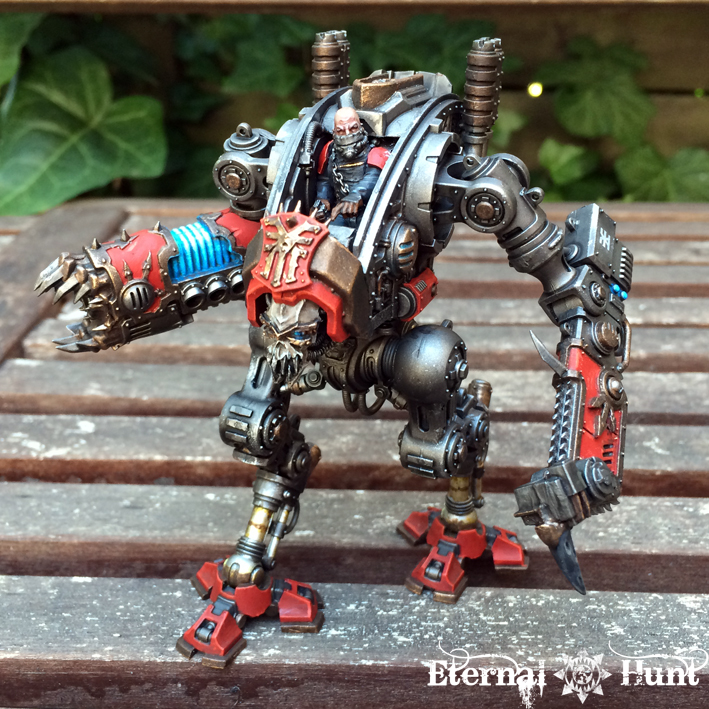
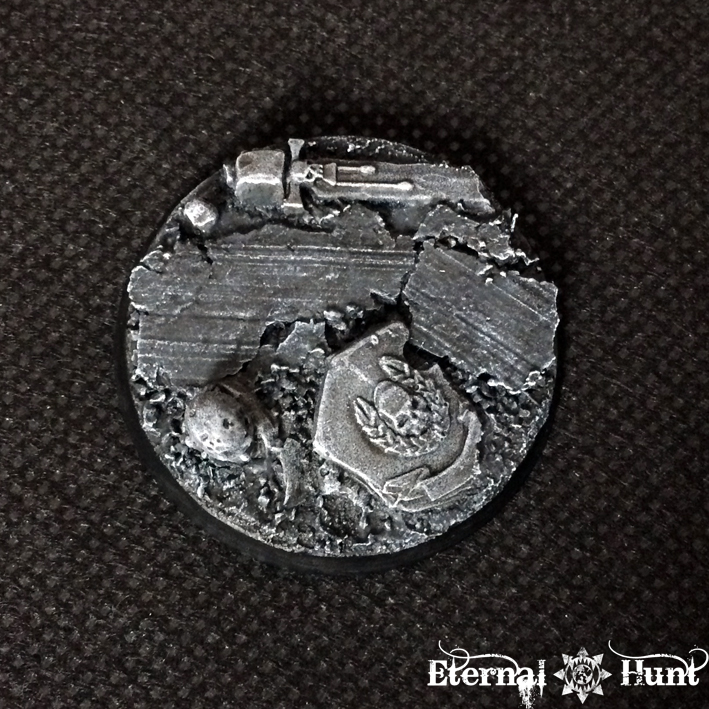
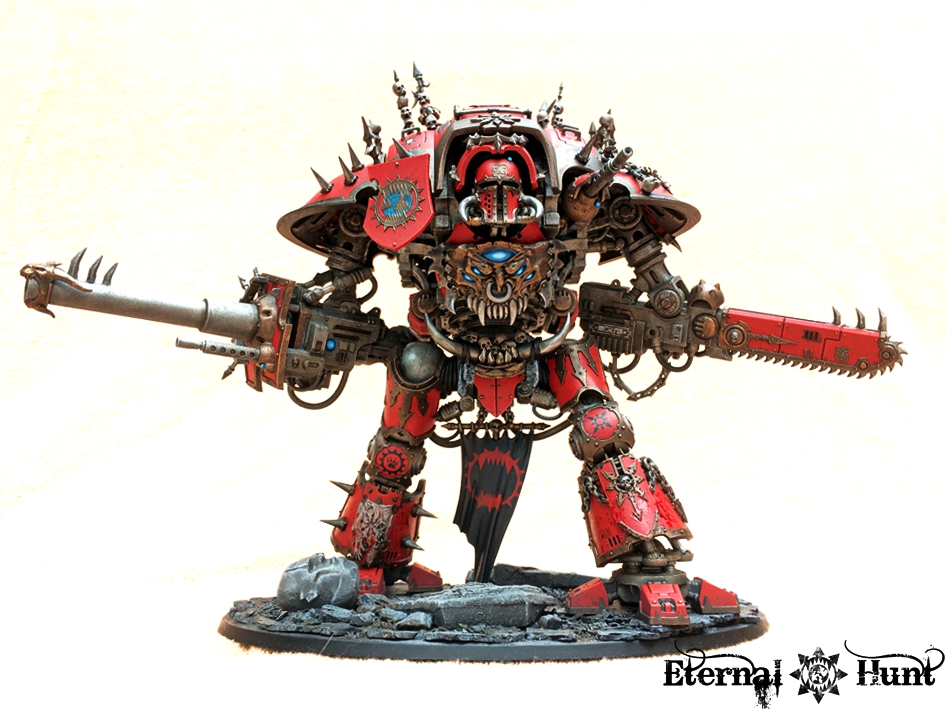
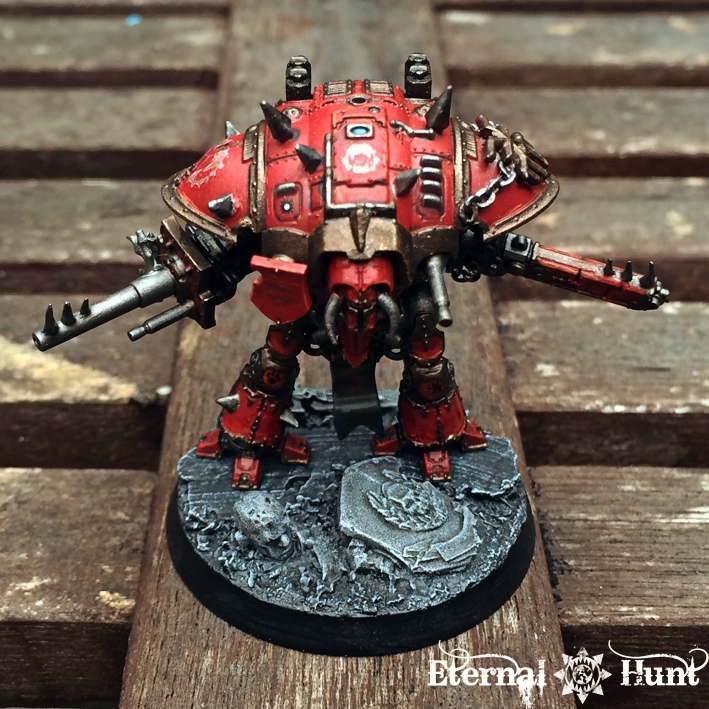
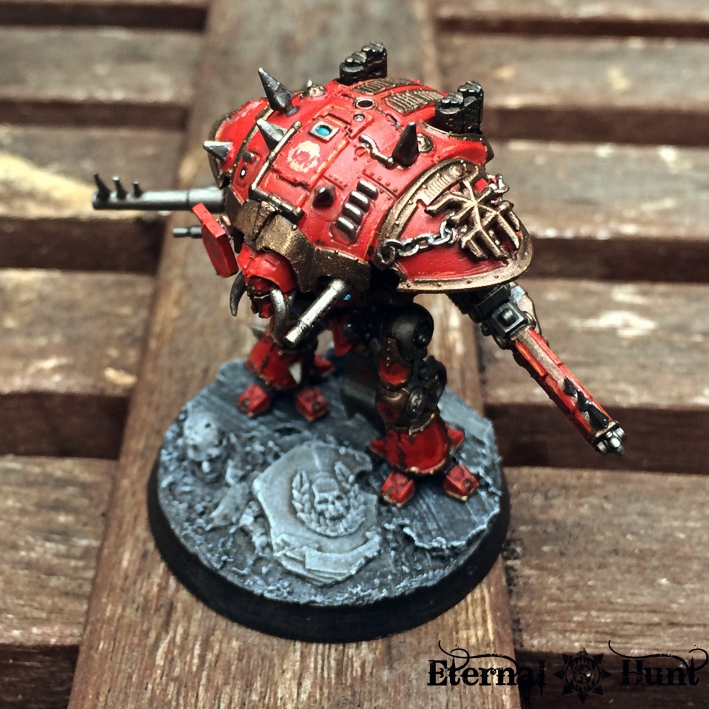
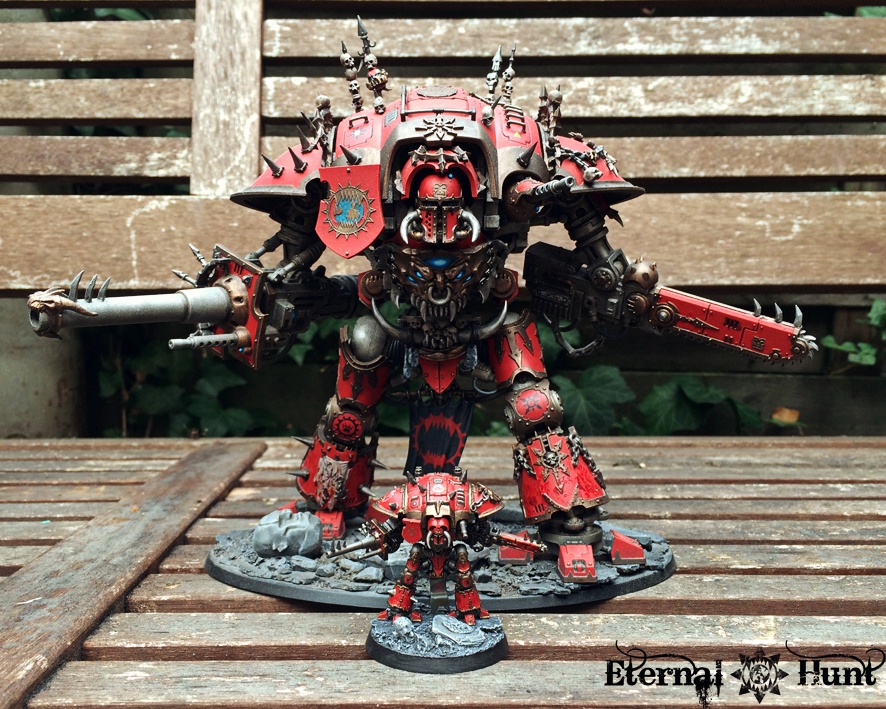
This only really left the basing, but since the objective with this entire model was to match the bigger version as closely as possible, I wanted this ethos to extend to the base as well. So for starters, check out the base of the bigger version of Gilgamesh:

As you can see, I used some pieces from the Space Marine statue from the Honoured Imperium terrain kit to represent fallen Imperial monuments, and I really wanted to recreate that look — and it seemed that fate was very much on my side…

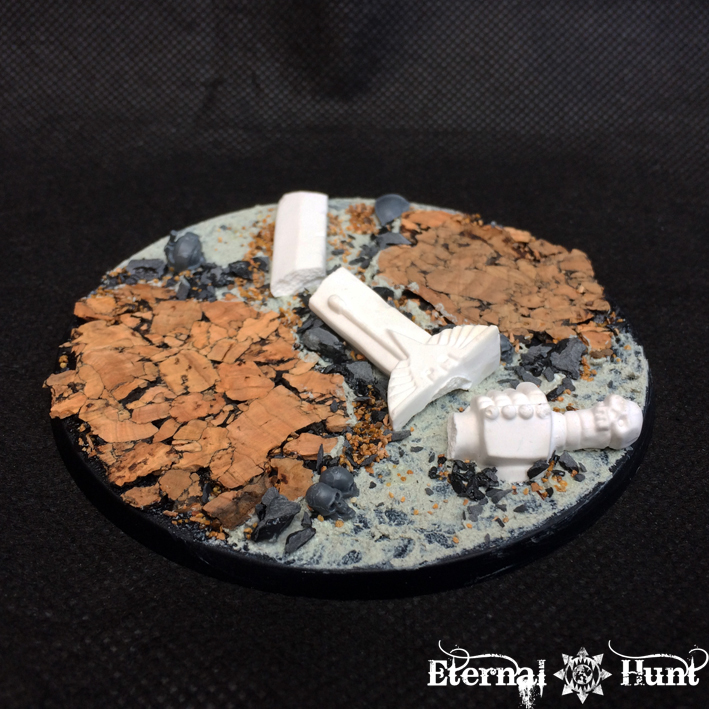
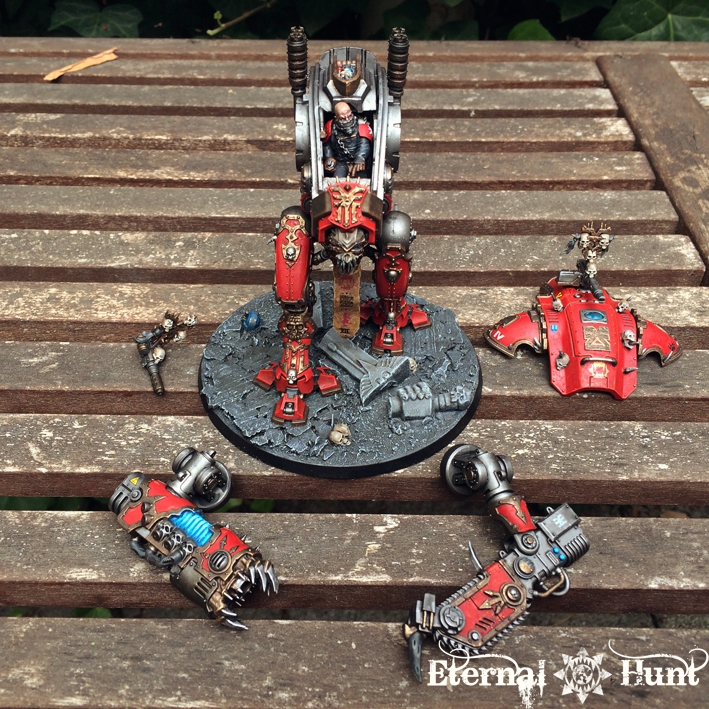
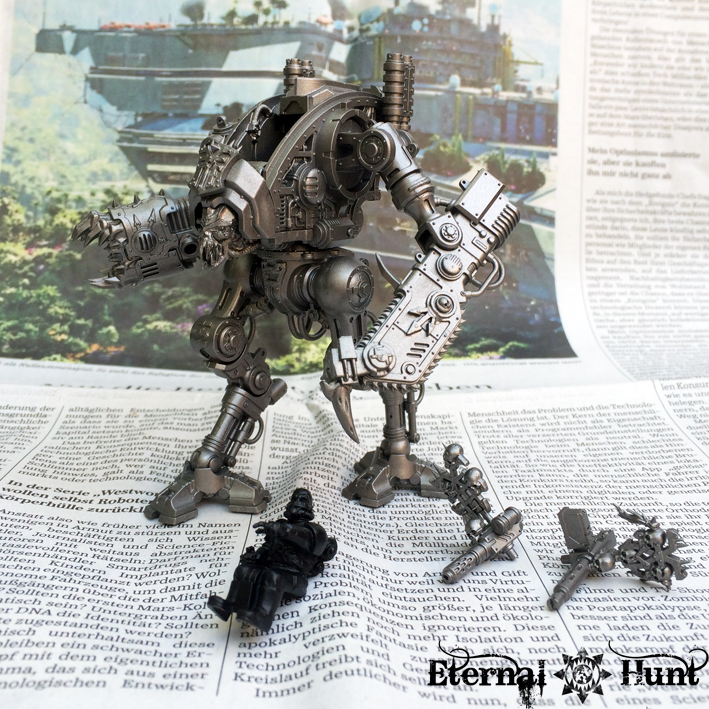
I actually realised a long time ago that the aforementioned statue seems to have been created mostly by upscaling existing Space Marine bitz: If you take a closer look, many of the parts of the statue seem to consist of bigger versions of plastic bitz from the company champion that comes as part of the old Space Marine command squad box (incidentally, I am pretty sure the statue’s cape is an upscaled chaos warrior cape, but that’s beside the point). And I actually discovered a while ago that GW used a face very similar – if not identical – to the statue’s face for different kits as well. So it didn’t take much work to collect the pieces that would allow for a very close recreation of my original design for the base. Take a look:

The shield on the left is pretty much the exact same shield also worn by the Honoured Imperium statue. It came from the aforementioned Space Marine command squad kit. The sword is from a plastic Terminator — I’ll admit the company champion’s sword would have been a better fit from a visual standpoint, but the Terminator sword worked better due to its size and proportions. And the head on the right is a piece of a broken Imperial monument from the WFB/AoS giant.

So I used these parts (or rather, copies of these parts) to create a setup that was fairly similar to the original base:

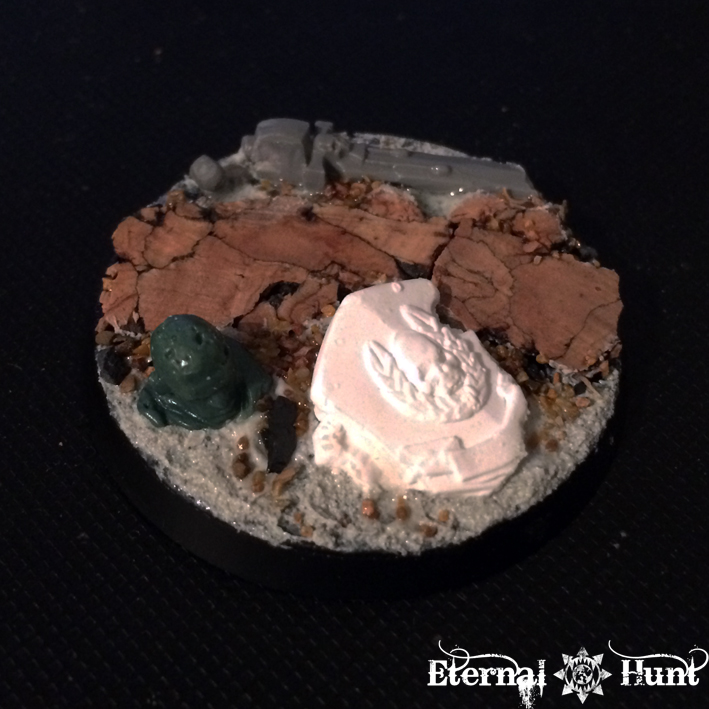
Now I had to improvise a bit, due to the bigger Knight’s base having an oval shape (and hence more room), but I think the setup worked out pretty well. I also chose to have the head in an upright pose this time around — something I should have done on the bigger base as well.

So here’s the base after undercoating…

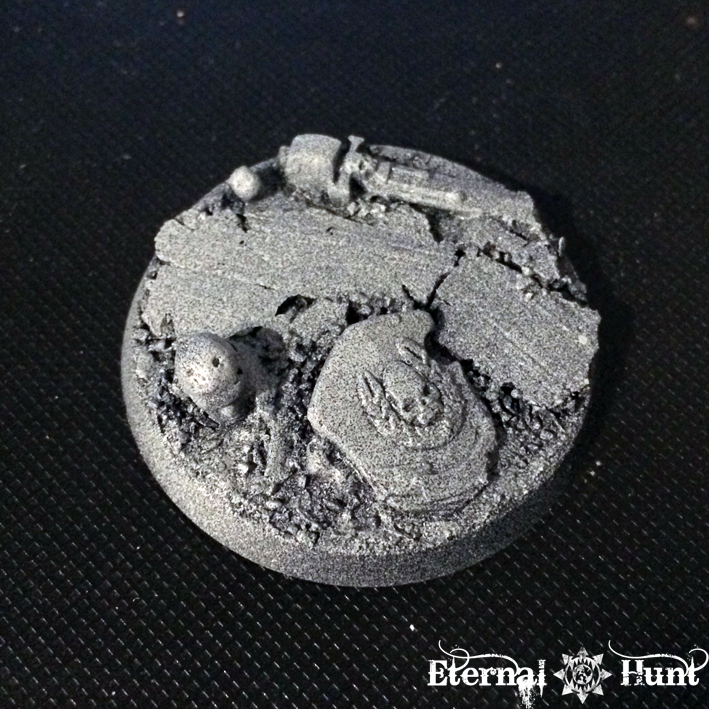
…and with the Knight provisionally placed on top:

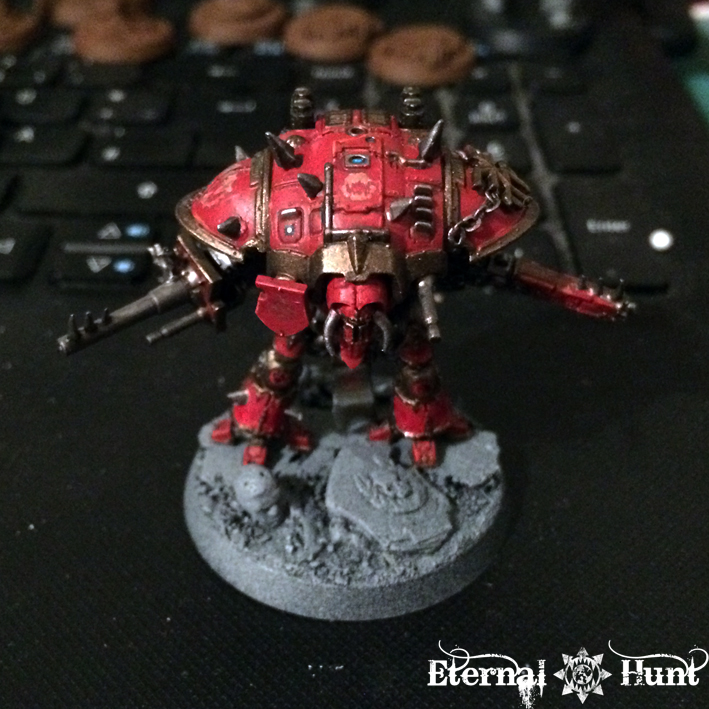
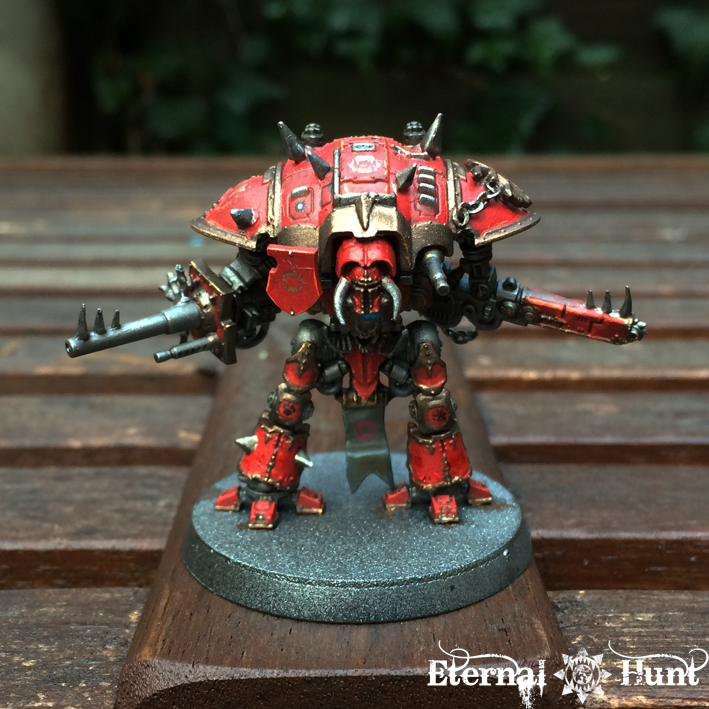
And here’s the finished base, painted to fit the bigger version:

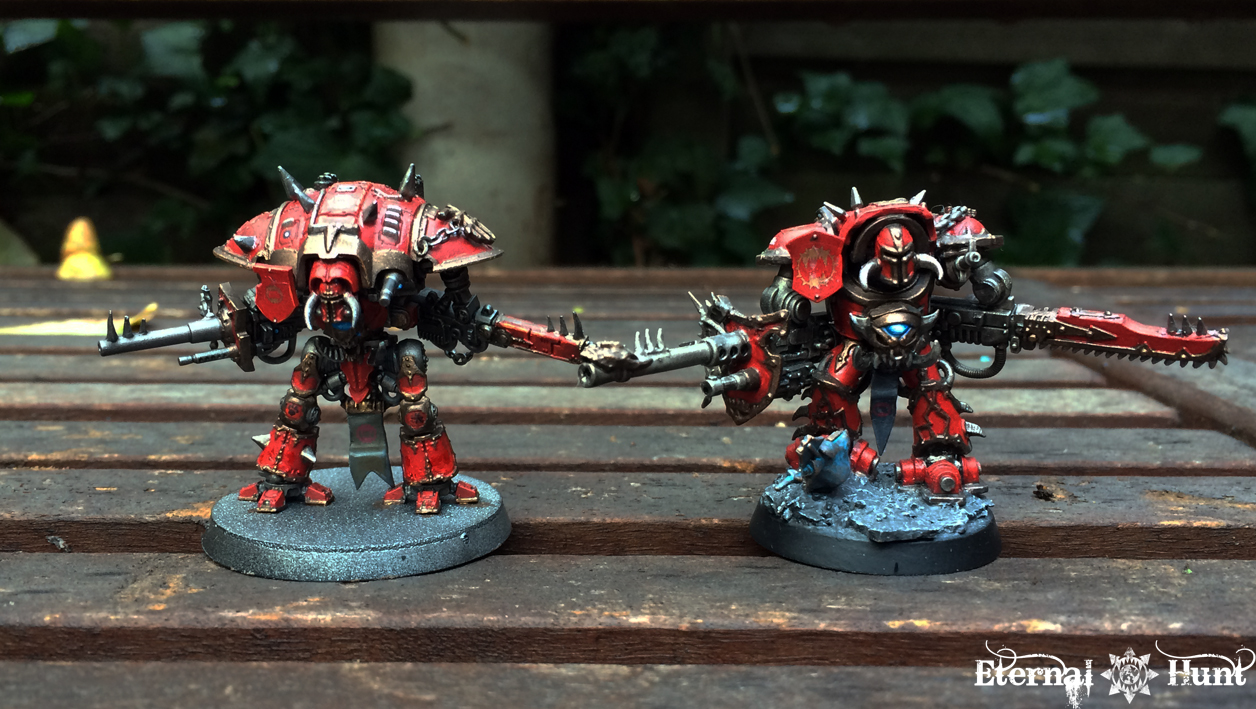
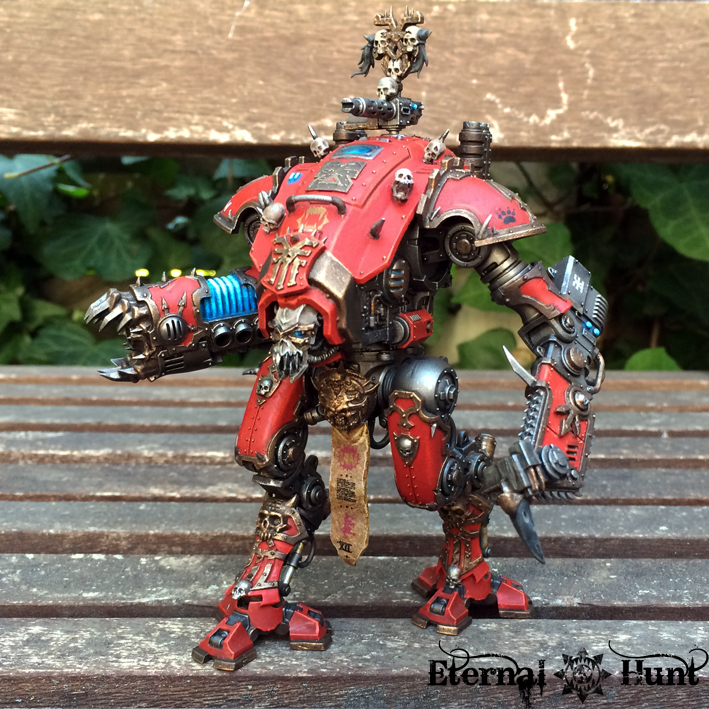
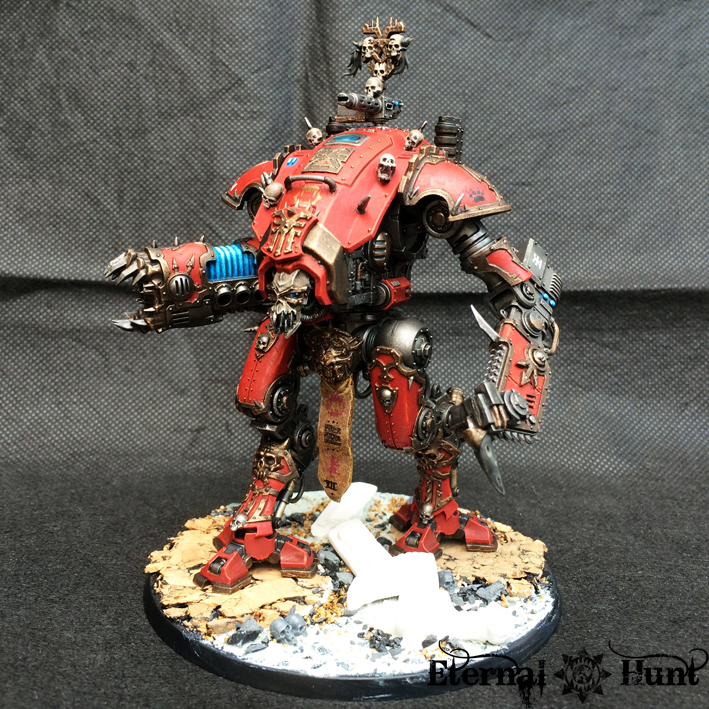
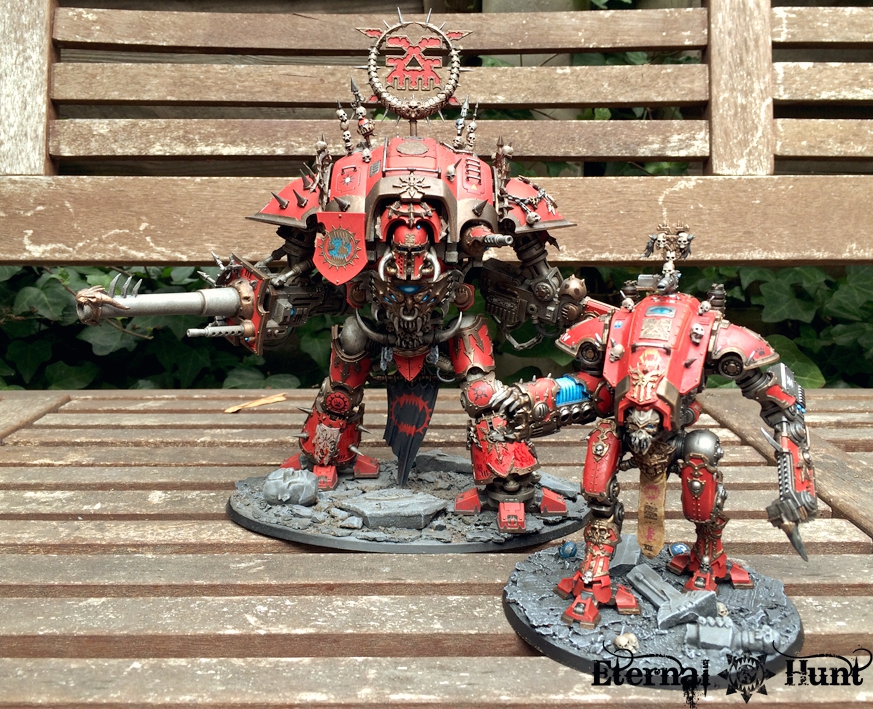
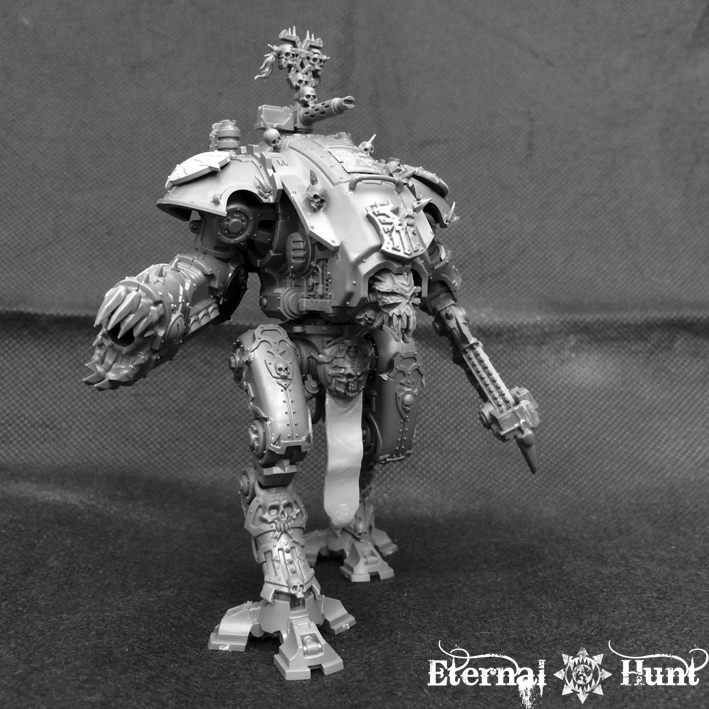
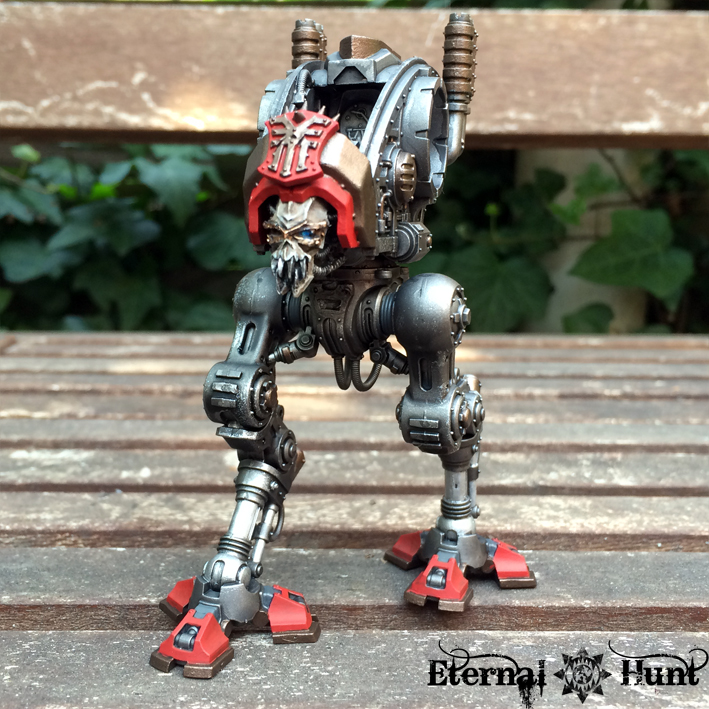
So all that was left was to affix the new Chibi-Gilgamesh to his new home, and then the model was done. So here, once again, the big version for the sake of comparison:

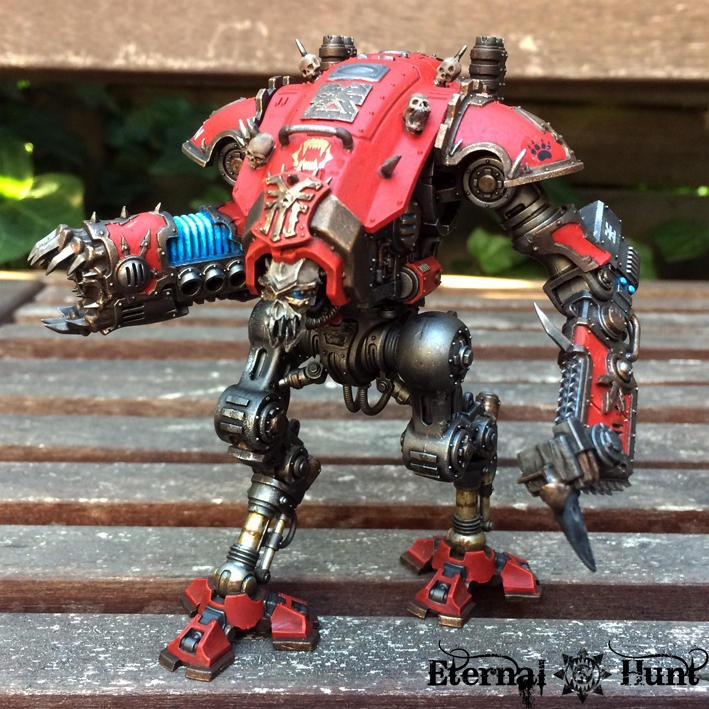
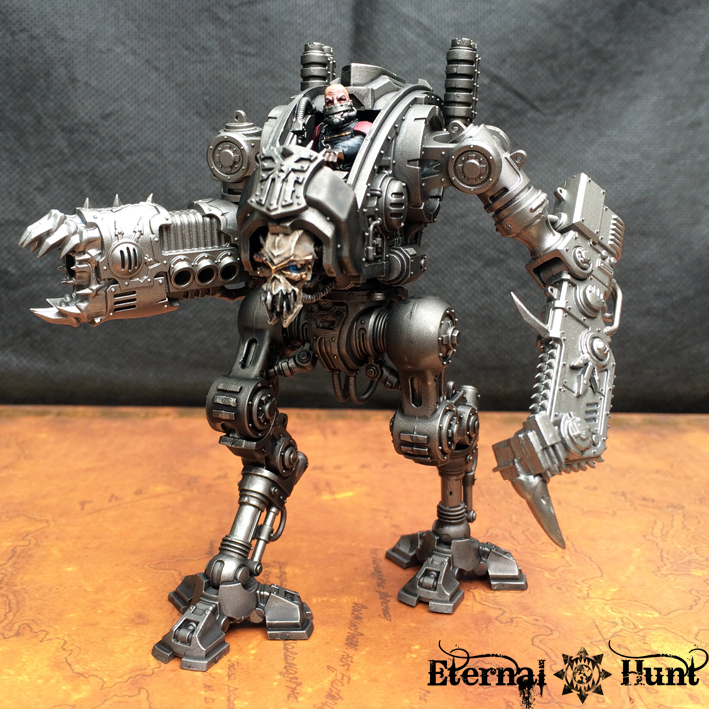
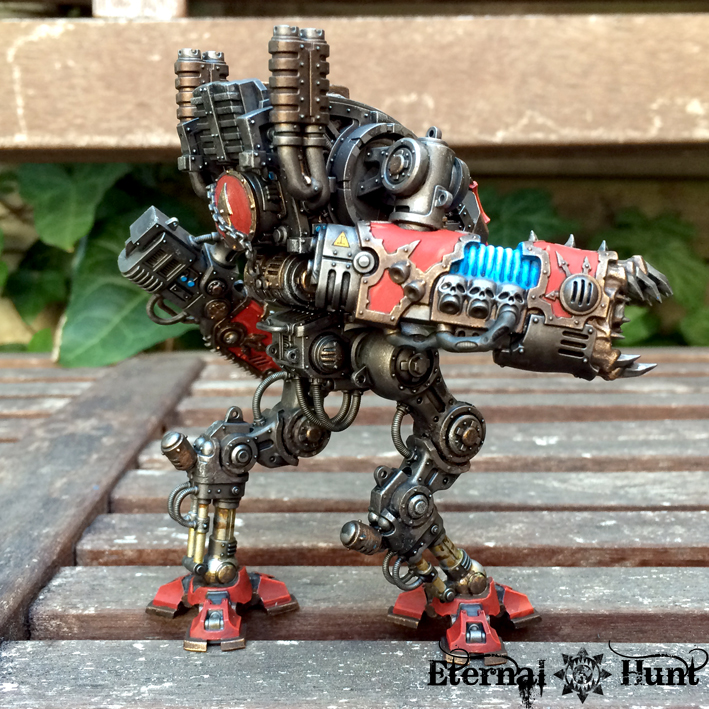
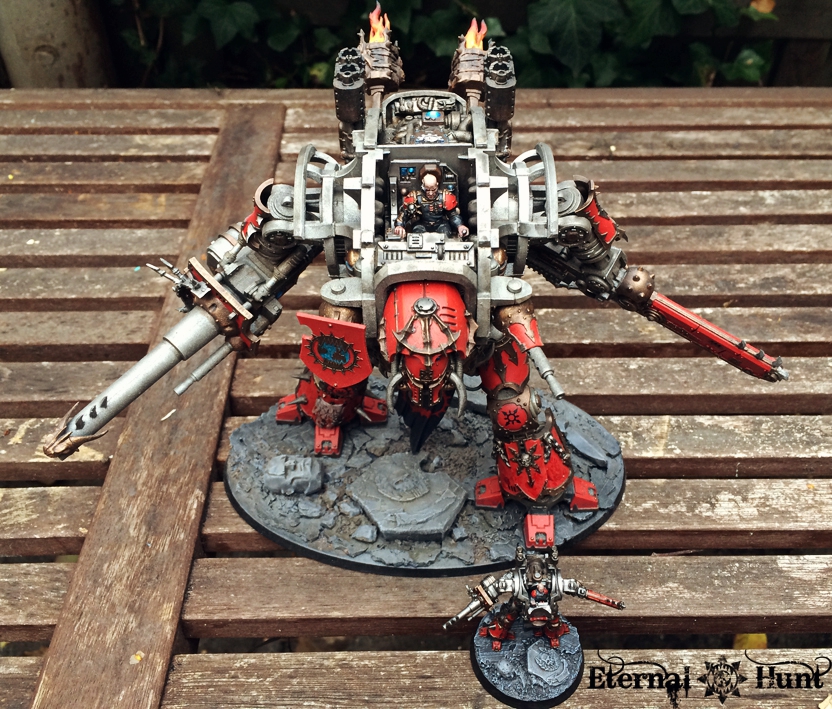
And without further ado, I give you

Chibi-Gilgamesh version 2.0


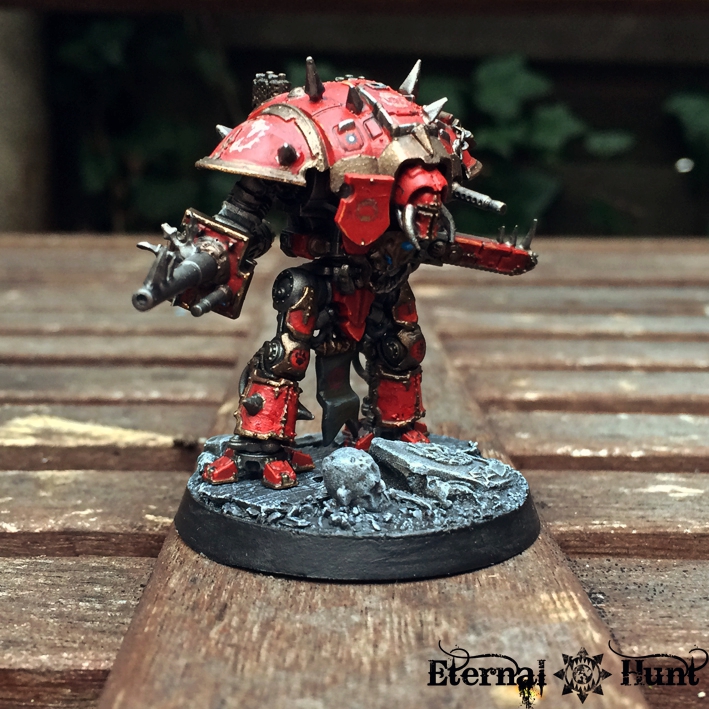
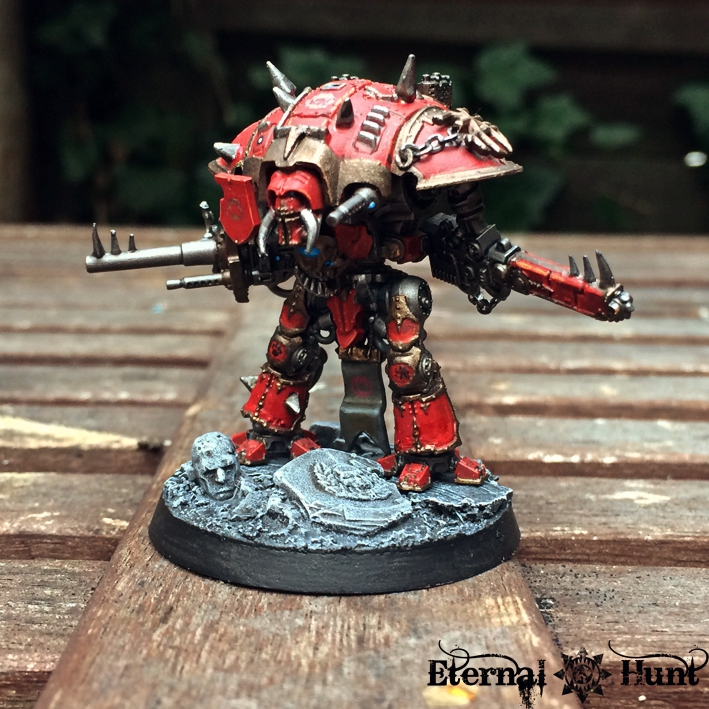
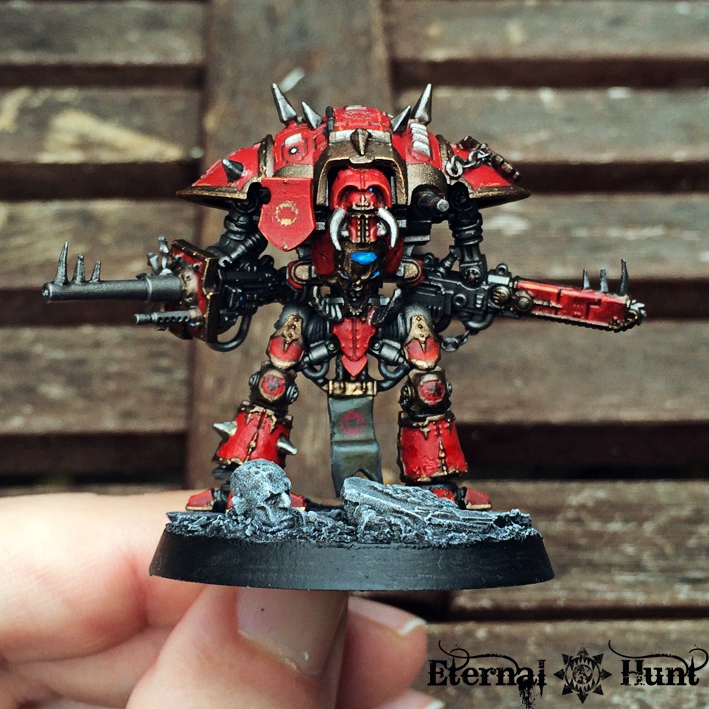
I am actually really happy with the way the model has turned out. I may have had to compromise a bit here and there because a couple of visual touches from the bigger model just couldn’t be reproduced at the smaller scale (at least not without ending up looking extremely goofy, that is), but you can still tell at a glance that this is supposed to be Gilgamesh at a smaller scale, wouldn’t you agree?

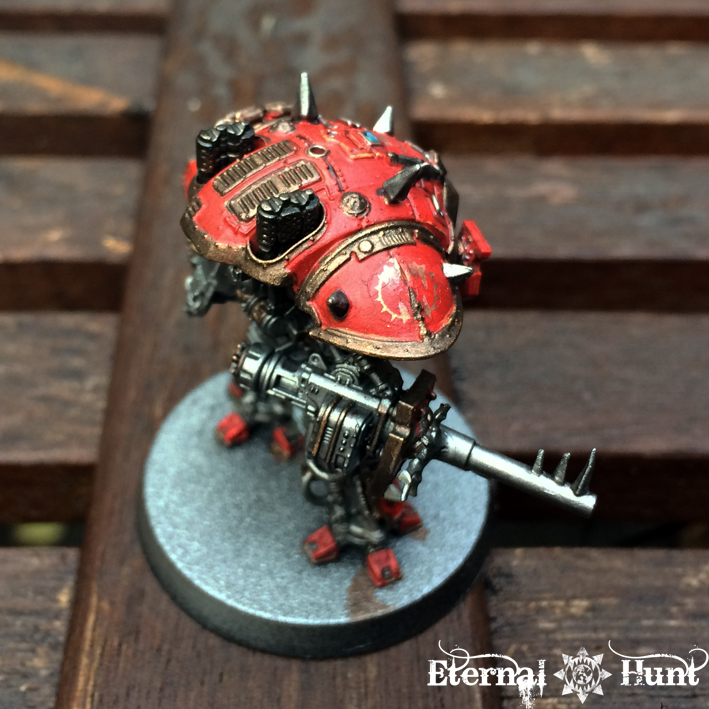
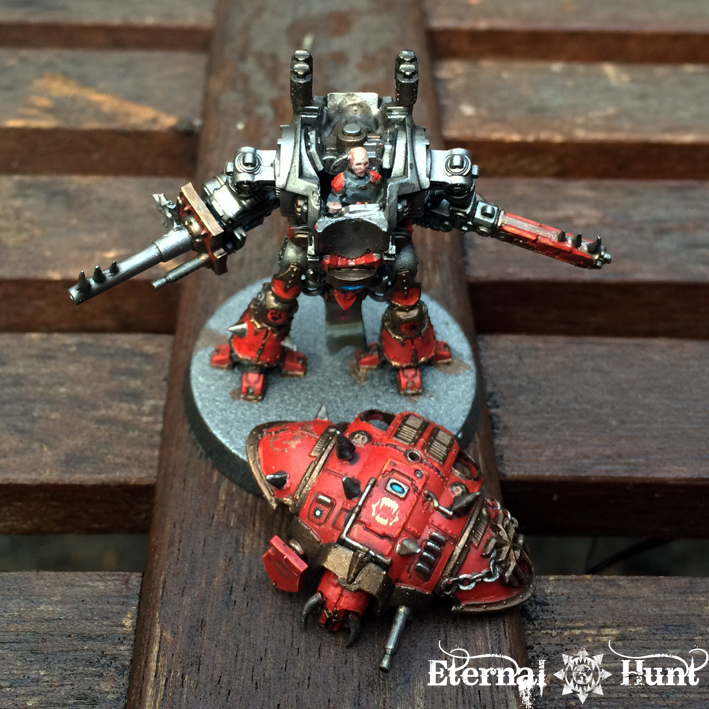
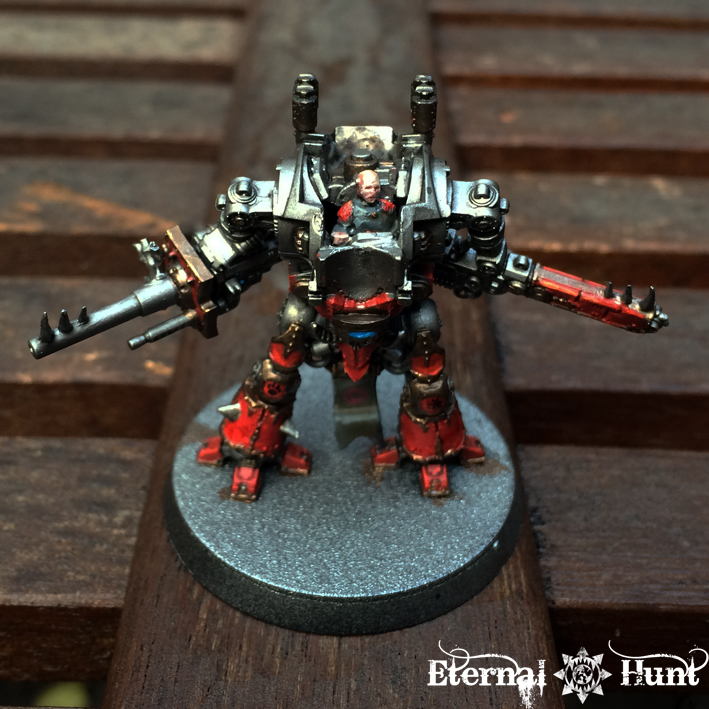
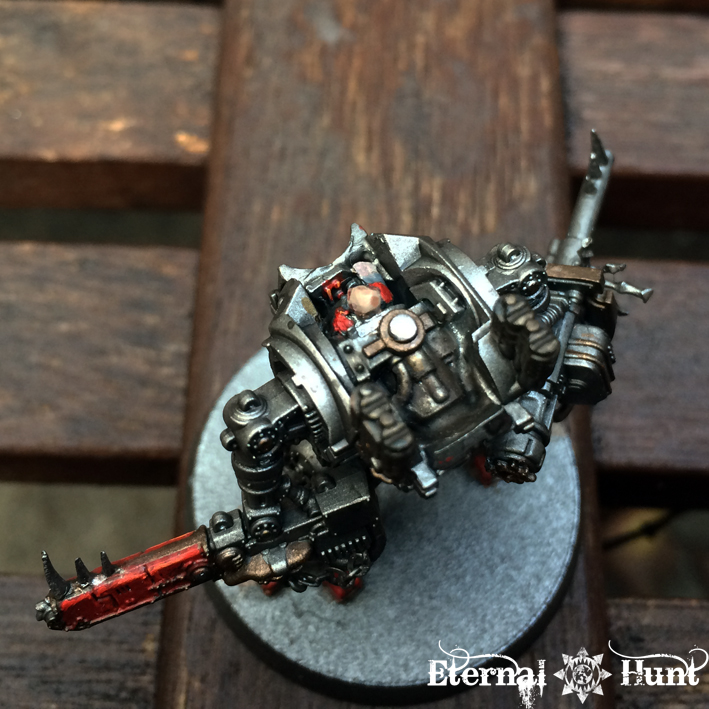
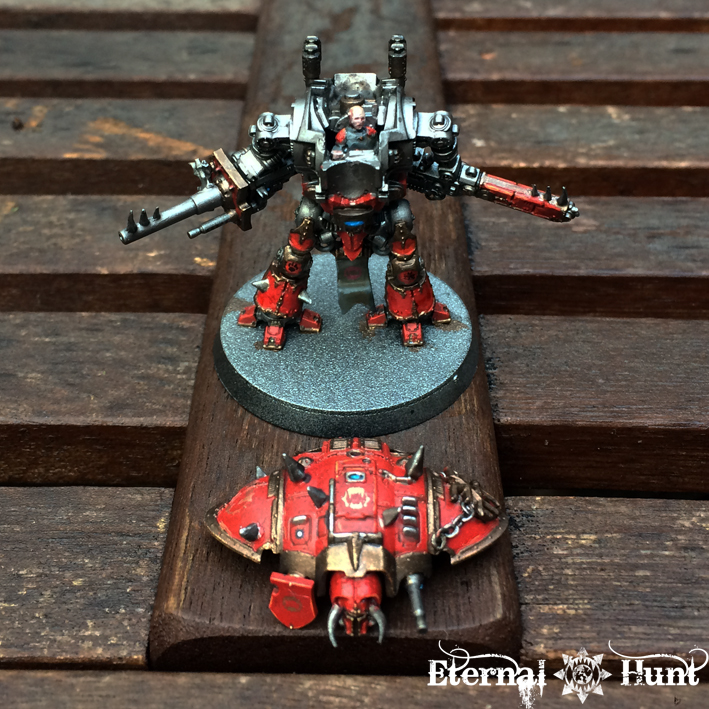
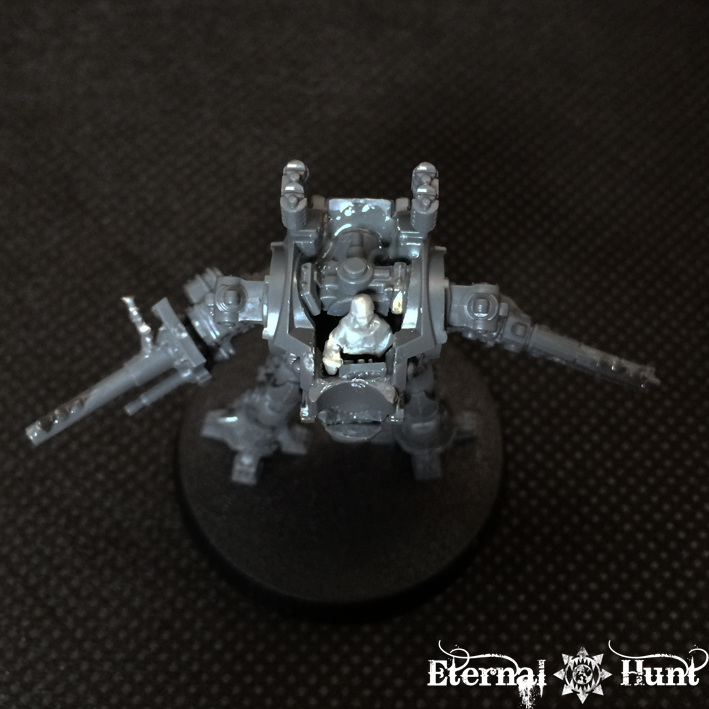
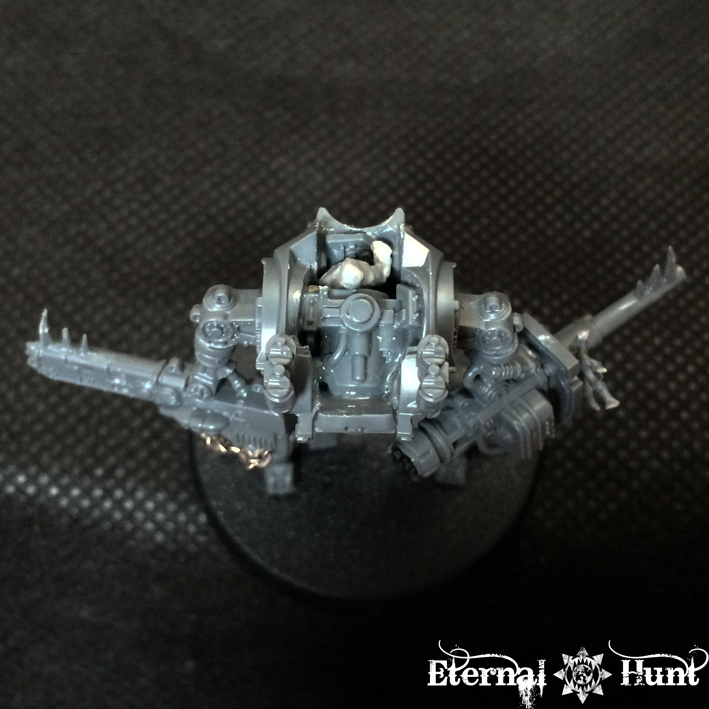
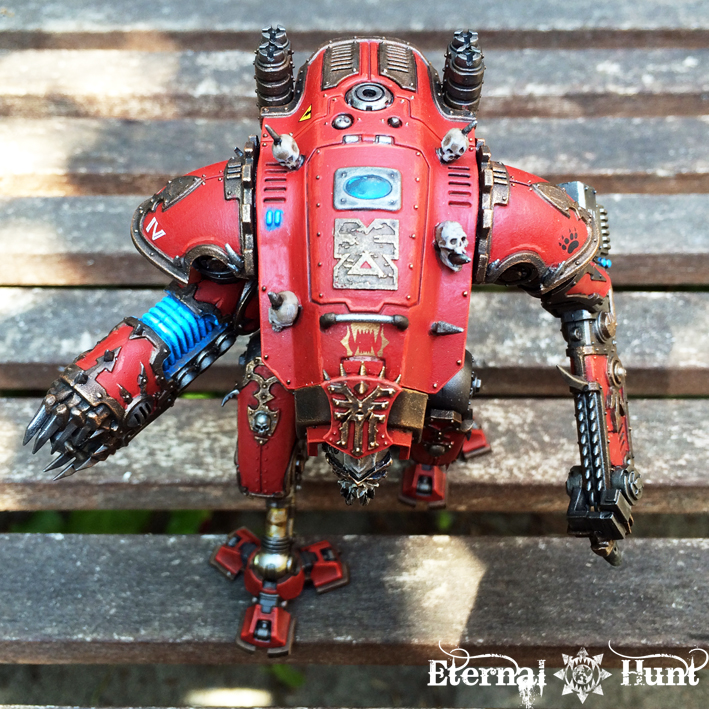
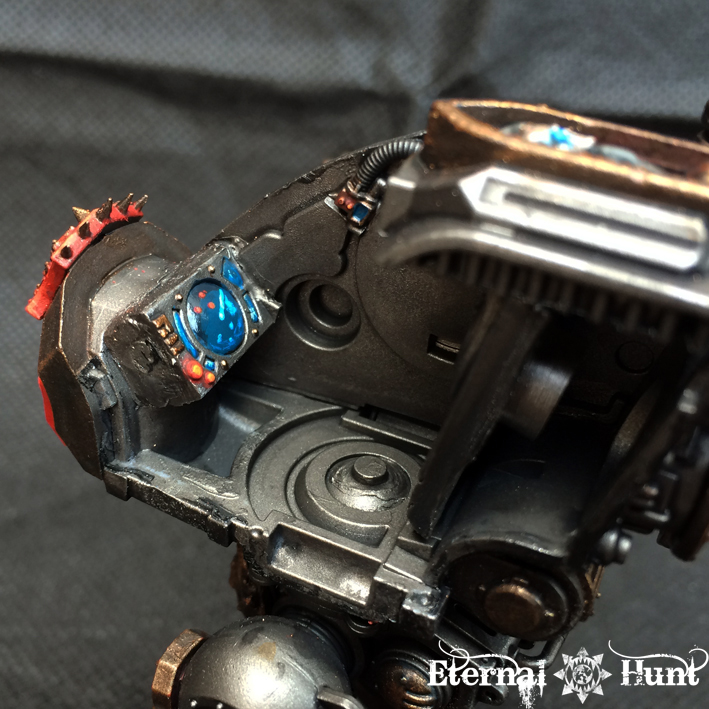
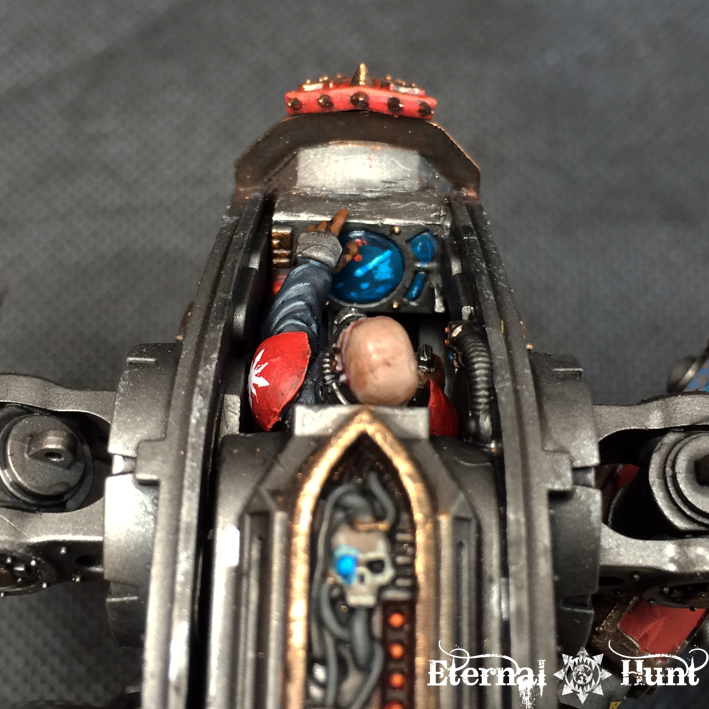
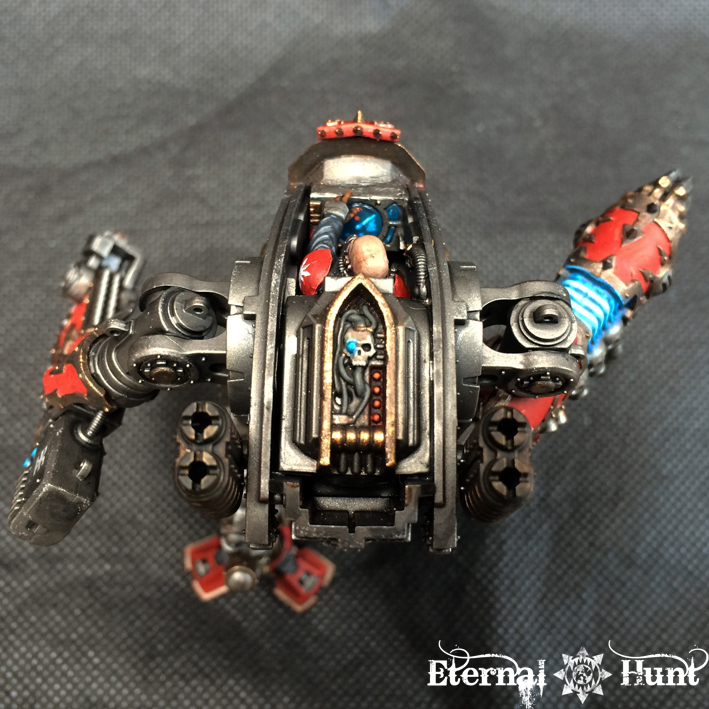
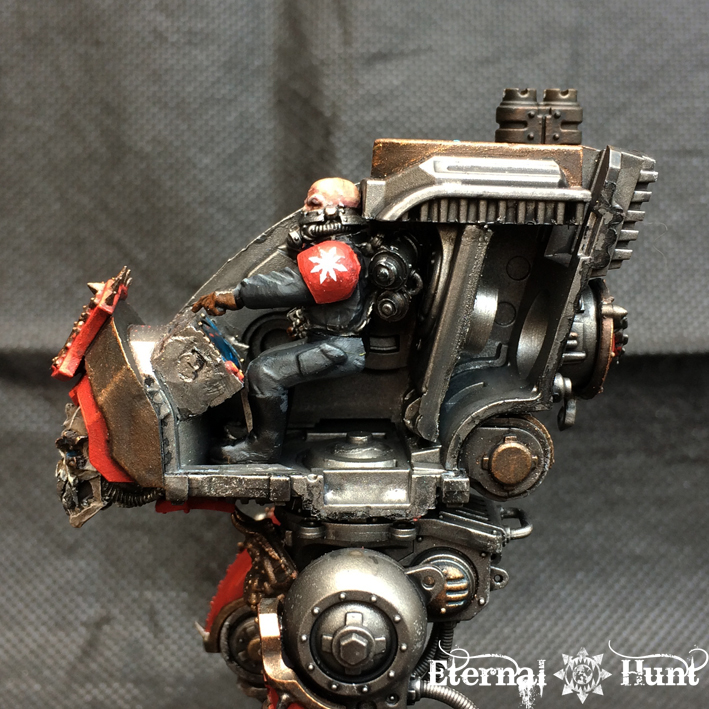
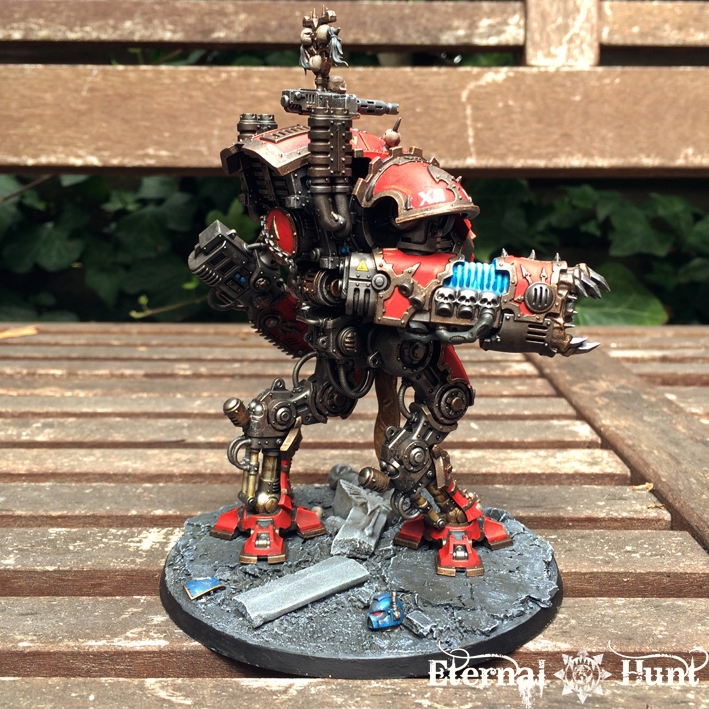
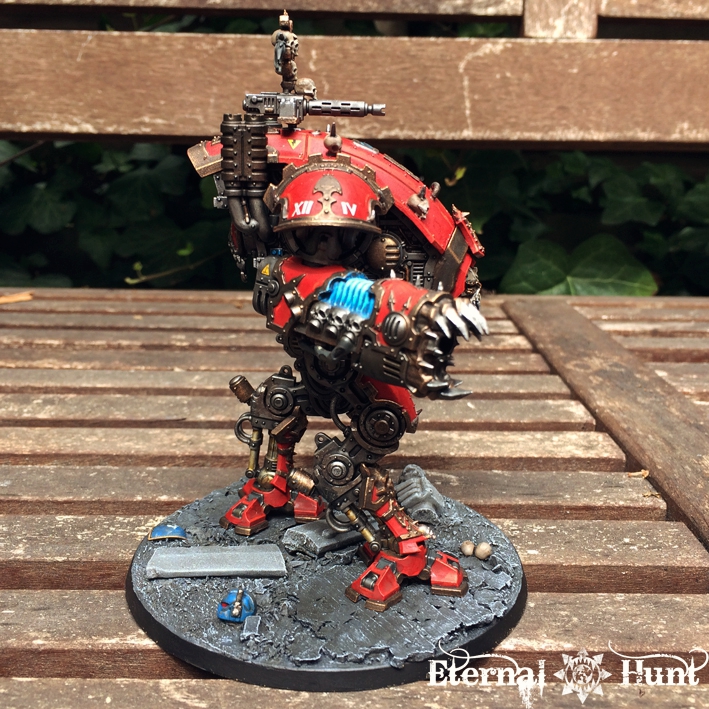
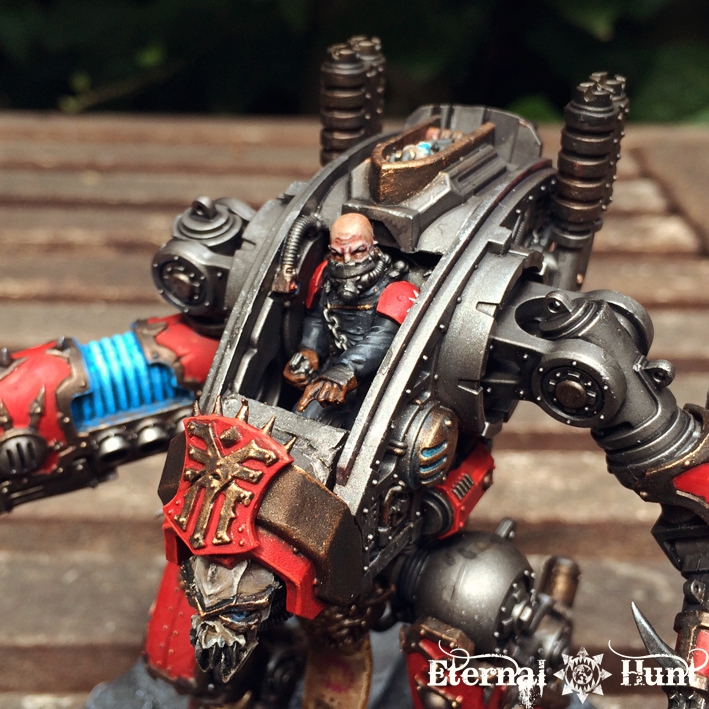
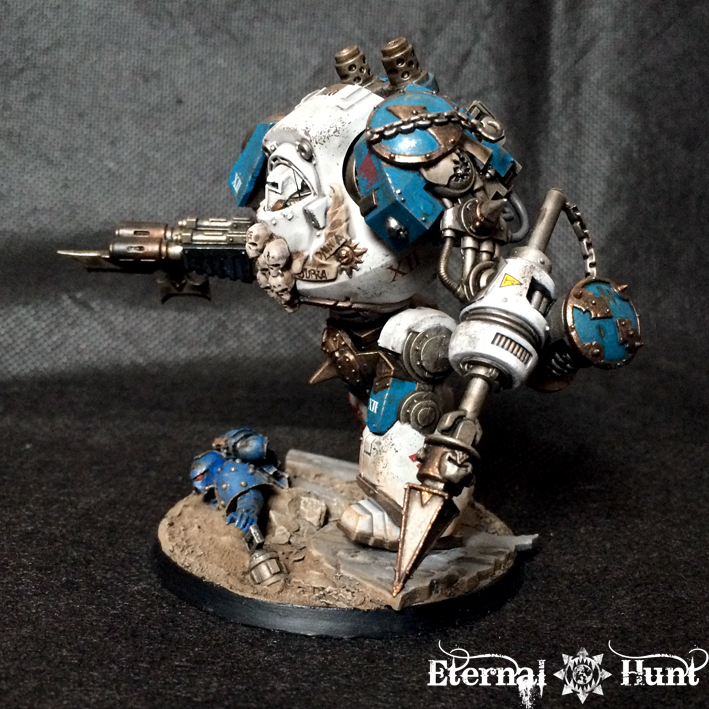
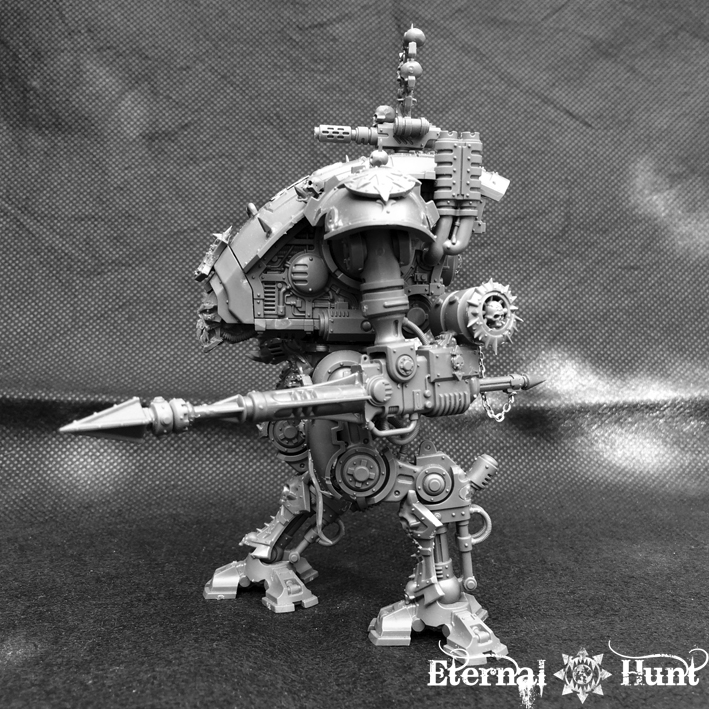
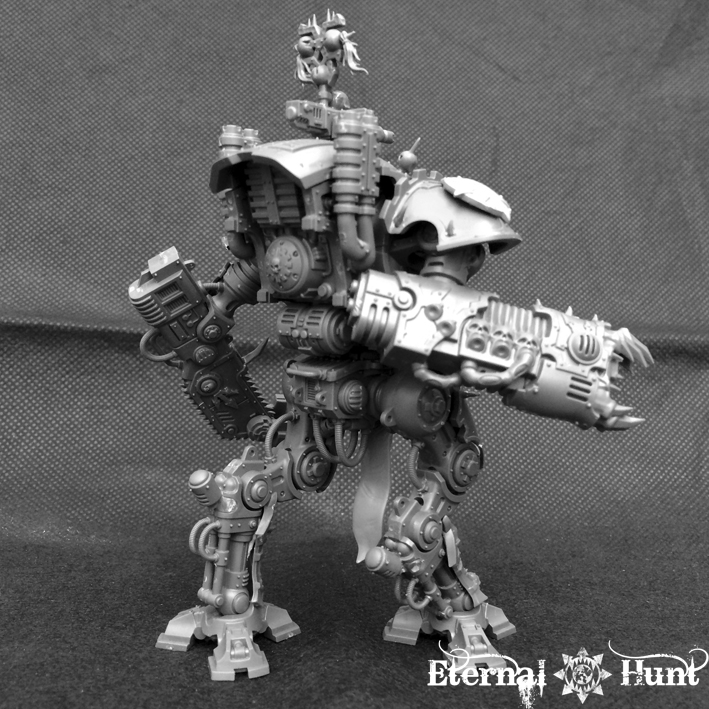
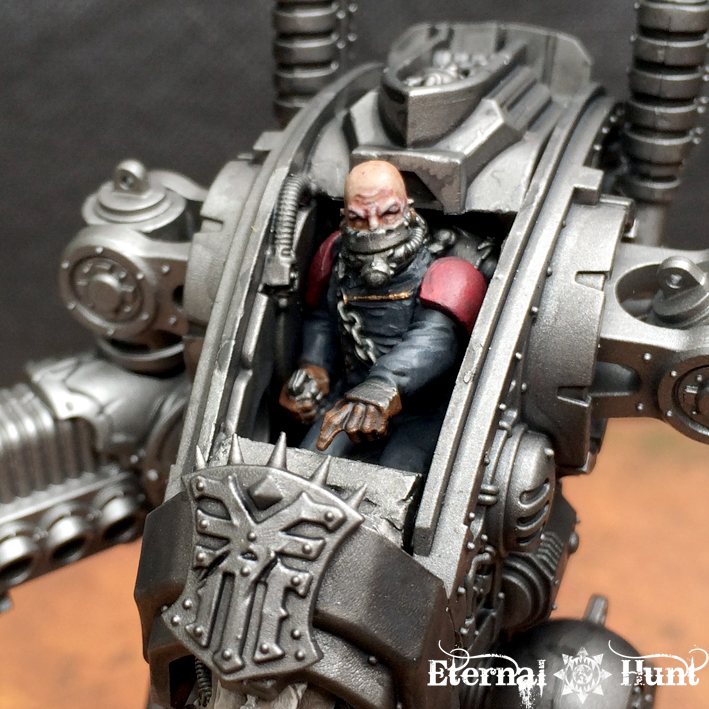
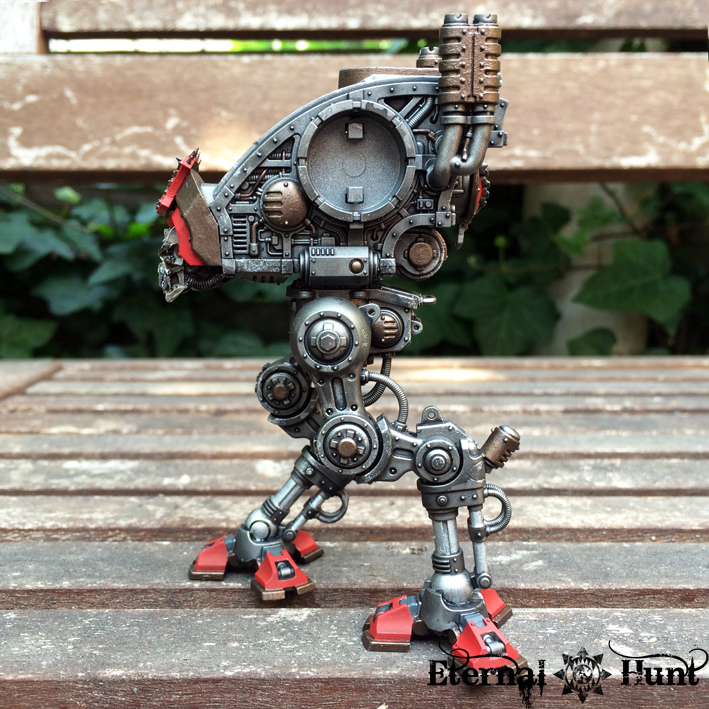
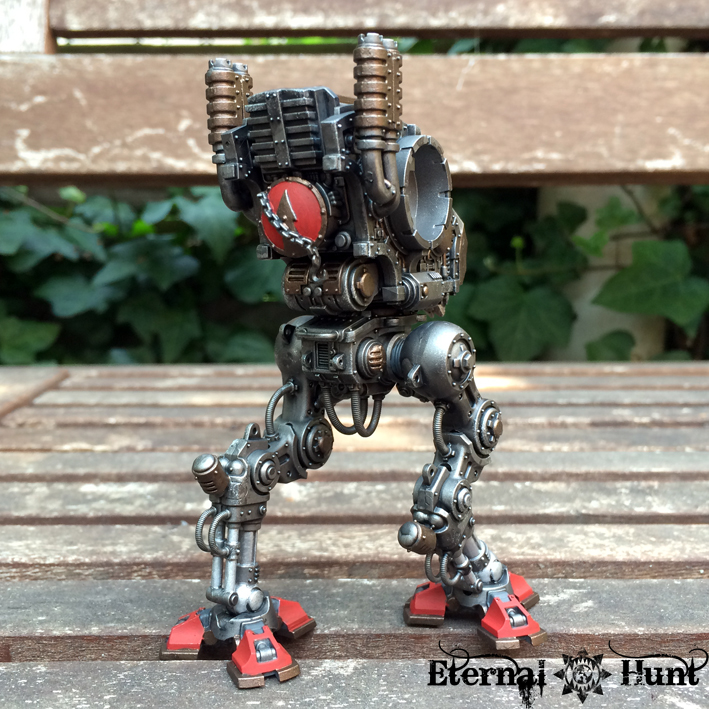
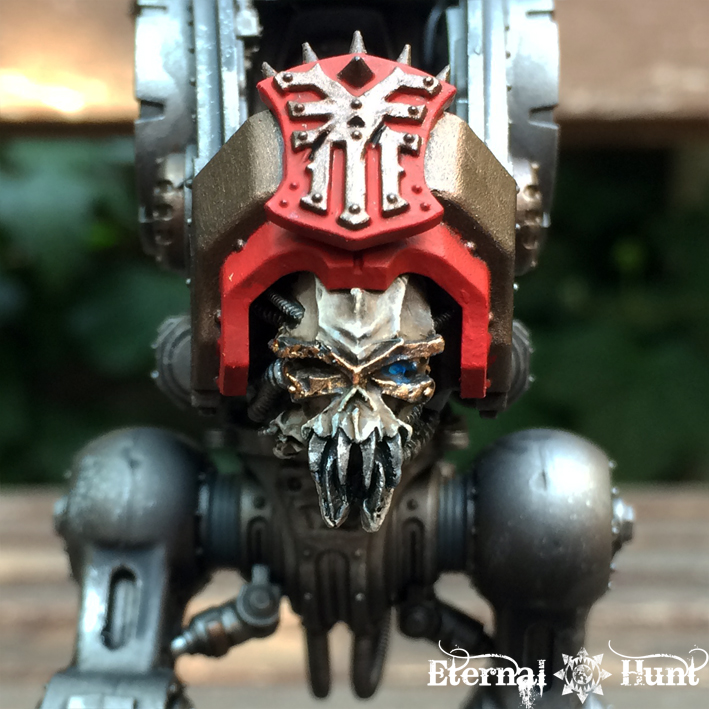
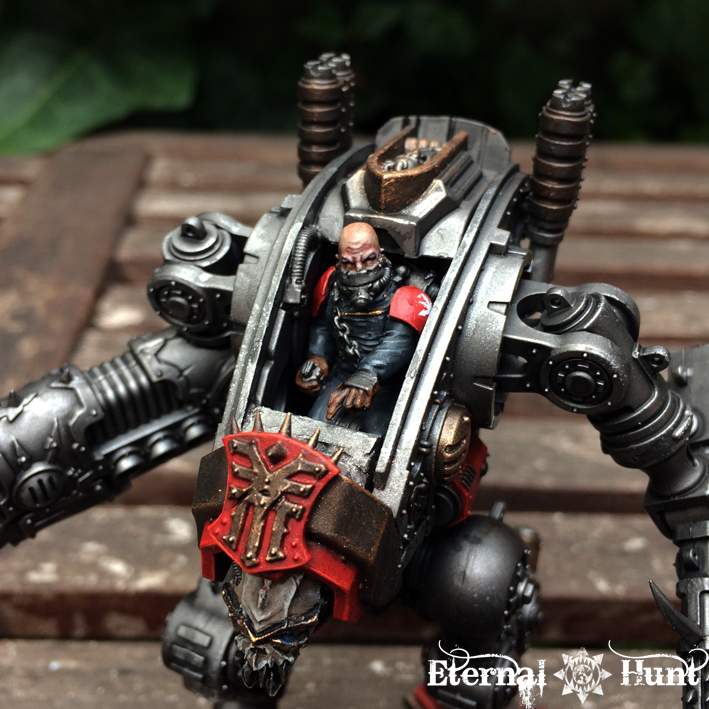
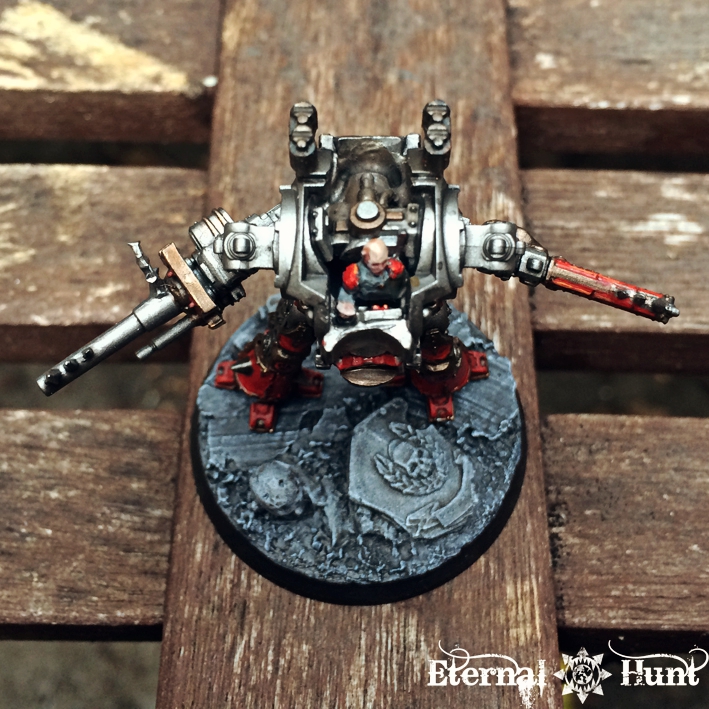
And there’s also my favourite part about this project, the somewhat harebrained, yet ultimately successful, scheme of adding a fully sculpted interior and pilot to a Knight at the Adeptus Titanicus scale. Check out the bigger version of Baron Harrowthorne again:


And here’s the chibi-version:


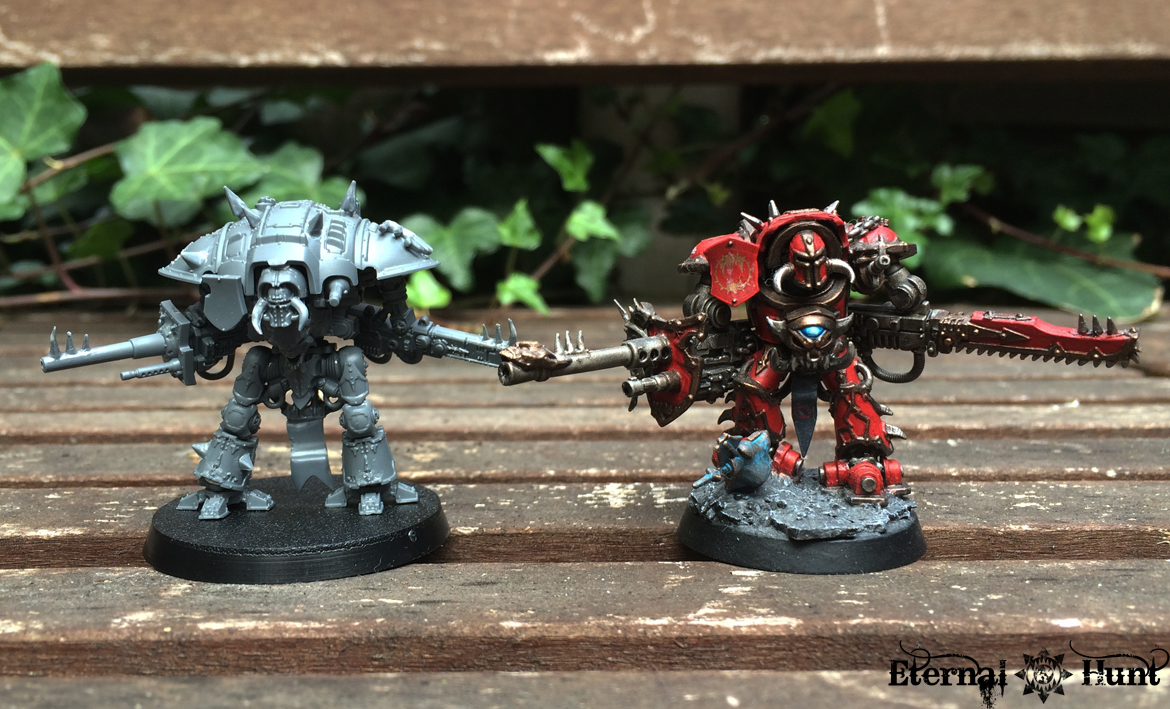
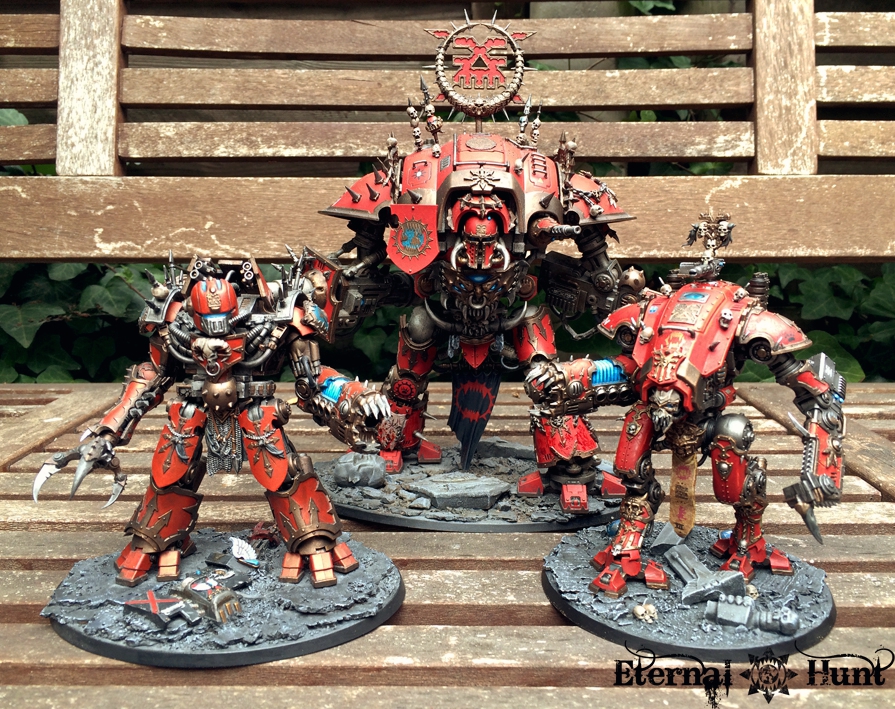
And now that the new model has been finished, here’s another comparison shot with its predecessor:


As I’ve said before, I really like how the older Chibi-Knight seems to represent the somewhat clunkier vintage Epic 40k design, while the new model fits the sleeker, more faithful designs from the new Adeptus Titanicus.

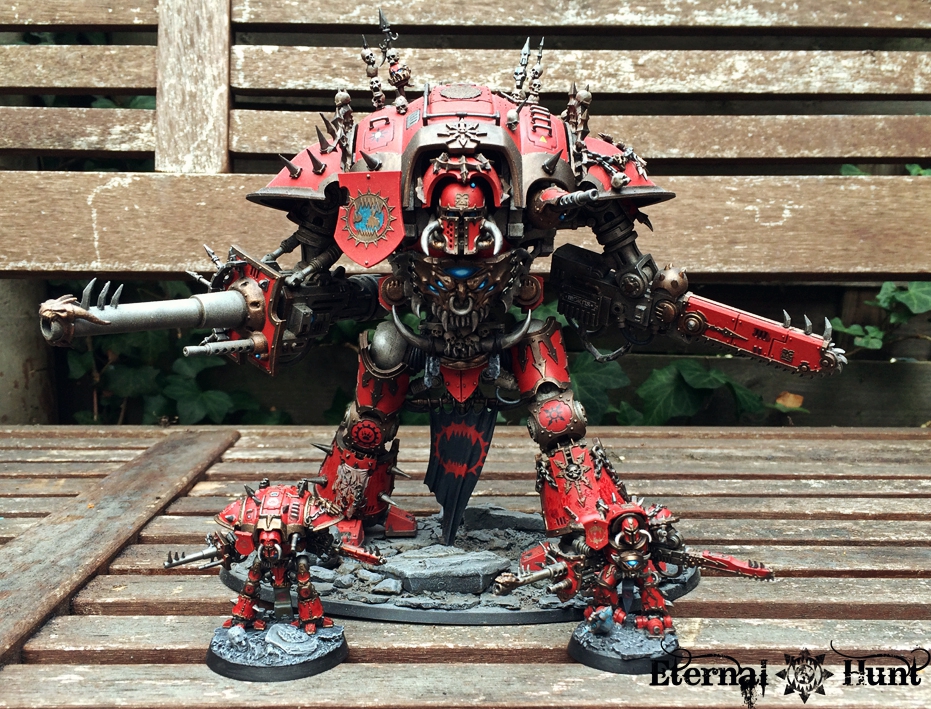
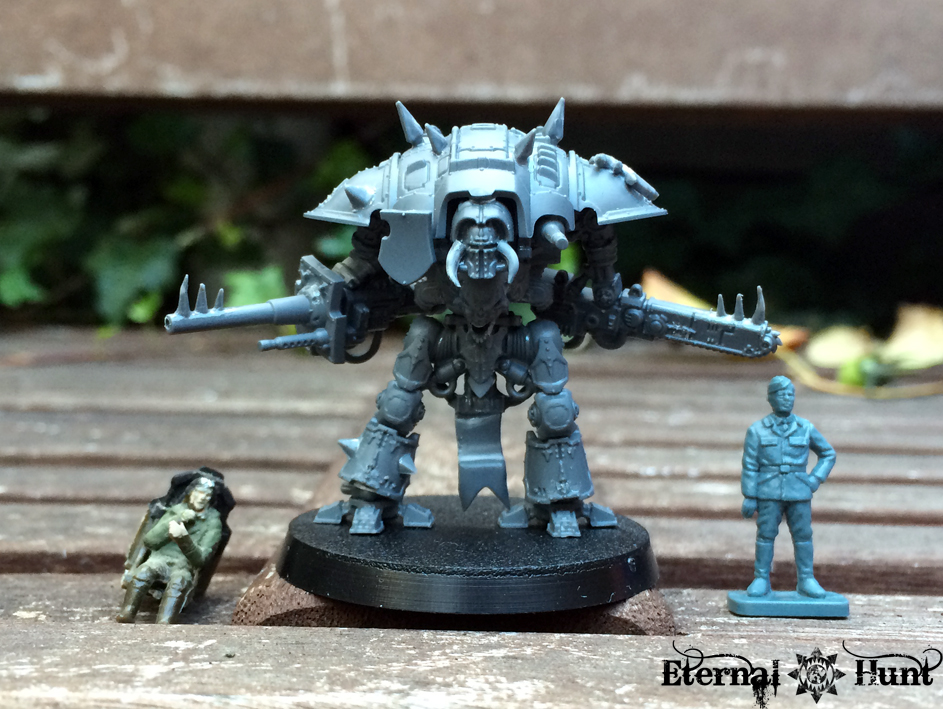
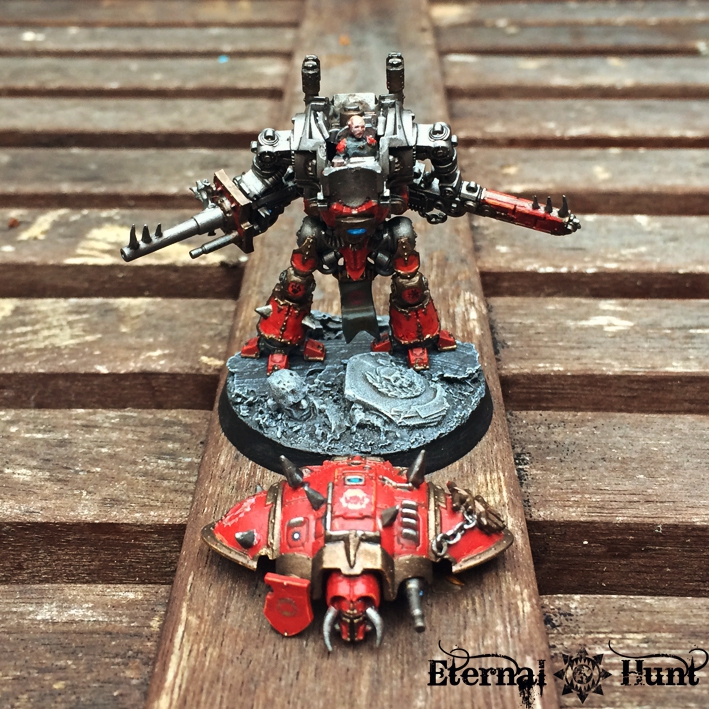
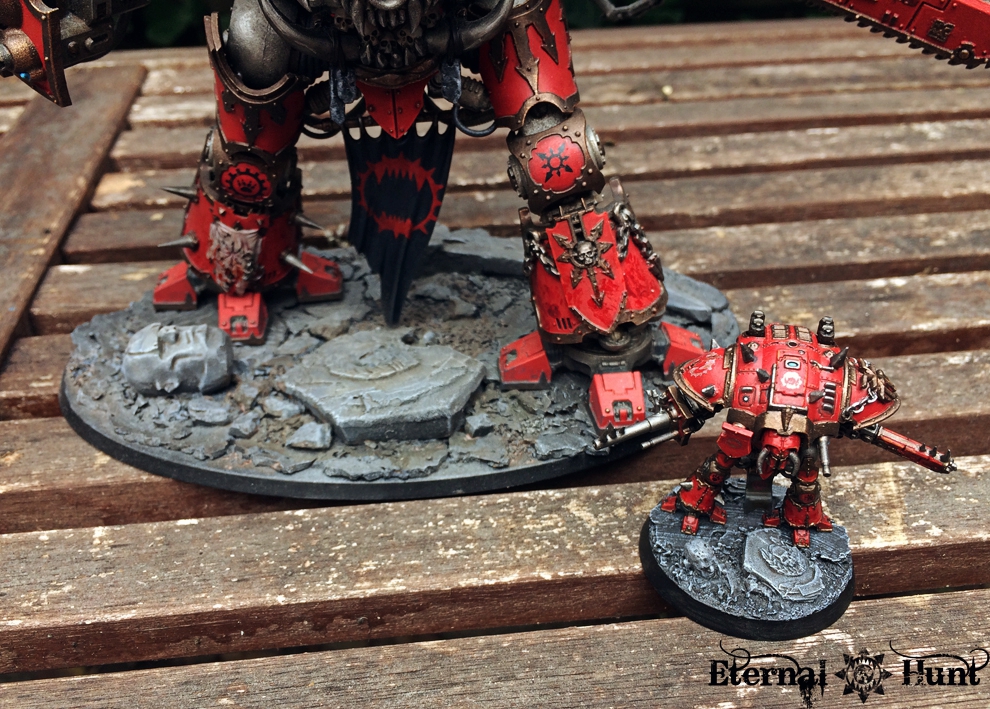
That’s not quite all, though. Because with the model finished, it was of course time to trot out the actual 28mm Gilgamesh in order to find out how well the new Chibi-Knight stands up to the big guy.

well,…


I think there’s definitely quite a bit of family resemblance, wouldn’t you agree?

Having managed to closely recreate the base also makes me stupidly happy, to be honest 😉

So yeah, a fun project all around! And you know what? I am also going to pledge this little guy as part of Azazel’s Mechanical November ’18 community challenge — fits well enough, I’d say 😉

In any case, it goes without saying that I would love to hear any feedback you might have! And, as always, thanks for looking and stay tuned for more! 🙂

A Short Knight, pt. 2

Posted in 40k, Chaos, Conversions, paintjob, World Eaters with tags , , , , , , , , , , , , , , , , , , on November 10, 2018 by krautscientist

Hey everyone, here’s the next look at my current project, the recreation of my 28mm Renegade Knight Questoris, Gilgamesh, the Warrior King, at the Adeptus Titanicus scale. I haven’t had much hobby time since my update, but I’ve tried to make it count. So let’s take a look, shall we?

First of all, this is where we left off last time:

While the similarity between the Adeptus Titanicus Knight Questoris and its bigger 28mm version already astonished me during the building stages, the parallels even extended to the actual painting process: Due to the way the model comes together, it’s actually possible to keep most of the armour plates, especially the big top carapace and shoulder pads, separate from the Knight’s “skeleton” during painting, so it was once again a matter of undercoating the skeleton in silver and the armour plates in red, then work from there.

And since this was my biggest alteration to the stock model, I did of course have to start with the pilot, trying the best I could to have the paintjob make up for the lack of sculpted detail:


Even at this stage, I was already reasonably happy with the way the chibi-version of Baron Harrowthorne looked, so after that, it was mostly a matter of carefully blocking in all of the base colours. Due to the delicate sculpt of the Knight, this was a bit more fiddly than on, say, a bog standard Space Marine model, but it was still fairly quick work. Here’s Chibi Gilgamesh 2.0 with all the base colours and washes in place:

And now came the delightful part: I carefully tried to match as many visual cues from the bigger version as possible — including the decals used on the original Gilgamesh. In some cases, I was able to use smaller decals that were a close – or even perfect – fit, in other cases (on the kneepads, for instance), I had to use a fine liner instead.

But anyway, enough talk, let’s take a look at the mostly finished model:

Just to remind you, here’s the big version:

And here’s what I have right now:


Pretty close, wouldn’t you agree?

As for Baron Harrowthorne and the cockpit, I had to give the area another small round of tweaks, of course:

So, once again, let’s start with the bigger version:


And here’s the Chibi-Baron:

As I’ve said before, since there is so very little actual detail on the pilot, I’ve had to use the paintjob to suggest detail were none extists, and to create an evocation, for lack of a better word, of the much bigger, more detailed 28mm pilot. I am pretty happy with the outcome, though — if you take a closer look you can even see the glowing buttons on the control panel:

And here’s another comparison picture with my earlier Chibi-Knight kitbash:

So a few very minor tweaks notwithstanding, the new Chibi Knight is basically finished at this point — except for the basing, that is, and I do have a rather nifty plan for that. Let’s hope it works out!

Until then, however, I would love to hear what you think! And, as always, thanks for looking and stay tuned for more!

A Short Knight, pt. 1

Posted in 40k, Chaos, Conversions, World Eaters with tags , , , , , , , , , , , , , , , , on October 29, 2018 by krautscientist

Hey everyone, still no painted models this week, alas, but rather a small project that had me sidetracked. Small in every sense of the word, actually. So what is this about?

The recently released 2018 version of Adeptus Titanicus has left me weirdly indifferent so far — surprising, really, as I always thought I would be right at the front of the queue if it ever made a return. But the focus on the biggest Titans somehow makes it less interesting to me (even though I’ll readily acknowledge that being able to own multiple Warlords without having to sell a kidney is probably one of the main draws of the game).

That being said, when the AT-scaled Questoris Knights were released, I knew I had to pick up some of them. And at 25 Euros for three, they seemed reasonably priced, so I made the plunge:

What really surprised me was how the detail on these is truly off the charts: It’s almost uncanny how GW has managed to make them resemble the bigger version down to some of the smallest detail. And I found myself regularly having déjà-vu moments while building the first model — it’s that close to it’s bigger kin. And seeing how I was already having those déjà-vues, I started feeling the urge to build a smaller version of my Renegade Knight, Gilgamesh — in fact, some of you might still remember my previous attempt at building a “Chibi-Knight”, roughly at the Adeptus Titanicus scale – from all kinds of odds and ends:


Building that smaller version – dubbed “Chibi-Knight” by me – was a fun project back then, and I think the model still holds up fairly well, all things considered, even if it’s maybe a bit too clunky. But having a base model that was already a fairly perfect representation of an Imperial Knight from the get-go this time around really made me want to one-up my previous effort.

So I got to work, trying to make one of those small Adeptus Titanicus Knights resemble this guy as closely as possible:

And after a bit of messing around, my first WIP looked like this:

Pretty good already, wouldn’t you agree? Here’s a comparison of my first WIP next to the previous, kitbashed Chibi-Knight:

I actually like how the previous versions’s slightly weird proportions make it resemble the visual clunkiness and retro charm of the old Epic 40k models. By the same token – and due to the more delicate sculpt of the AT Knight – coming up with a way to mirror those chaotic decorations was slightly tricky, and had to drop some of the detail that was simply too small to reproduce – or would look weirdly clunky (such as using a Bloodletter face on the gun barrel, for instance). I also got the impression that most 28mm GW bitz are just a tad too big to use on those delicate AT Questoris Knights, so this did take some doing.

In the end, I went for the visual essence of the model, trying to hit enough design cues to make it work, dropping some that were just too much trouble to get right, and figuring out which bitz to use for either.

So here’s the basically finished build for Chibi-Gilgamesh version 2.0 that I have come up with:


All things considered, I think I have managed to come up with a pretty good reproduction of my 28mm Gilgamesh at the smaller scale. But that wasn’t even the end of the project, because during the conversion process, I found myself staring at the Knight’s hollow interior again and again…


…and wondering if maybe….just maybe…

…it would be possible to add a fully realised interior as well — just as I had done on 28mm Gilgamesh.

Sure, the mere concept is a bit ridiculous, but once I had gotten the idea into my head, I realised that there would be no way to weasel out of this challenge: Chibi-Gilgamesh 2.0 needed a cockpit!

Coming up with a pilot was the most challenging part of that, obviously: I thought I was already out of the woods when I remembered some 40+ years-ish old plastic Army Men style soldiers my uncle used to play with as a child, and wanted to use one of those, but they turned out to still be a tad too big. As was a pilot from one of my uncle’s old model planes:


My next idea was to use a Z-scale model train figure — and indeed, those come in all shapes and sizes, even in a sitting position. And they are also readily available online. In batches of one hundred, no less!

In the end, that would have included purchasing them in China, however, and it just didn’t seem sustainable to pick up something so cheap and minuscule from halfway across the planet. So I was already planning a visit to the local model train shop when another idea struck me: I remembered one of the old plastic Bretonnian Knights from an old WFB starter box having a stylised little person as their heraldic helmet crest — maybe at just the right scale?

When I dug out the bit from my cupboard of shame, I realised the figure was pretty much the right scale indeed — but alas, it was a Lady of the Lake style sculpt:

Space Marine helmet included for scale.

Very fitting for Bretonnians, no doubt, but not a particularly good match to recreate my Baron Harrowthorne model at a smaller scale. But maybe there was still something there that I could use? So I shaved off most of the detail from the helmet crest, until I was left with only the bare outline of the model, then tried to carve it into a rough incarnation of Gilgamesh’s pilot:

If nothing else, I was able to leave the suggestion of facial features in place. And I realised I had the beginnings of a pilot.

The cockpit, on the other hand, was almost trivially easy to build: I used some tech-y leftover bitz (from a Heldrake foot, IIRC) for the reactor section…


…and if you take a closer look, you’ll see that I even included a small control panel for the pilot:

So here’s another comparison shot for you: The 28mm version of the cockpit and pilot:


And my WIP version at the Adeptus Titanicus scale:

Of course I realised that the pilot was still looking slightly too primitive, so I added some tweaks to him, greenstuffing in the tiniest shoulder pads and placing some teeny tiny plastic nubs on the model to suggest both the medals on the bigger version’s chest as well as the cranial augmetic implants:

The rest of the detail will be suggested by the paintjob — at least that’s what I hope! Now in all fairness, the pilot is probably still a tad too big, but there’s just no way I can come up with an even smaller version, so I’ll call this conversion a success!

This has been such a fun little project — and given the size of the model, I hope it’ll be easy enough to paint up as well. Maybe this could even be the model to get me out of my recent painting slump? Keep your fingers crossed for me! 🙂

In any case, that’s it for today’s update. It should go without saying that I am looking forward to any feedback you might have. And, as always, thanks for looking and stay tuned for more! 🙂

A Child for the Warrior King, pt.3: The Hound

Posted in 40k, Chaos, Conversions, WIP, World Eaters with tags , , , , , , , , , , , , , , , , , , , , , on July 30, 2018 by krautscientist

With the ETL VI deadline fast approaching, this last week was mostly given over to the task of completing my Renegade Armiger Warglaive, and I would very much like to share my progress on this project with you today! It wasn’t all smooth sailing, either, because Germany has been in the iron grip of a heat wave for quite a while now, with temperatures solidly in the mid-30s Celsius degrees for most of last week — certainly not unheard of in other parts of the world, but not something we are all that used to in my particular neck of the woods…

But I soldiered on regardless, so let’s take a look at what I have to show for my perseverance:

Here’s where we left off last time:

The biggest task at this point was to paint the bigger amour plates for the legs as well as the top carapace. In order to save myself some time, I decided to use GW’s Mephiston Red spray as an undercoat for the armour plates. But while it did end up laying down a nice, even coat of red, the red was also fairly flat and chalky — so I did end up re-painting all the red areas anyway…

In the end, it probably did save me some time, after all, but it was certainly not a game changer on par with, say, the Leadbelcher spray.

Anyway, I tackled the armour plates one after another, picking out the various details and blocking in the different colours. The biggest piece of work was the top carapace, of course, so that’s where I started. Here it is, with most of the detail already blocked in:

As you can see, I also added some decals during this stage: These days, I never save the decals until everything else has been painted, because that will invariable make them look tacked on, almost like an afterthought. By applying them sooner, they can be weathered and damaged along with the rest of the model, as needed, in order to actually make them look more realistic. Now in this case, this only really involved a subtle pass of sepia wash to make them look just a bit more natural, but it’s a habit I have picked up. Besides, none of them were in the way of the eventual highlighting, so that helped, too 😉


Some of the decals were actually chosen to tie the model into the lore of my World Eaters army: The paw print hints at Gilgamesh’s honorary membership in the Legio Audax, the “Ember Wolves” (while the Titan Legio is an actual part of the background, as of “Betrayer”, I did make up Gilgamesh’s membership in it as part of my own head canon).

Meanwhile, the numerals on the right pauldron stand for the XII Legion’s IVth company — mirroring a similar marking on Gilgamesh’s right shoulder guard:


So here’s what the carapace looked like at this stage:


And here it is, a short while later, with all of the missing detail painted and a pretty serious (at least for my standard) amount of highlighting in place:

The rest of the armour plates were given the same treatment, and while none of this is any award winning stuff, the subtly higlighted red ended up looking quite a bit deeper than the armour on Gilgamesh, while still fitting the overall look: While the Armiger should still look like it belongs, it also shows off how I have grown as a painter over the last couple of years, and I like that, to be honest 😉

So anyway, here’s the Armiger in its almost finished state:

At this point, I made a To Do list for myself listing all the small cleanup work and small tweaks I still needed to do before the model would be finished. I also made an eleventh hour decision to diverge from the original conversion, as the original plan had been to add some marauder shields on top of the Armiger’s pauldrons, for an even more baroque, chaotic look. Like so:

But when I added them to the pauldrons, I just couldn’t shake the feeling that the model actually worked better without them, so after hemming and hawing and asking for feedback over at the forums, I eventually decided to leave them off — something about them just didn’t quite click with me, while the model did seem complete enough without them.

So at this point it was mainly a matter of checking all of the boxes on my To Do list, one after another.

One area of notice was the detailing of the cockpit and reactor section, and I am pretty happy with how that area came out. Take a look:


For the cockpit displays, I chose an approach I had seen on a Knight by fellow hobbyist Noigrim — I really liked the idea of approaching enemies being visible as red dots on the radar 😉

And here’s a closer look at the reactor section:

This is how the whole assembly looks when seen from the side, by the way:

From a conversion perspective, this is probably the most involved customisation on the entire model, but I do think it has been worth it.

The other big thing to take care of was the base. Here’s the completed build I came up with:


Gilgamesh’s base uses several pieces of broken imperial statuary (courtesy of GW’s “Honoured Imperium” terrain kit), and I thought it would be cool to match that look, albeit on a slightly smaller scale. So the base was built around a shattered statue’s broken sword (once again, a very apt metaphor for the failing Imperium of Man, and all that), and I used different kinds of slate, sand and cork to build up a suitable amount of rubble and texture around it all. The main floor texture was, once again, created using Vallejo’s Sandy Paste.

I also did a preliminary dry fitting to find out wether the model would fit neatly onto the base:

And after that, it was off to the painting desk for one last time. Here’s the finished base, completed a short while later:

As you can see, some skulls and broken Ultramarines armour pieces were also added to the base, if only to tie the model into the 28mm scale a bit better (and make for smaller areas of visual interest).

And with that, my Renegade Armiger was finished. So let’s take a look at the model, shall we?


The Hound

Enkidu Lance
attached to the XII Legion’s 4th assault company


And a couple of detail shots, of course:

First up, the Armiger with its carapace removed and a closer look at the pilot:

The plan was to make the pilot look similar to Gilgamesh’s pilot, the Baron Harrowthorne:

At the same time, I wanted it to be fairly obvious that the Hound is below the Baron in rank, so his uniform is just a bit plainer. I think the finished look works pretty well:

The top carapace will – obviously – stay removable, if only because it allows me to show off the custom cockpit and pilot every once in a while 😉 In fact, the entire model retains a certain amount of modularity:


This should provide a nice extra bit of flexibility once the second Armiger (codenamed “The Huntress”) has been completed! Incidentally, the harpoon arm I shared with you in my previous post will actually serve as the Huntress’ stock armament…

Here’s a side view that gives you a better idea of the detail work on the undercarriage:

The amount of detail on the Armiger’s skeleton owes a lot to the “JeffTibbetts school of Knight painting”, as it were 😉

Another area of the model I want to showcase is the banner between the Armiger’s legs:


While loyalist Armigers appear a lot less draped in personal heraldry than their Imperial Knight masters, I wanted to invoke the impression that Armiger pilots may serve their lords for far longer in the Great Eye, so it seemed appropriate to include a banner showing the pilot’s battle honours: It shows both the World Eaters’ legion badge as well as the War Hounds’ old symbol — probably a shout out to the Hound’s epithet.

At the same time, I also wanted to make the banner look more rugged than the banner on the bigger Knight, so I painted it as some kind of roughly tanned hide. I used the approach outlined in Brandon’s tutorial here, with a couple of minor tweaks, and am pretty happy with the finished effect.

Oh, and I also finally managed to take a picture of the face that shows of the Armiger’s glowing eye:

The missing optical sensor on the right side was originally a consequence of a slight miscast of the face, but I think it gives the model an even more sinister and chaotic look, so it actually works in its favour, wouldn’t you agree? 😉

Oh, and here’s a picture of the Armiger and my Renegade Knight Titan, Gilgamesh, “The Warrior King” — “Father and Son”, so to speak:

In fact, I discovered that my older Wargrinder conversion could actually work as an Armiger fairly well, at least from a scale perspective:

And with that, I have managed to finish both my entry for this year’s ETL event as well as my contribution to Azazel’s “Jewel of July” challenge. Pretty nifty, eh? 😉 To be honest, I am immensely pleased with the finished model — I actually put this off as long as I could, and I really had to force myself to start painting, but I couldn’t be any happier with the result. That being said, this has been a pretty involved project, so I think I’ll allow myself a bit of rest and mostly focus on small fry for a bit 😉

But anyway, so far for my first Renegade Armiger Warglaive. It goes without saying that I would love to hear your feedback on the model, so leave me a comment! And, as always, thanks for looking and stay tuned for more!

A Child for the Warrior King, pt.2

Posted in 40k, Chaos, Conversions, WIP, World Eaters with tags , , , , , , , , , , , , , , , , , , , on July 24, 2018 by krautscientist

It has been a couple of months since the Forgebane boxed set provided us not only with a very cool – and entirely Space Marine-free – 40k starter set, but also with the Armiger Warglaive, a very interesting smaller pattern of Imperial Knight:

In the interim, we have seen a full release of the Imperial Knights as a faction, with new smaller and bigger Knight models to boot. And some of you may still remember my conversion of a Renegade Armiger from a while back:

Of course I just had to build some chaotic Armigers to accompany my Chaos Knight Titan, Gilgameshthe Warrior King – and the guy you see above was my first proof of concept — and one that I am still very happy with, it must be said!

However, with my recent focus on painting INQ28 characters, the poor Armiger has remained unpainted all through the recent Imperial Knights release — high time, then, to return to the model and finally give it some much needed attention!


I. “Fire the Ursus Claws!”

First up, something I have wanted to share with you for quite a while now, but the chance never presented itself:

After building my first Armiger, I realised that I wanted to get a bit more creative with the CC weapon on the second model — and there was also something about the way Armigers are portrayed in the fluff as support to bigger Knights in the fluff, helping their masters to bring down their prey and soften up bigger opponents, that drew me back to the World Eaters’ background and the armament of their warmachines in the lore — and then fellow hobbyist Augustus b’Raass put words to the vague idea I had been thinking about all along:

OOOH OOOOH this gave me an idea: how about the World Eaters Harpoon thingy whatsitcalled -you know, that traditional thing. Dammit, the name eludes me, but you must know what I mean!

And Augustus was perfectly right, of course: I really needed to build an Armiger-sized Ursus Claw harpoon!

I had already used the idea on my second World Eaters Contemptor, Raud the Hunter, a while ago, albeit at a smaller scale:

So for the sake of visual consistency, one objective would be to make the weapon resemble the Ursus Claw on my Contemptor, so they would at least seem to be variations of the same weapons system.

Now when it came to actually building an Armiger-sized Ursus Claw, Talarion’s approach to building a lance weapon for an Armiger served as invaluable reference material. So between his version and my own-Dreadnought sized proof of concept, here’s what I came up with:

This was just the basic setup, mind you, with very little chaotic decoration in place, and the weapon also still lacked the drum-fed chain attached to the harpoon (the drum bit is already visible in the picture, though). That being said, it was also a pretty simple conversion, really, spliced together from the Armiger’s stock chainblade arm and a couple of additional bitz.

In case you want to reproduce the design – or build something similar – here’s a mini-tutorial for you:

Tutorial: Building a Knight Armiger harpoon arm:

First of all, here are the bitz you will need (keep the red parts for the conversion, while the grey parts go back into the bitzbox): 

  • I. the stock Armiger Warglaive chainweapon arm — just carefully get rid of the blade (and of that one small, greyed-out area towards the back!).
  • II. a lamp post, either from the 40k basing set for big models or from the old City of Death terrain. I used two parts from this piece, although the foot is by far the more important one, as it makes up most of the actual harpoon.
  • III. The spiked tip from another small terrain piece, that is – again – available both in the aforementioned basing kit or the City of Death terran kits.
  • IV. a small piece from the Adeptus Mechanicus Kataphron kit — I only really chose this for visual balance and because it makes the harpoon look as though it might actually be a bit more sophisticated (and able to carry an electrical current, for instance).
  • V. The shaft from the Blood Angels Librarian Dreadnoughts psi-weapon — although there are probably many bitz that would work just as well. You could even use a piece of plasticard to fill the same role.

All you have to do is to carefully line up these bitz and glue them together (of course you can always pin the entire thing, if you want to make sure it’s ultra-straight and stable): I’ve made you a diagram about what goes where:

As an aside, I actually love the fact how part IV. – coincidentally – mirrors a very similar part on the Knight Valiant’s Thundercoil Harpoon, even though my design predates the release of the new model by a couple of months 😉

I also chose to include a chain drum, made mainly from a leftover Imperial Knight weapon part (if I recall correctly). You can basically use any round, hollow shape for this, though — even any kind of (half-)barrel might do. I added a piece from a WFB plastic spear to the centre of the drum, then carefully wound some Gale Force Nine model chain around it and attached the end to the harpoon, in an attempt to actually suggest a mechanism.

Here’s a look at the finished arm, with a bit of chaotic decoration in place.

Two additional remarks about the conversion:

One, I do realise a more ornate, spiky tip would probably have made for a more Khornate look, but I kinda wanted to retain a certain sense of internal consistence across my collection. Well, that and I also like the idea that the weapon itself is so blunt and brutal that it’s mostly designed for efficiency, and less for show. If you decide to build your own harpoon/lance weapon, however, swapping in a tip of your liking should be the easiest thing in the world.

Two, elsewhere on the blogosphere, it has been pointed out how the chain mechanism could never work from a mechanical perspective. That is probably correct. I went with a setup that seemed at least a bit logical to me, while also looking visually balanced. But I definitely did not get into the actual engineering of a working mechanism, so feel free to make any necessary adjustments on your own version, especially if you have a better grip on mechanics than I have! 😉

If nothing else, I do think the finished arm looks pretty cool when mounted on an Armiger:


Here’s a closer look at the chain and mechanism:


Since my first converted Armiger will be going with the chainsword arm shown at the beginning of this post, the harpoon arm serves as a bit of a teaser for the second Armiger I am going to convert. That being said, I’ll definitely leave the arms interchangeable, so they can be swapped between models as needed.


II. Gearing Up!

The building optional Ursus Claws notwithstanding, there was still the matter of the unpainted Armiger to deal with — even moreso since I have vowed the model as an entry for this year’s ETL event over at The Bolter & Chainsword. So it was time to finally get this bad boy painted. Just to remind you, here’s what the conversion looked like:


Unlike the last time I had to undercoat a Knight, there were no spraying mishaps this time around, fortunately enough, so here’s what I started with:

Now the first painting session was mostly spent on the – rather thankless – task of darkening down the body with black wash:

In order to make things a bit more challenging – and rewarding – for myself, however, I did sneak in some painting on the Armiger’s head (which I finished in one go)…

And on the pilot, laying down the base colours and the first pass of washes:

Since then, the paintjob has mostly consisted of chipping away at the model one area at a time so far. Starting with the Armiger’s metallic base structure and leaving the armour plates for later seemed, once again, like the obvious way to go.

So here’s the Armiger’s “skeleton” with most of the base colours blocked in:

While this may not seem like riveting stuff, the extra depth provided by the bronze detail should make quite a bit of difference on the finished model, I hope. Plus this also allowed an early idea of how the bone faceplate would eventually contrast with the red armour:

I’ve learned from JeffTibbetts’ absolutely amazing “Queen Bee” project that it pays to take some extra time on a Knight’s metallic skeleton, adding areas of grime, scratches and all kinds of wear and tear for that extra bit of realism (or rather, plausibility) and texture — true, most of it will be covered up by the various armour plates later on, but being able to glimpse something that resembles an actual, working machine underneath it all makes the whole war machine, preposterous as it may be, more grounded in realism.

With this preamble out of the way, here’s a side view at the mostly finished “skeleton”, showing off some of the carefully applied dirt, grime and lubricant 😉

The same process was then repeated on the arms, finally making the model look as though it were actually going somewhere:

And the pilot has also been finished (after another round of highlights and the application of a decal to his shoulder pad):

So here’s the current status of the model:


As you can see, the arms are basically done at this point — including the plasma “special effect” on the right arm, obviously. This also means that, with the exception of a bit of cleanup and some minor finishing touches, the Armiger’s “skeleton” is now finished, and I’ll be focusing on the armour plates next.

In fact, here’s a sneak peak of the model with the undercoated top carapace provisionally mounted in place:

The ETL event ends on August 1st, so that leaves me with about a week to paint the rest of the armour, perform all the necessary cleanup and add the finishing touches, then maybe add a base — while I am definitely going to base the model with all bells and whistles, it is not something that’s required for finished models that are part of the ETL, so if I have to cut some corners, it’ll be there. All in all, in spite of my general laziness, it seems like a realistic task. However, my neck of the woods is also currently in the midst of a heat wave that renders painting more complicated than it needs to be — so wish me luck! 😉

Oh, and in addition to being my first (and probably only vow) for this year’s ETL, this guy also counts as an entry for Azazel’s “Jewel of July” challenge.

So keep your fingers crossed for me, as I brave the hot weather in an attempt to get this guy finished in time! It goes without saying that I would love to hear any feedback you may have! And, as always, thanks for looking and stay tuned for more!