Archive for daemon engine

State of the Hunt, Week 14/2019: Another chaotic interlude…

Posted in 40k, Chaos, Conversions, state of the hunt, WIP, World Eaters with tags , , , , , , , , , , , , , , , on April 2, 2019 by krautscientist

So, something unrelated to my #HeroQuest2019 project for today’s update — don’t worry, though, work on my HeroQuest models continues apace! However, with all of those incredible new Chaos Space Marine models hitting the shelves, I felt the need for just a wee little bit of chaotic kitbashing — indeed the irony of all of those models finally arriving just when I happen to have taken a bit of a hiatus from 40k has not escaped me…

For now I have mostly resisted the lure of the new kits — or of the Shadowspear boxed set, for that matter: While I basically love everything I have seen so far, I can simply not justify dropping over a hundred Euros on yet another box that would remain unpainted for the foreseeable future. But I do have my ways, and so a recent bitz delivery has provided me with the raw material for some smaller experiments. So let us take a look, shall we…?


I. The Host

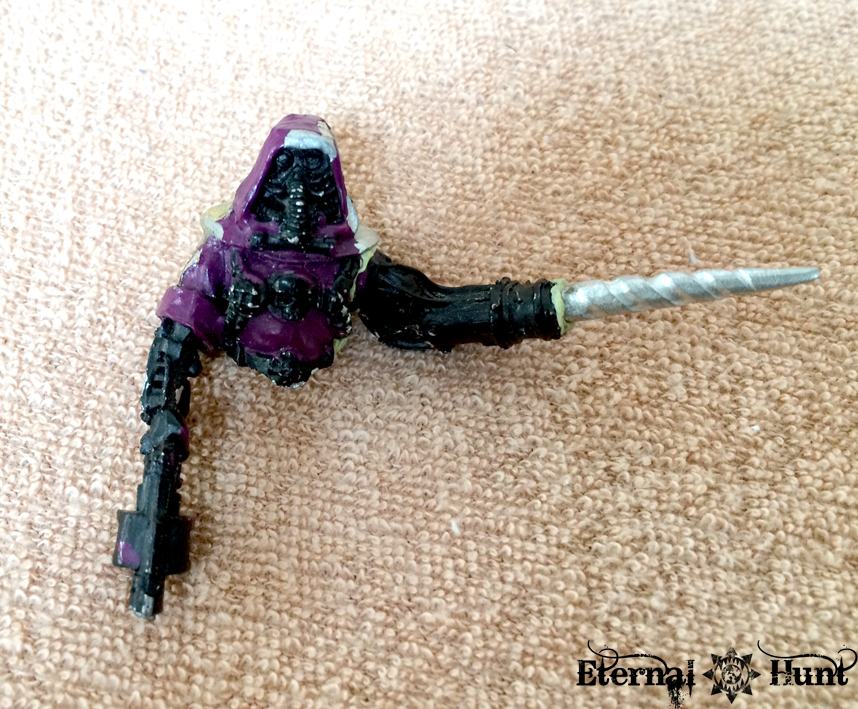
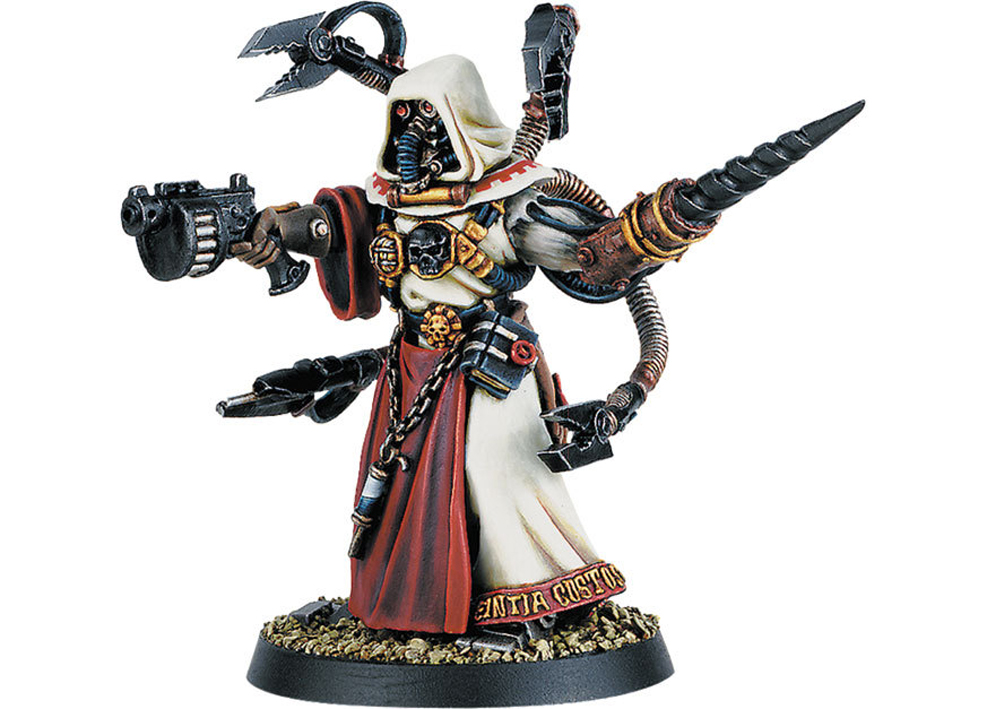
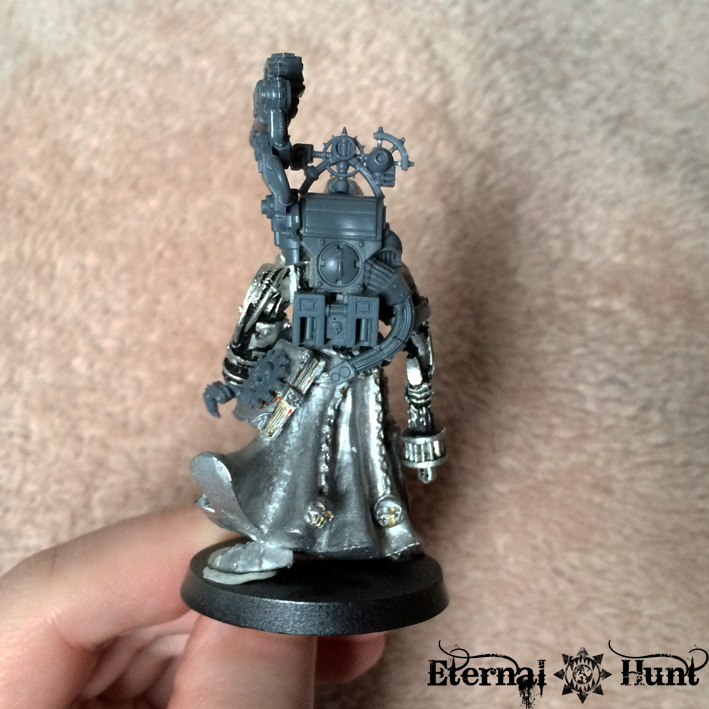
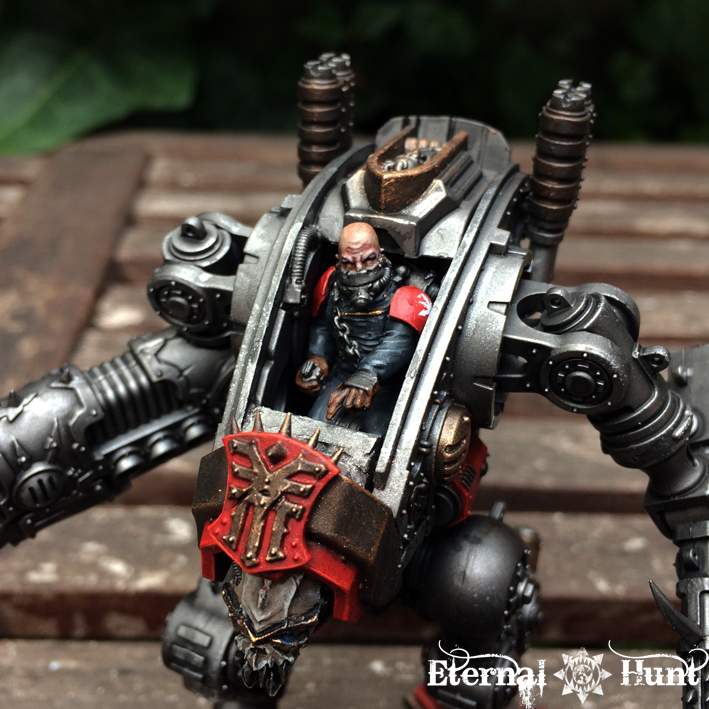
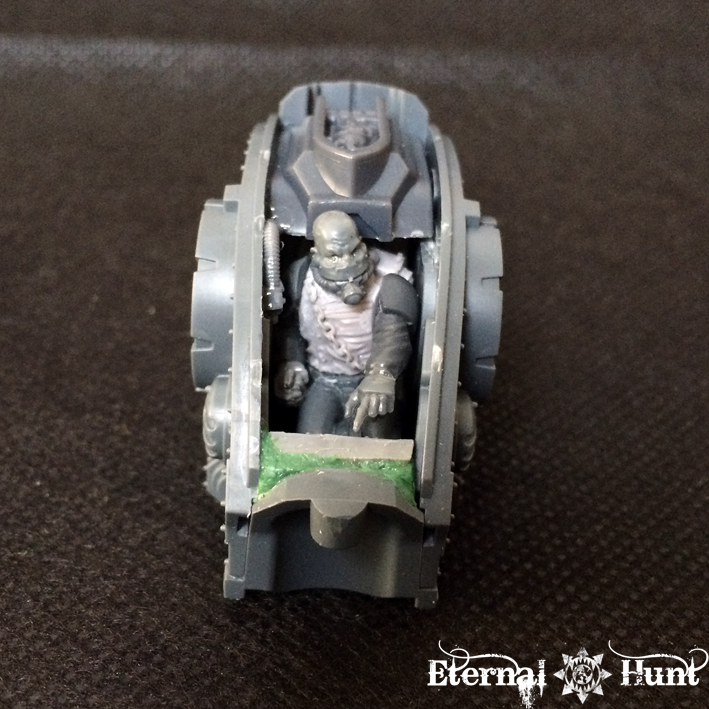
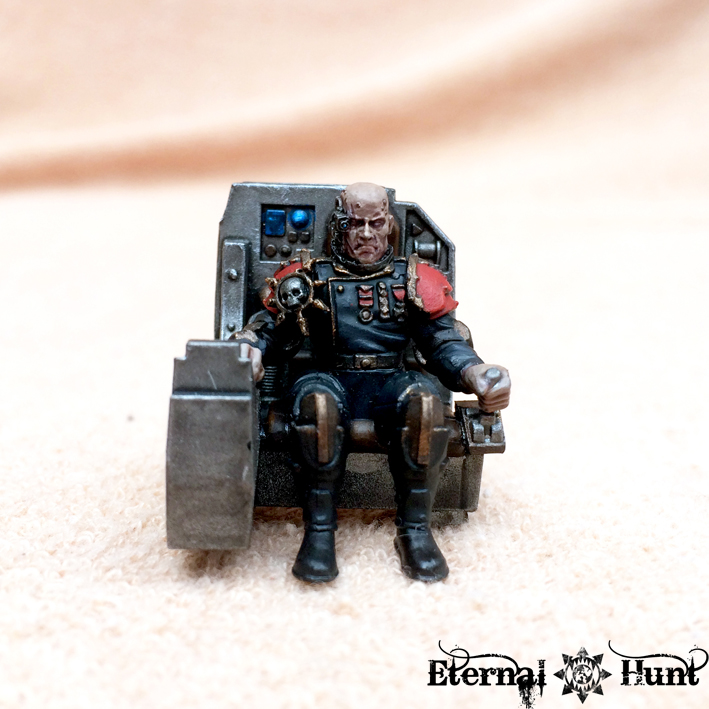
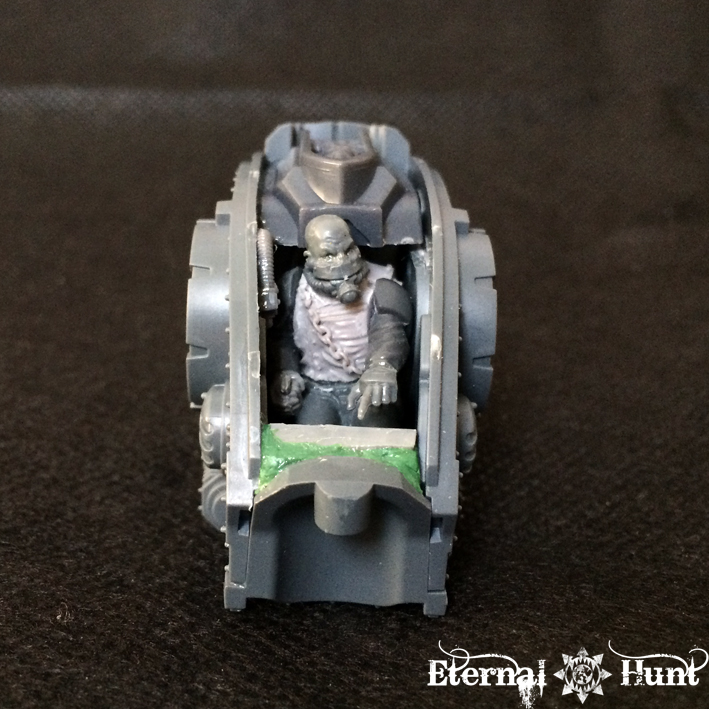
Let’s start with what’s probably the least impressive offering for today, albeit one that I am nevertheless pretty happy with: Ever since first laying eyes on those rogue psykers that came with Blackstone Fortress, I have felt the need to use one of them to create a Daemonhost (most likely for use in INQ28): There’s just something about the chains and weighing down the psyker’s floating body that really recalls the Daemonhost aesthetics originally introduced by the 54mm version of Inquisitor — plus I have been saving that perfect Daemonhost head (originally from the Hellstriders of Slaanesh) for such a conversion. So anyway, here’s what I have made:

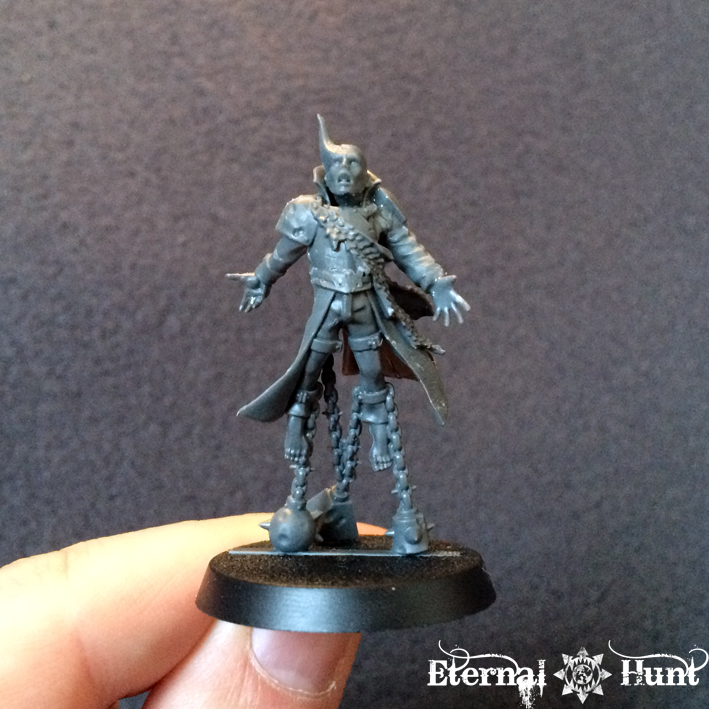
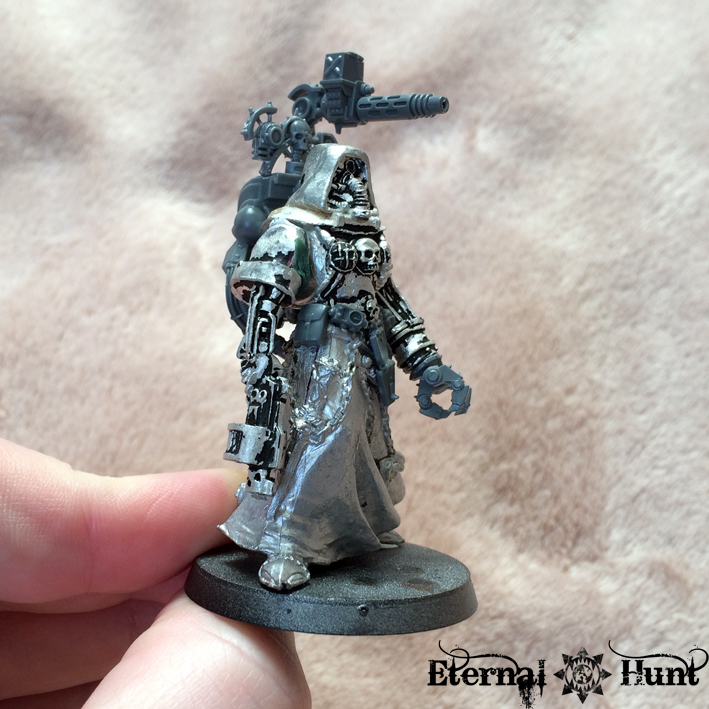
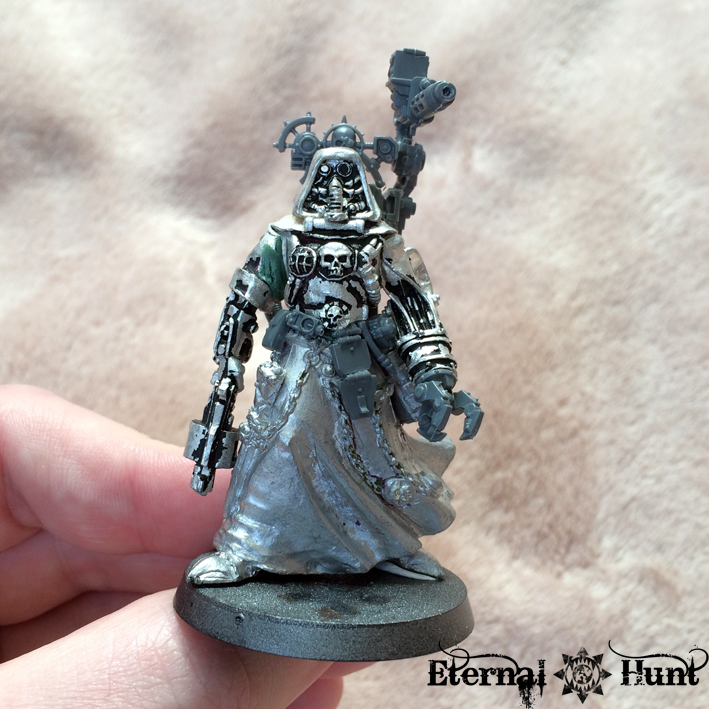
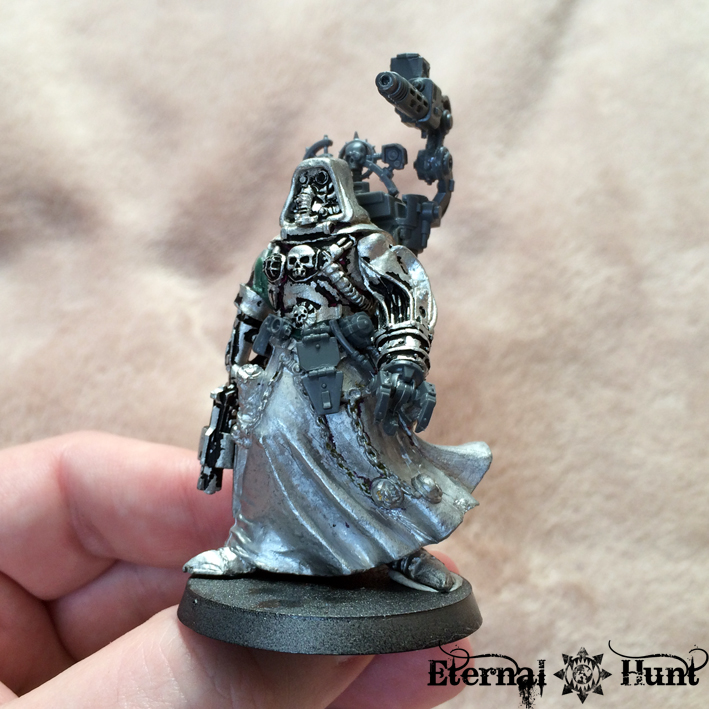
As you can see, it’s a pretty straightforward conversion: I have mostly just replaced one of the arms and the head, and have also shaved off most of the openly chaotic decoration. I still think the changes have nicely tweaked the general look and feel of the model — just a few purity seals and imperial doodads, and this poor wretched soul is ready for grueling servitude in an inquisitorial retinue (probably of the Ordo Malleus flavour, come to think of it).

This was, however, merely the warmup:


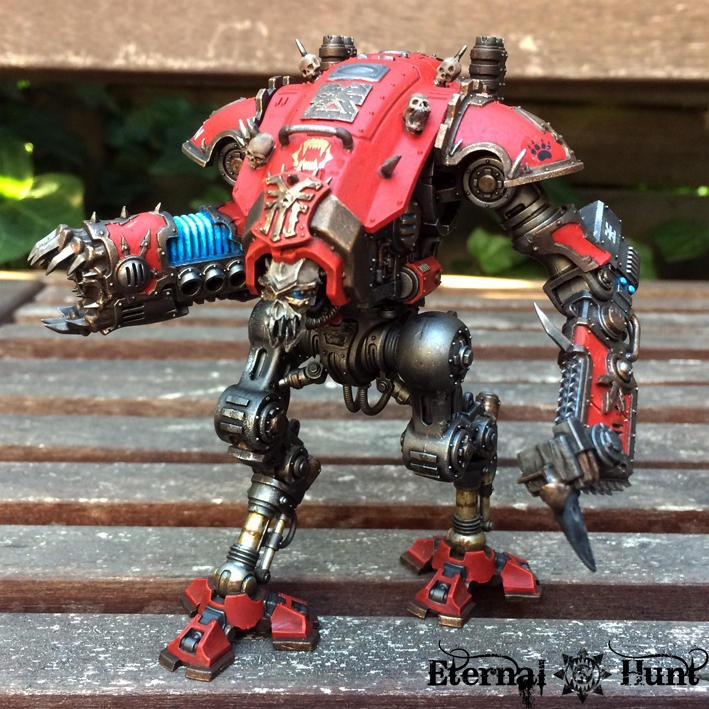
II. Don’t look a gift Dread in the mouth…

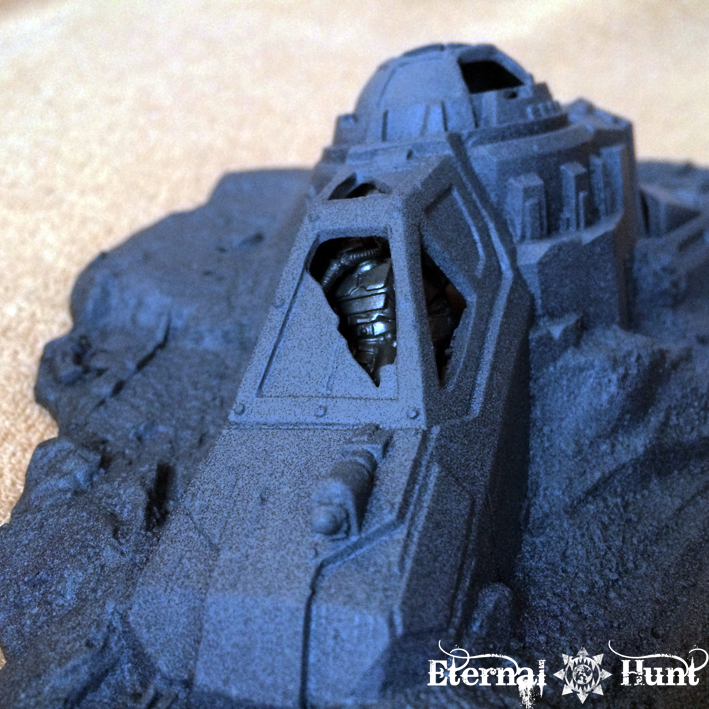
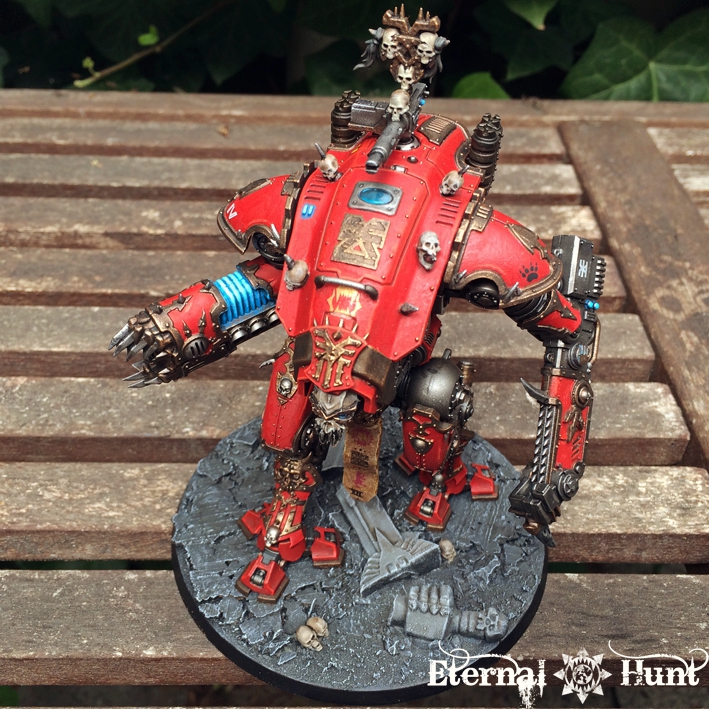
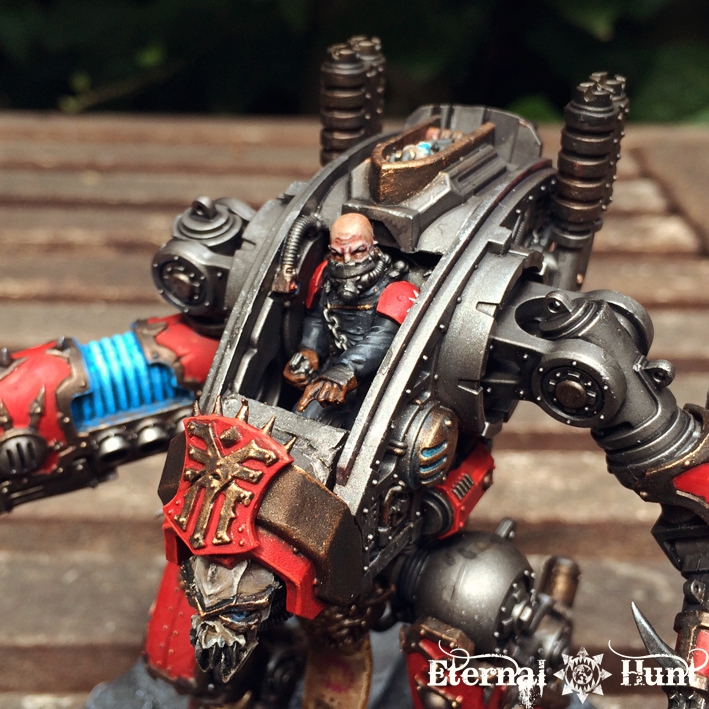
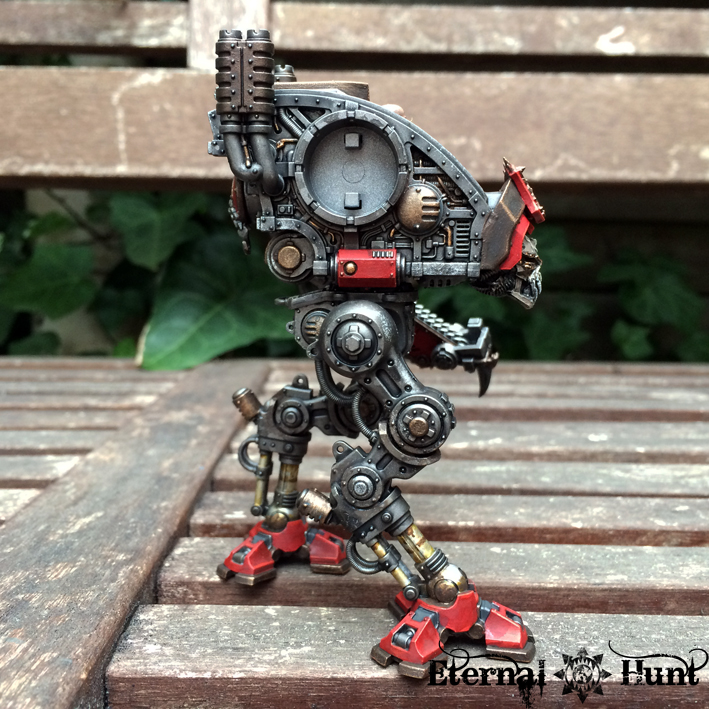
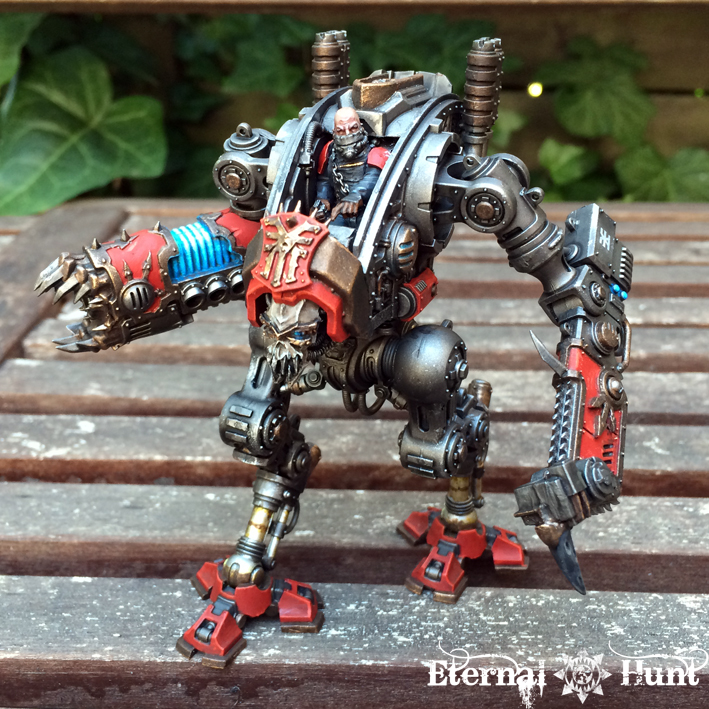
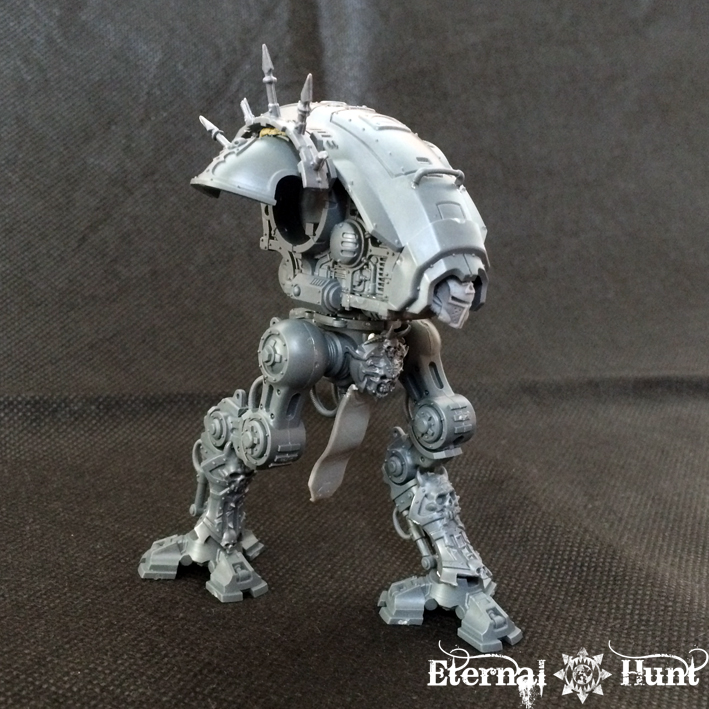
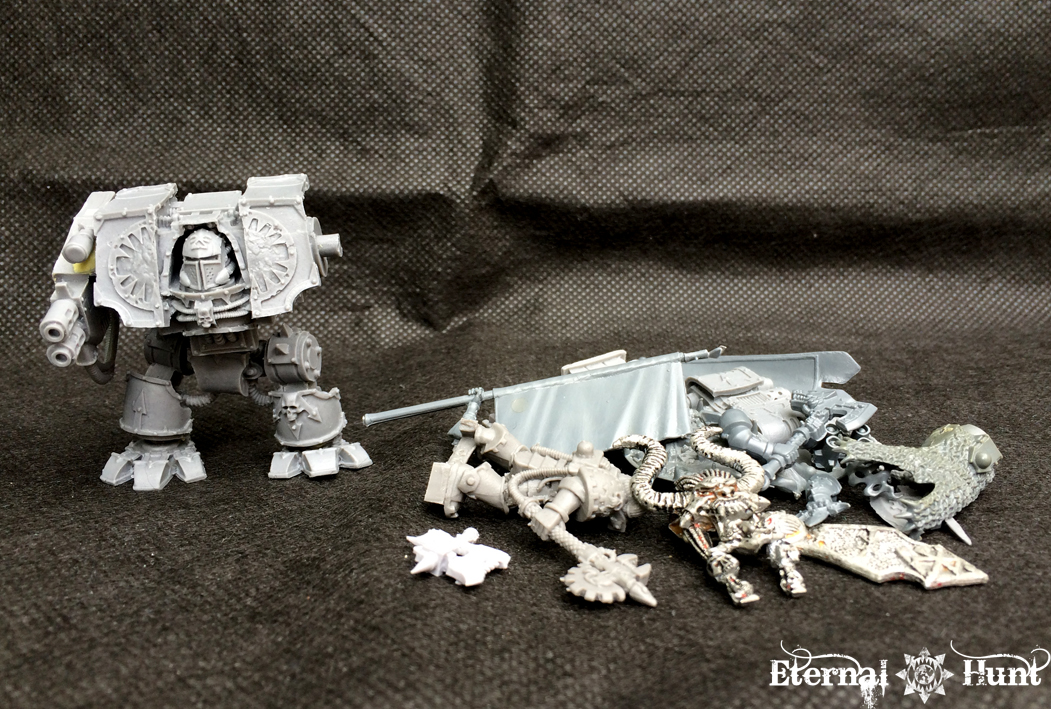
The second model I would like to share with you has been a long time coming: Back when I visited fellow hobbyist Augustus b’Raass in Amsterdam in 2017, he was generous enough to present me not only with a pile of conversion bitz, but also with one of the old Forgeworld World Eaters Dreadnoughts:


Now I have a fond personal history with those FW Dreadnoughts, because they were my first proper contact with Forgeworld to begin with: Back when I saw those, I remember being utterly blown away with the sheer quality of the sculpts — and there was one for each Traitor Legion, mind you! And all of this at a time where the Traitor Legions didn’t exactly get all that much love from GW proper.

Alas, I never purchased one of the Dreads, and when they went OOP a while ago, I was quietly furious at myself at passing the opportunity to have the World Eaters one in my collection — an oversight that Augustus remedied by way of his wonderful gift.

But I am nothing if not a hobby butterfly, so it took me ages to finally start working on the Dreadnought — I was also missing some proper arms for him, in my defense. But when Augustus recently sent me a wonderful squad of World Eaters, he also included a chaos Dread CC arm in the package, and I definitely got the message: I would have to get the hell off my arse and build that Dreadnought, at long last!

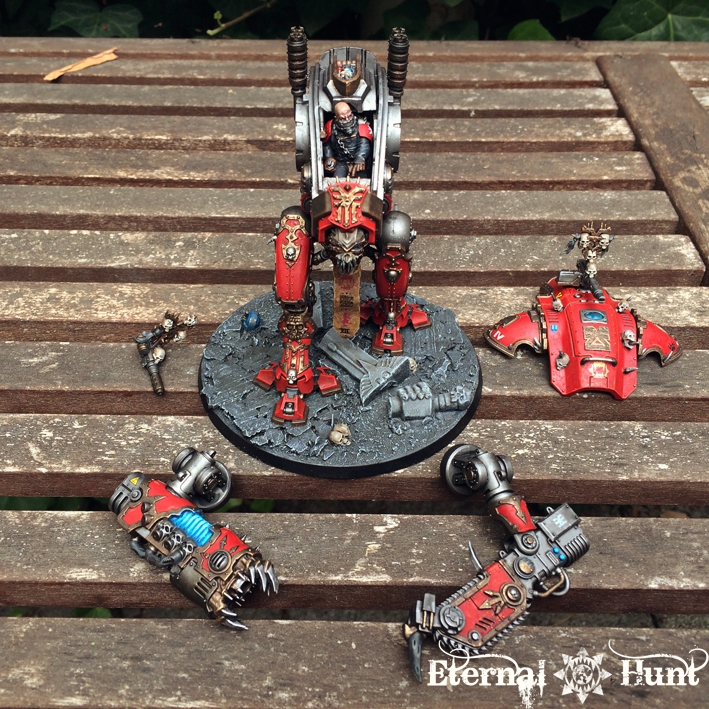
So only one bitz delivery later, I had everything I needed for the model:

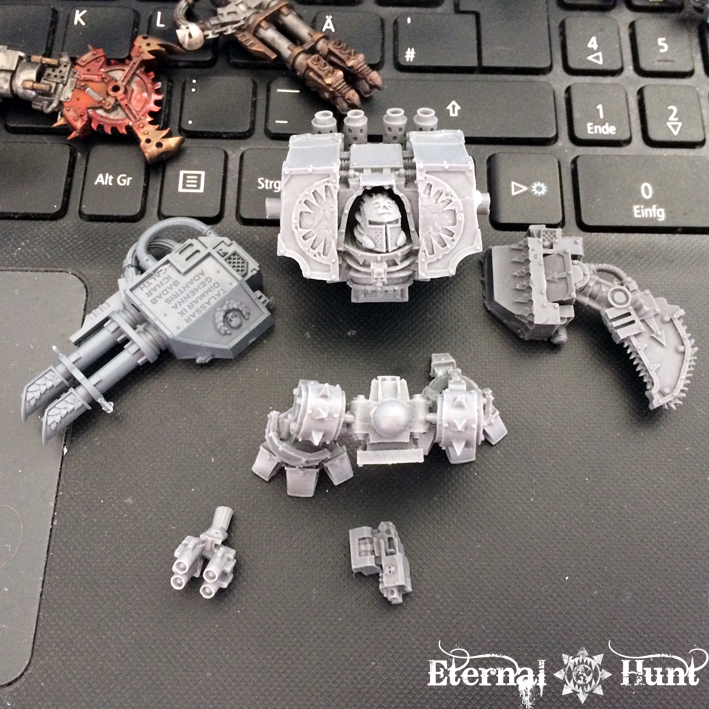
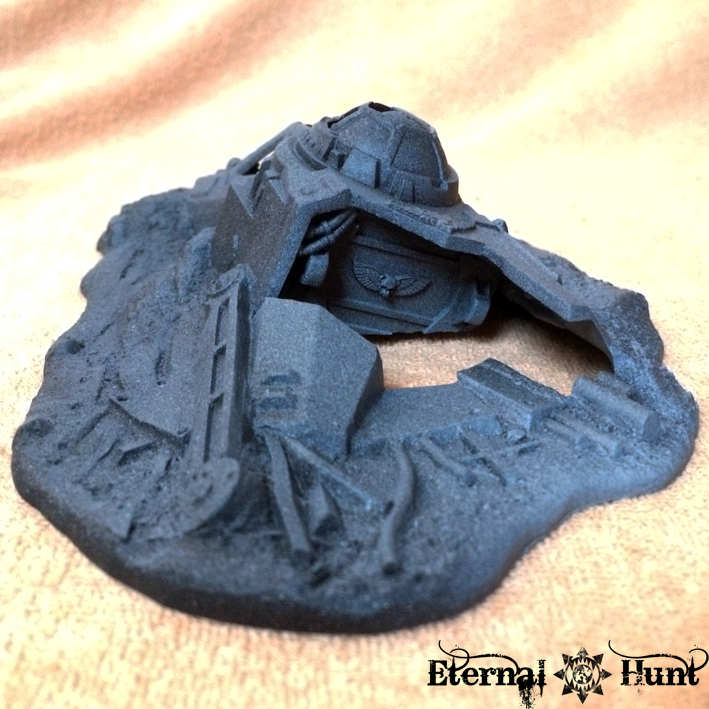
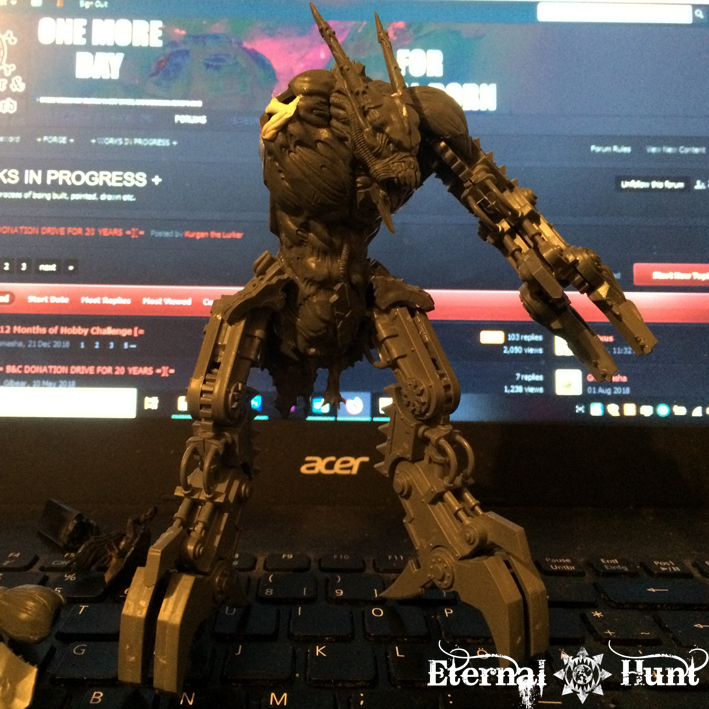
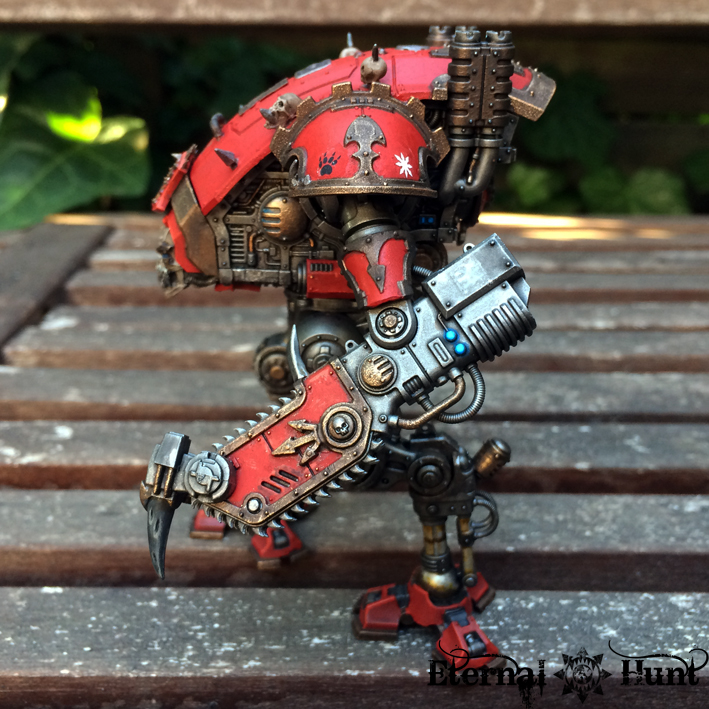
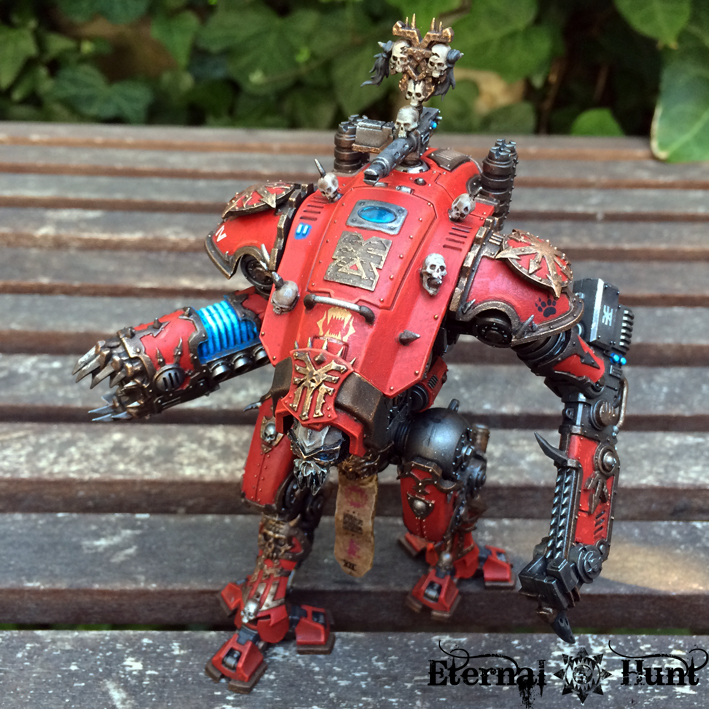
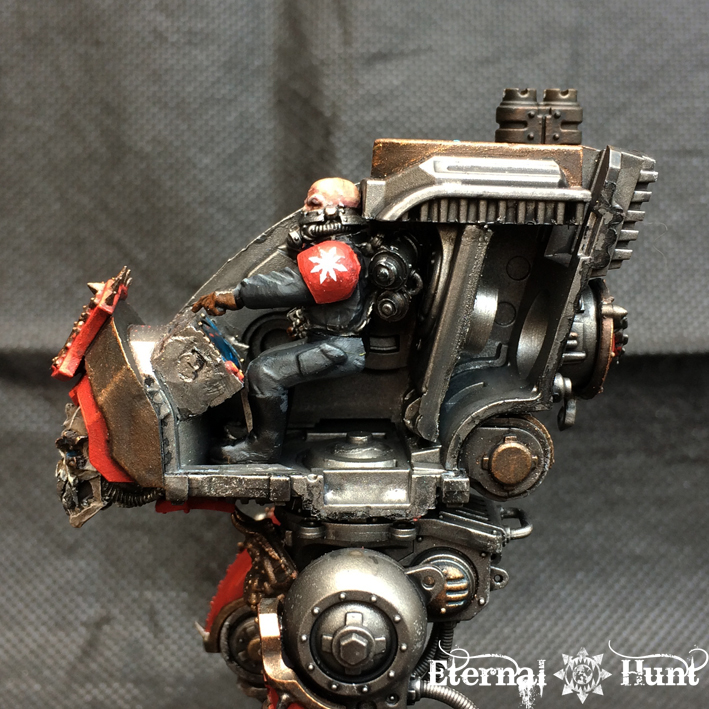
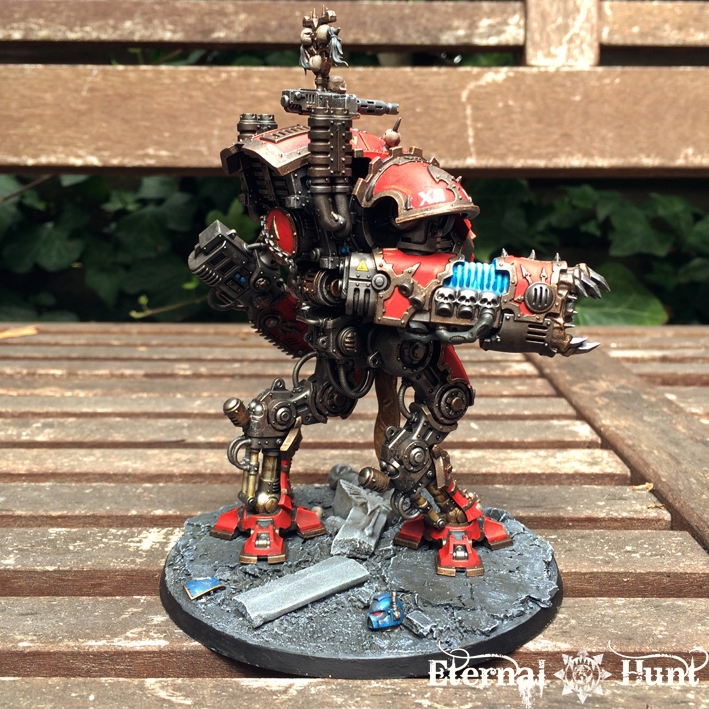
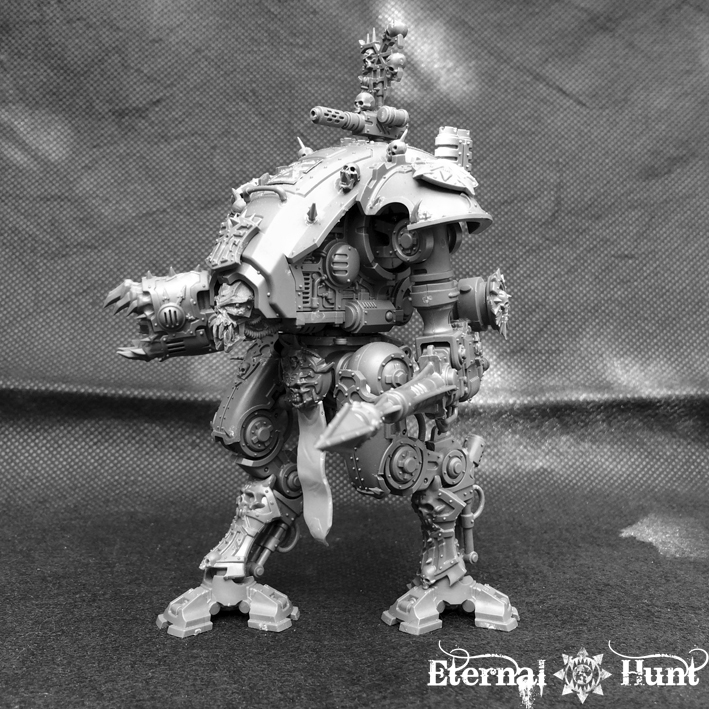
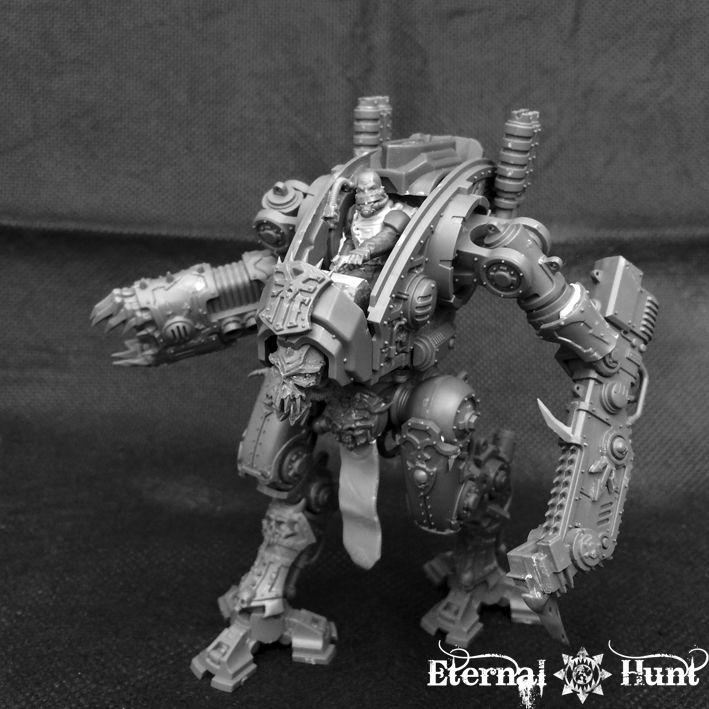
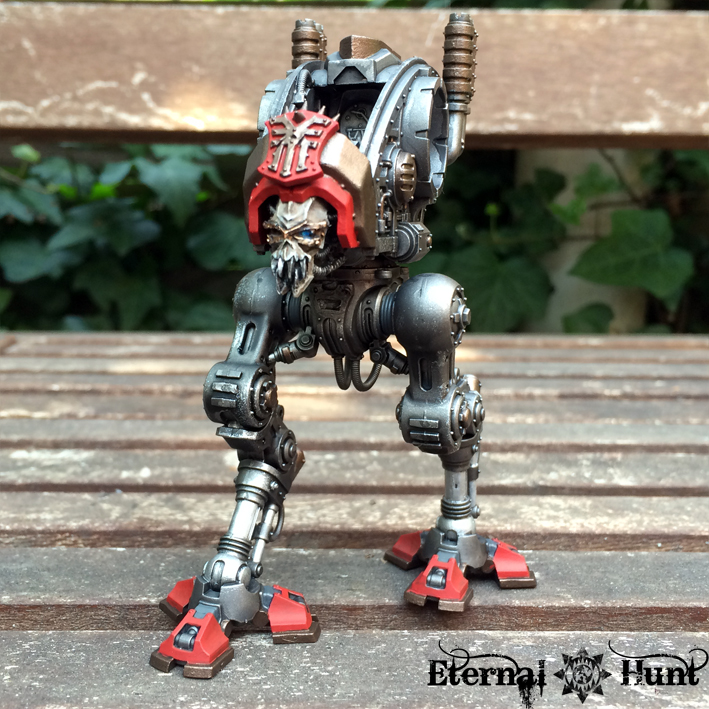
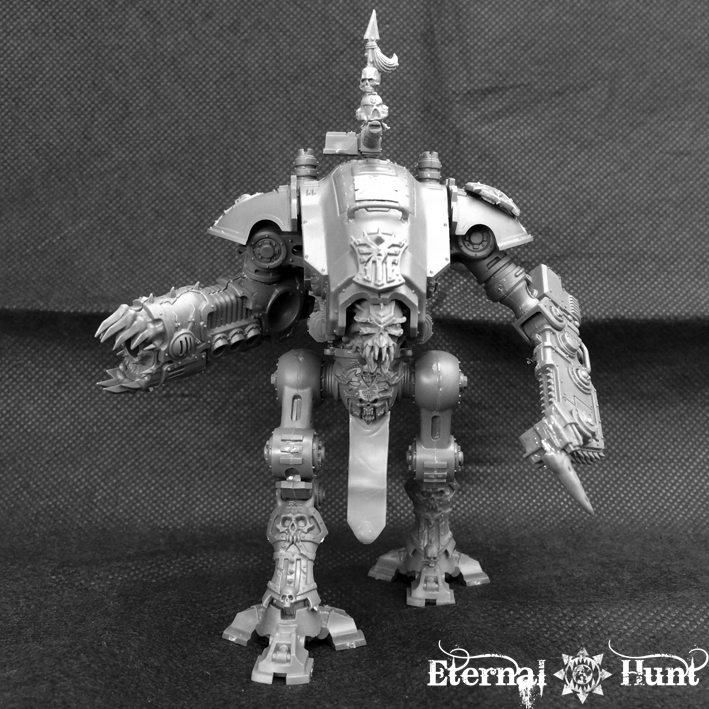
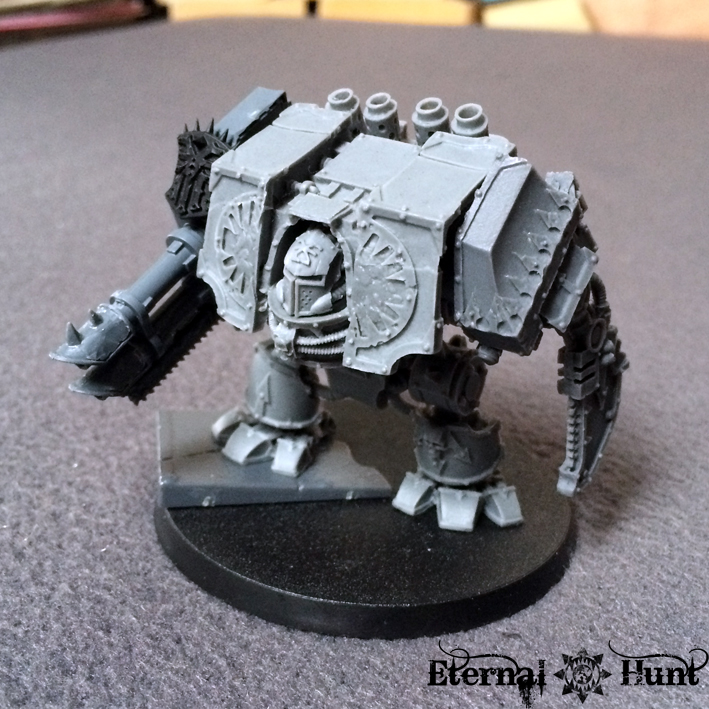
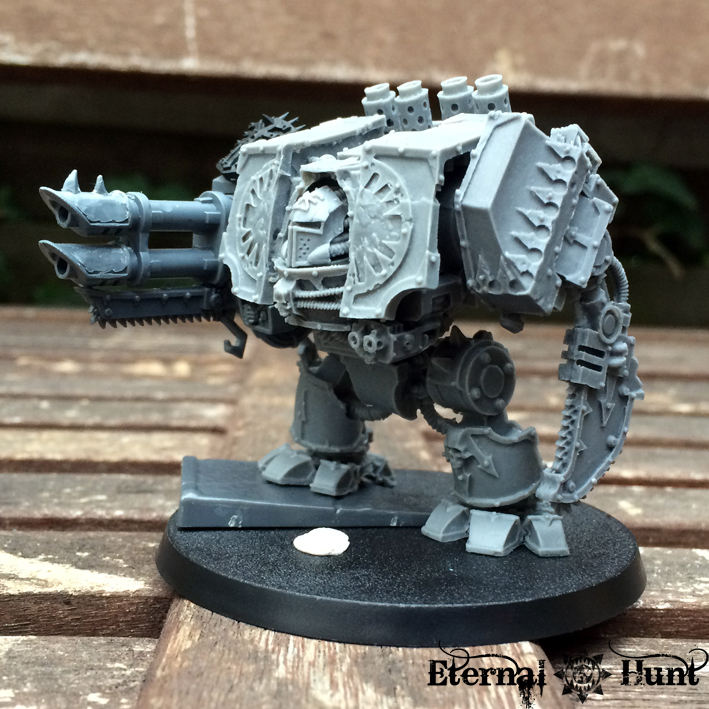
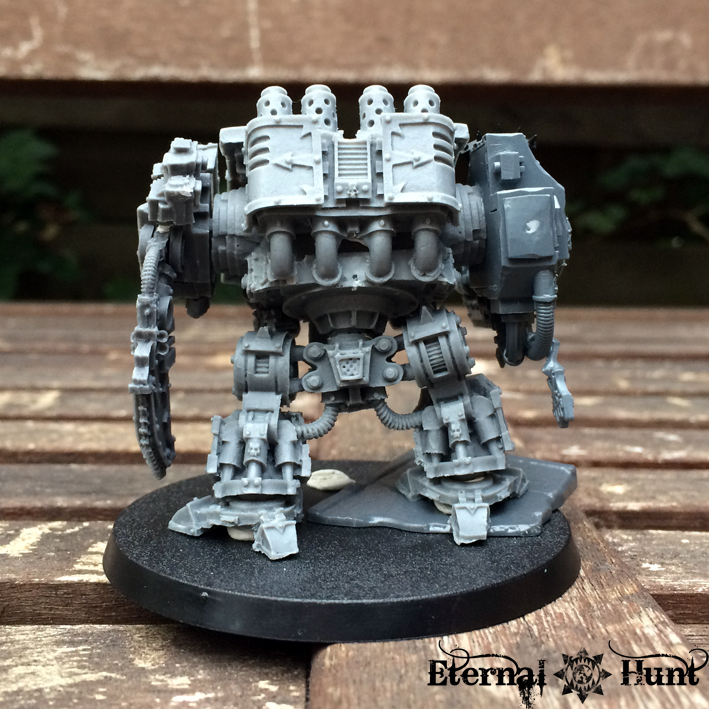
So here’s a look at the initial mockup of the Dreadnought:

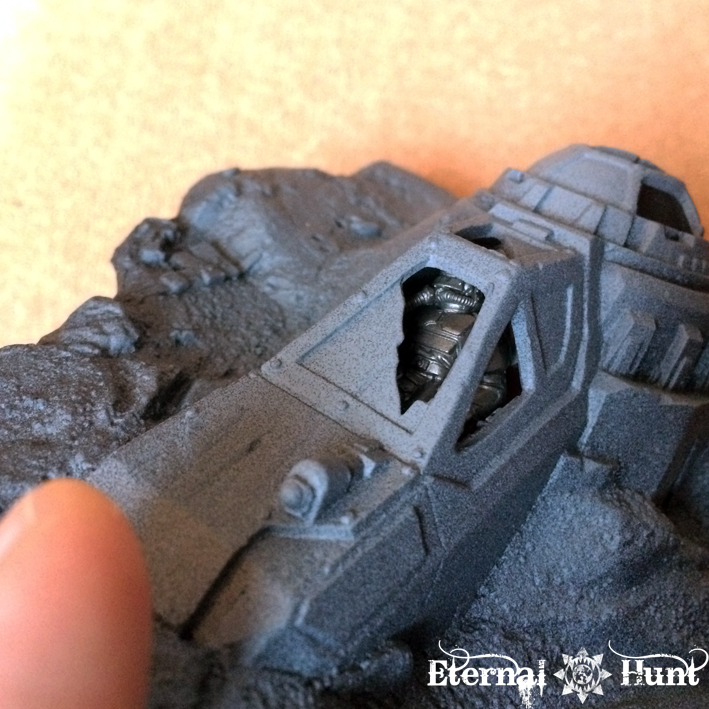
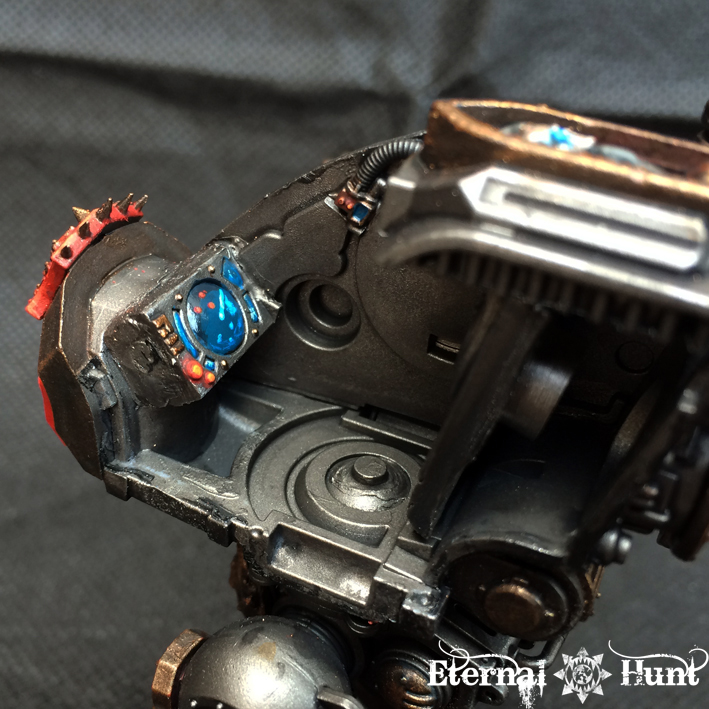
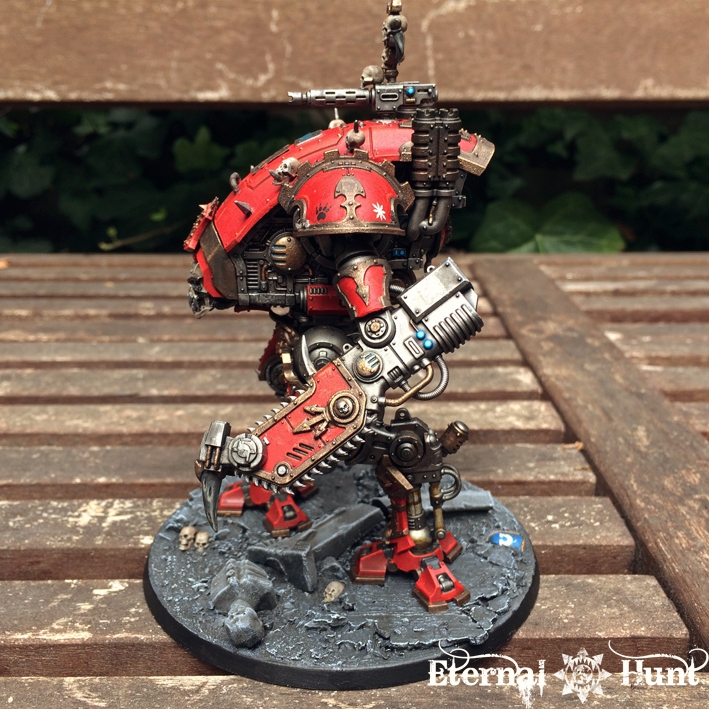
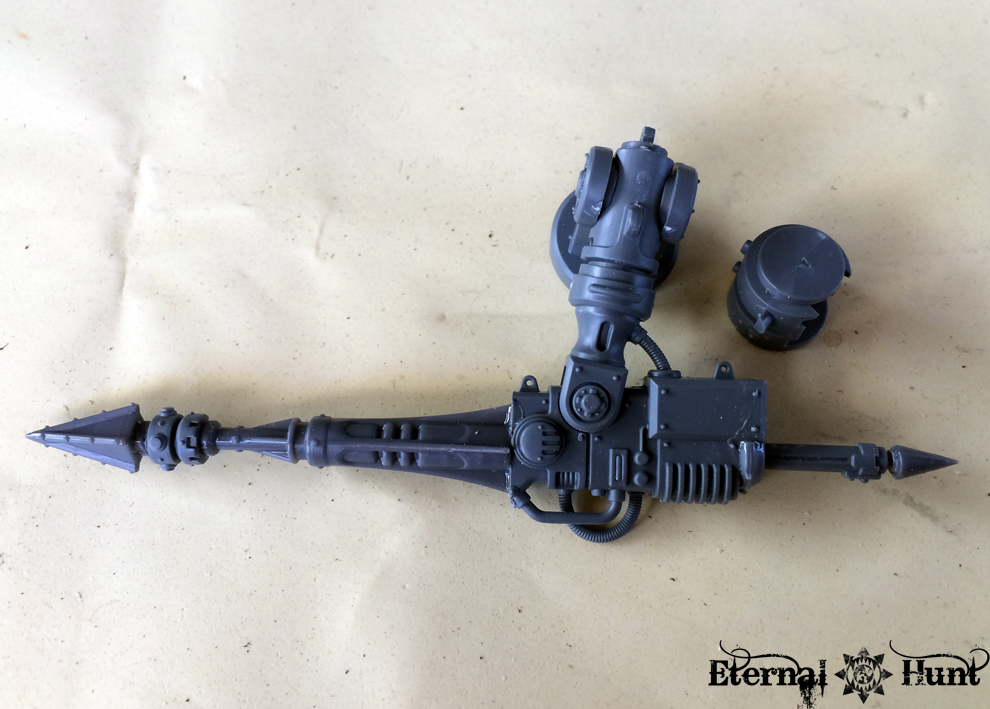
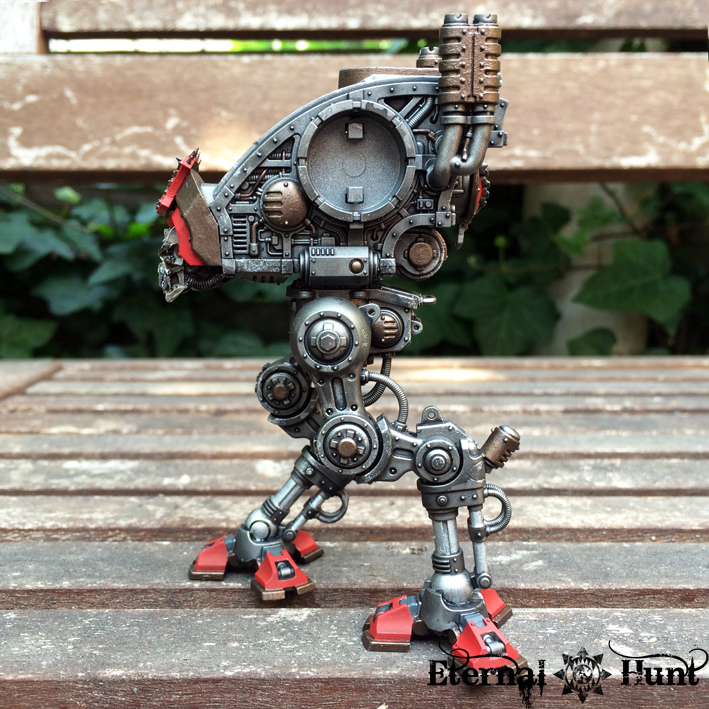
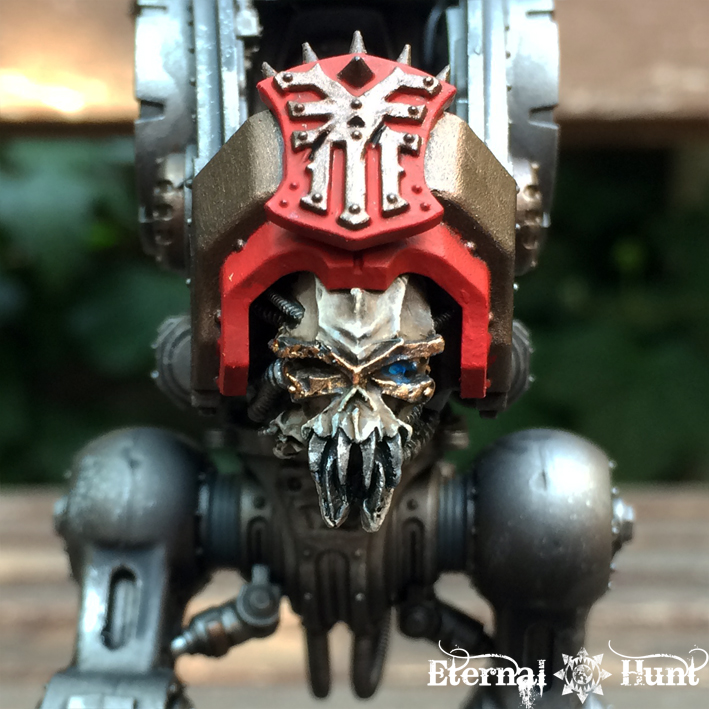
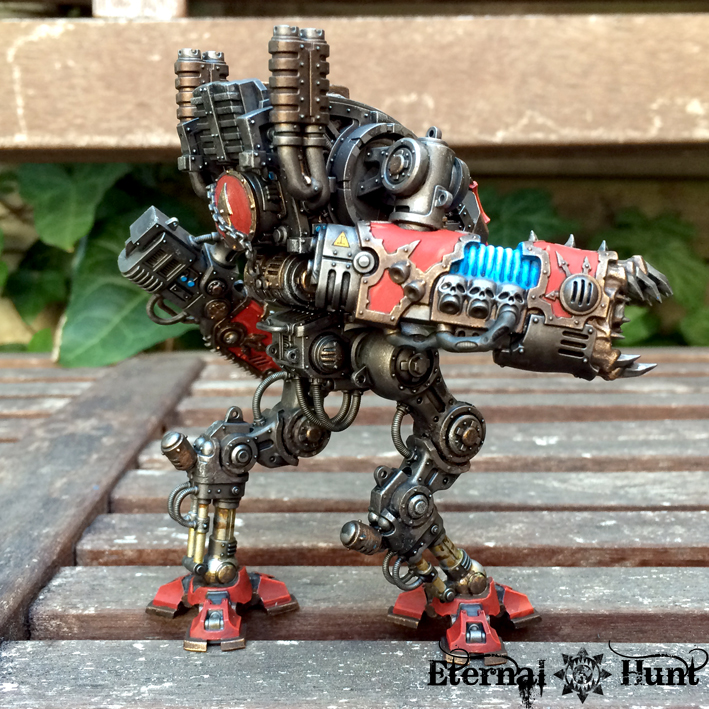
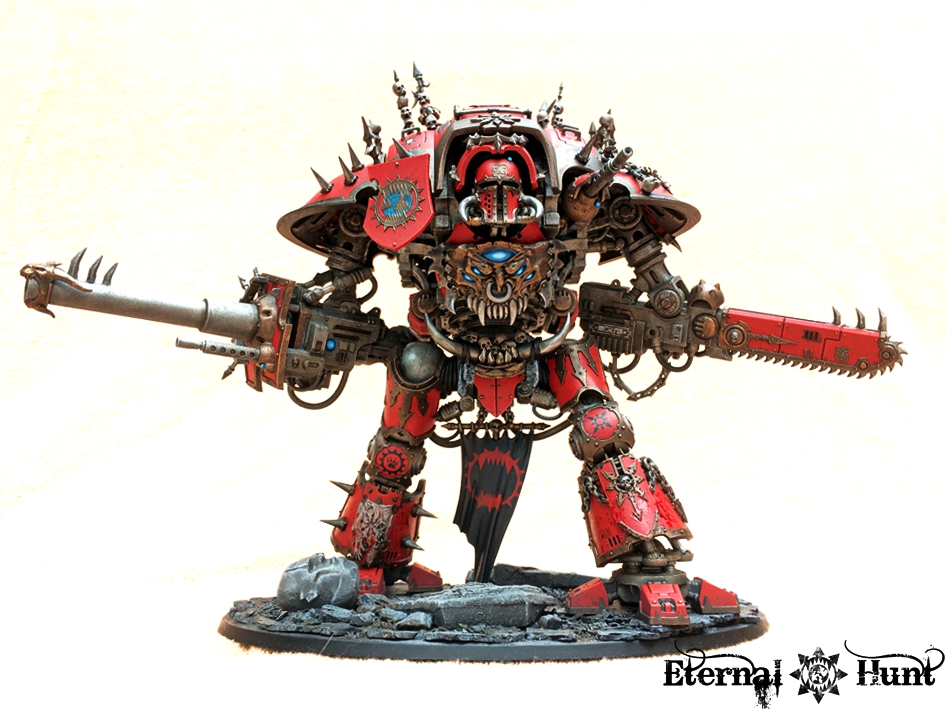
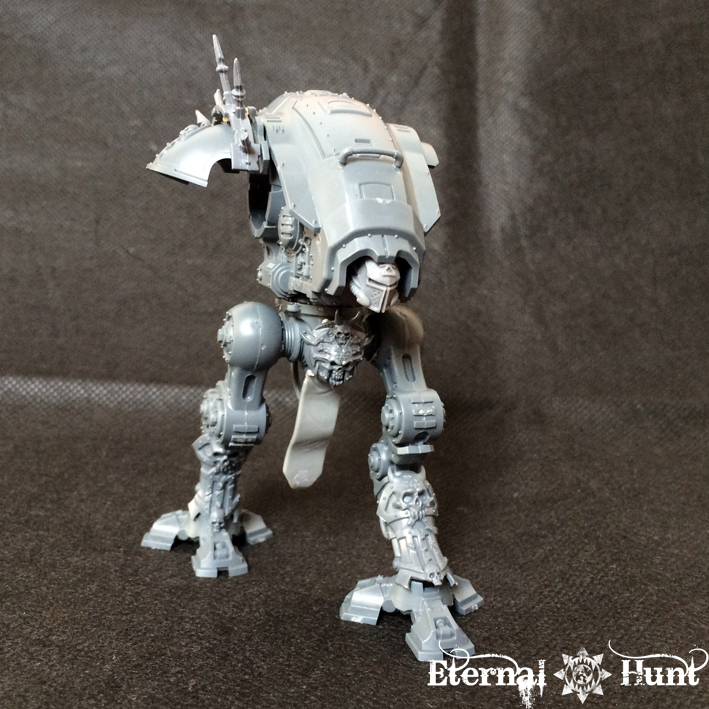
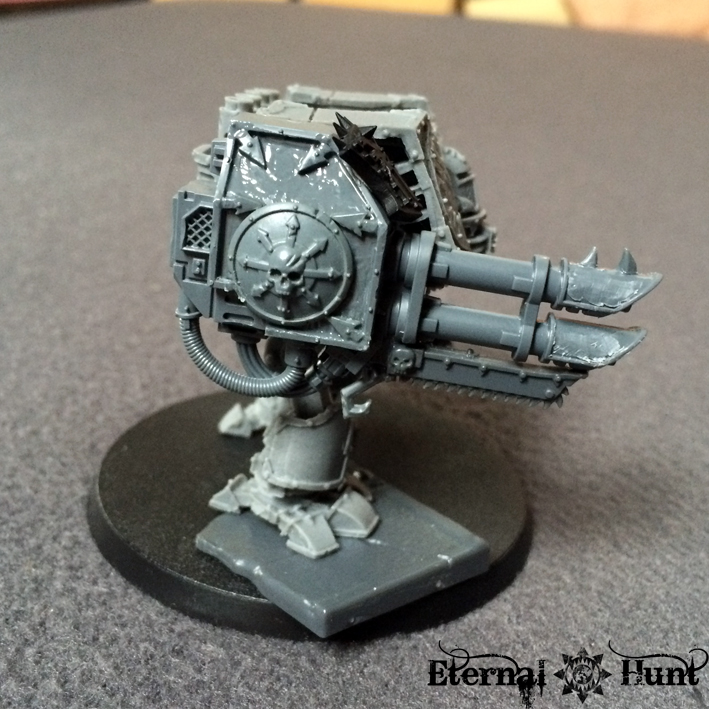
Most work went into turning that squeaky clean Venerable Dreadnought lascannon arm into a suitably chaotic version that matches the general look of the model. Here’s a closer look at the – mostly finished – gun arm:


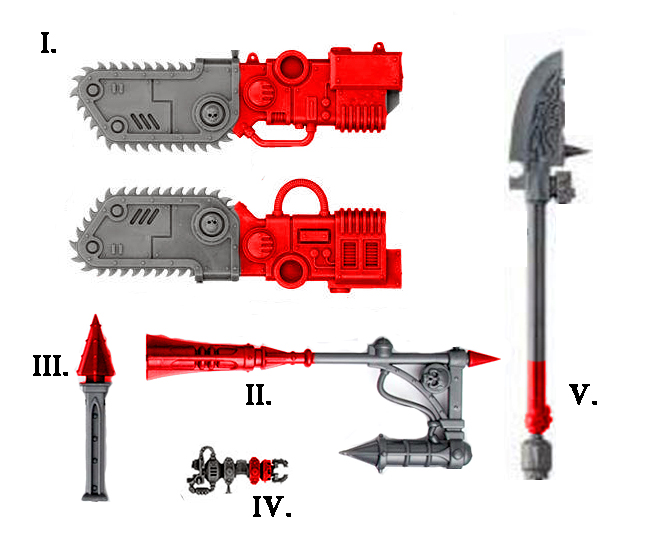
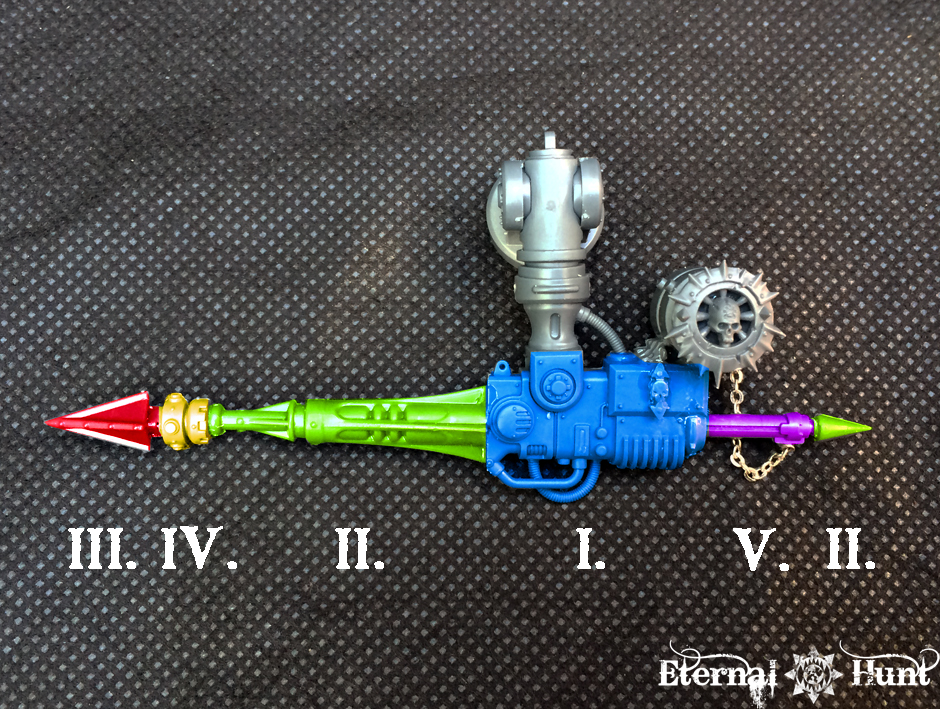
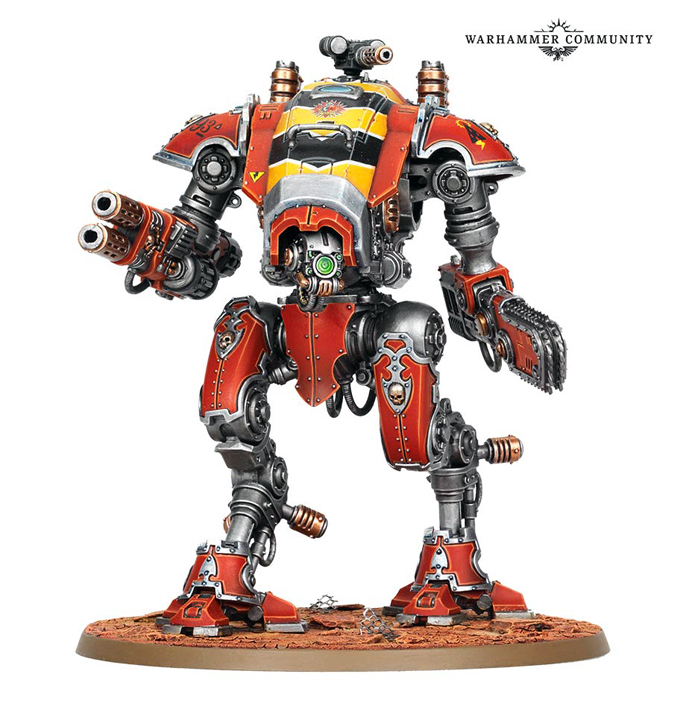
I chose the Lascannon, mostly for the visual balance created by those longer barrels. When it came to making it look suitably chaotic, I worked from Forgeworld’s “official” design, trying to match several of the visual cues present in the sculpt, while also putting a small personal spin on things here and there. So here’s a look at Forgeworld’s version:

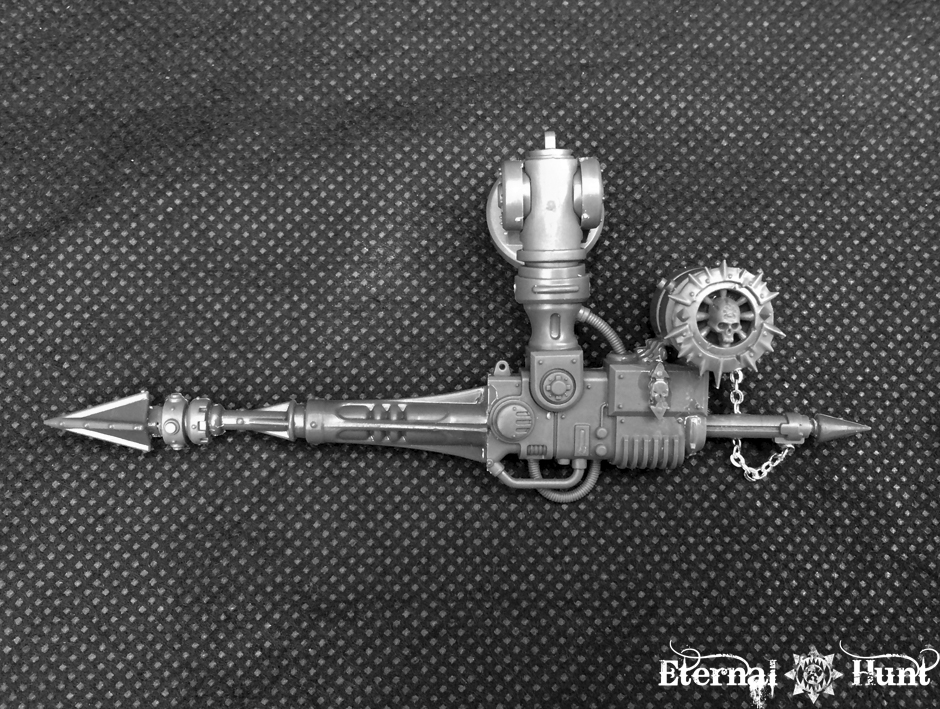
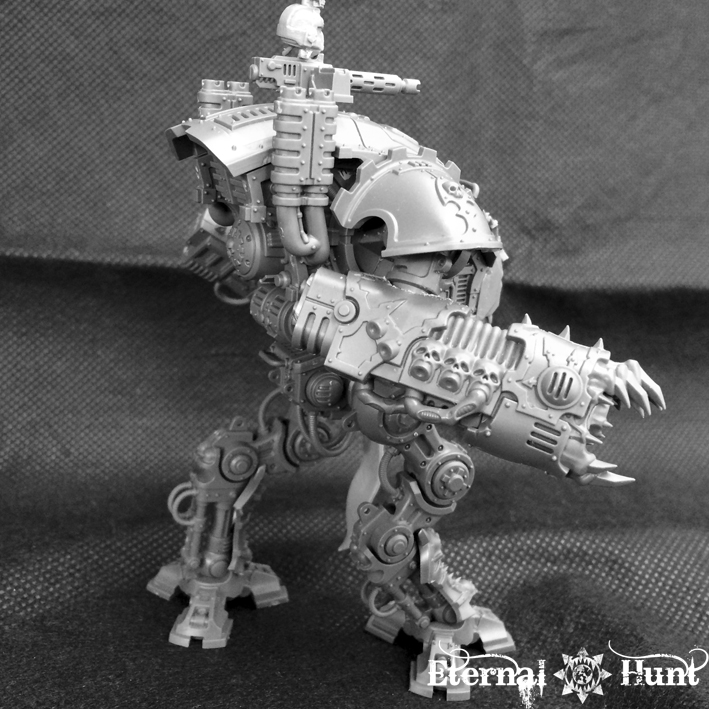
And here’s the – mostly finished – Lascannon arm I came up with:

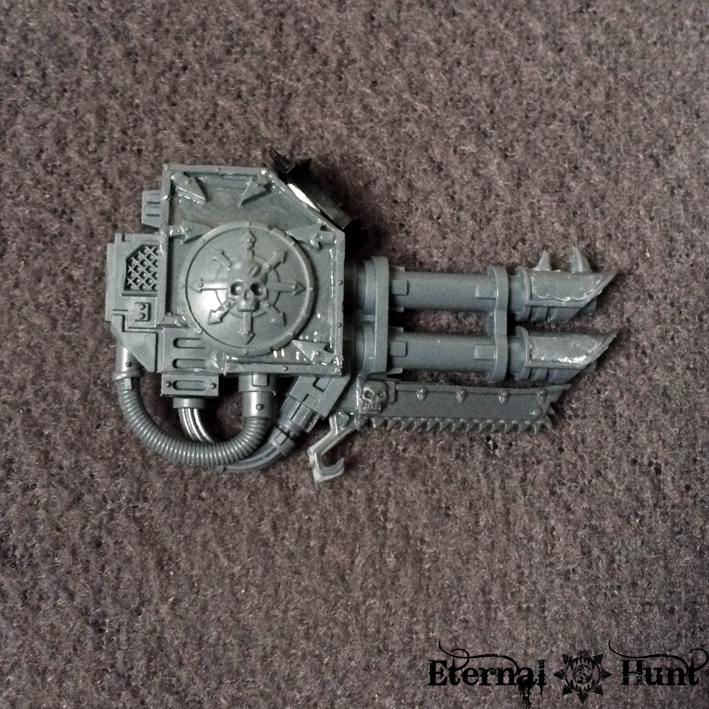
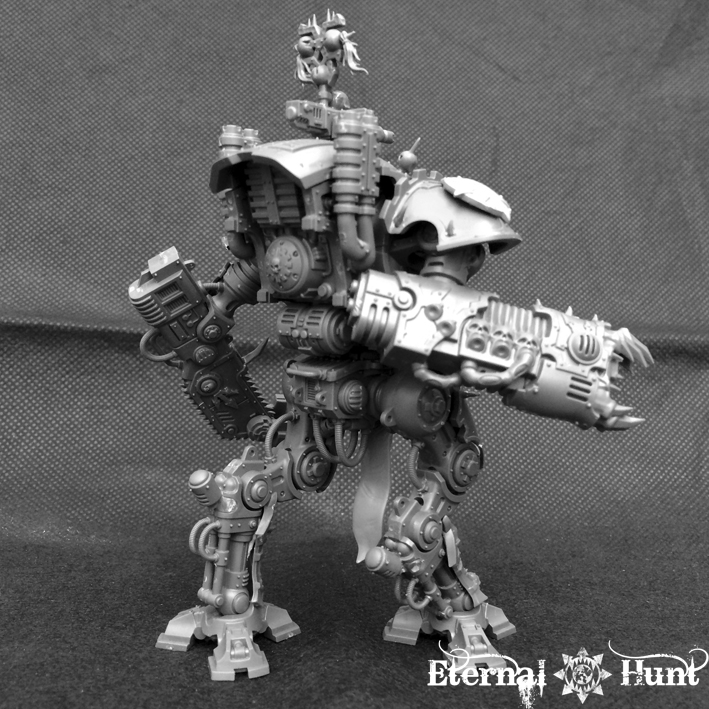
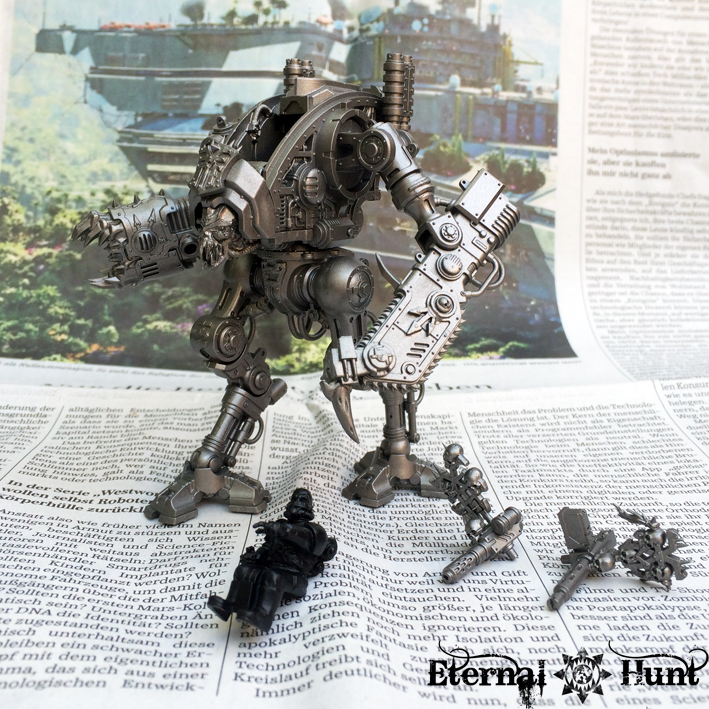
There’s also an additional cool little special effect in place here: I decided to base his gun arm on one of the weapons from the Venerable Dreadnought kit in order to be able to keep the arm modular, so that it will accept alternate guns and can make use of the additional weapons I already built back when I converted my first Venerable Dreadnought.

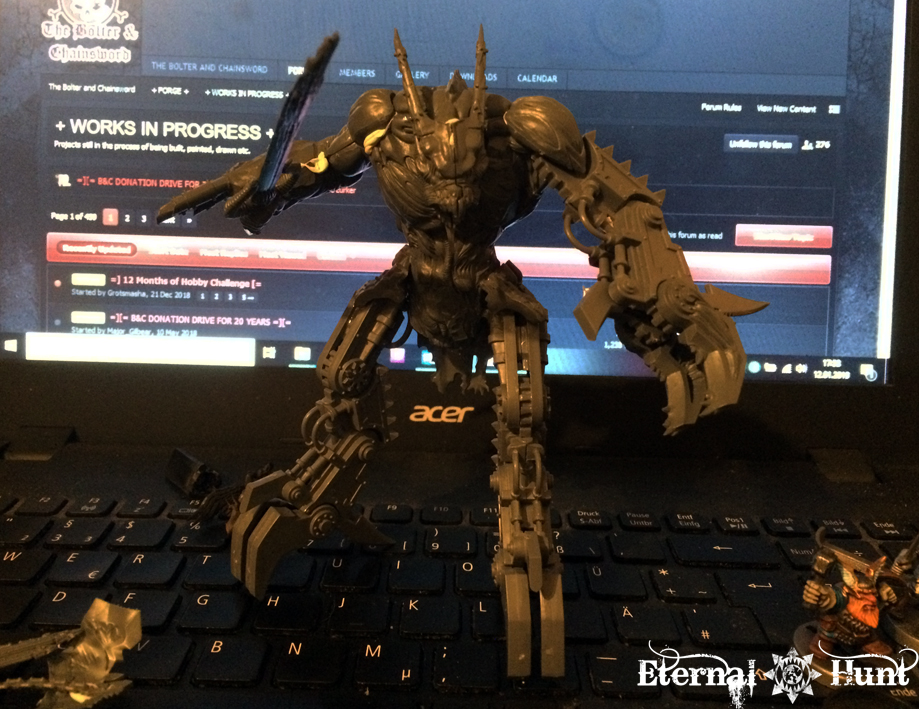
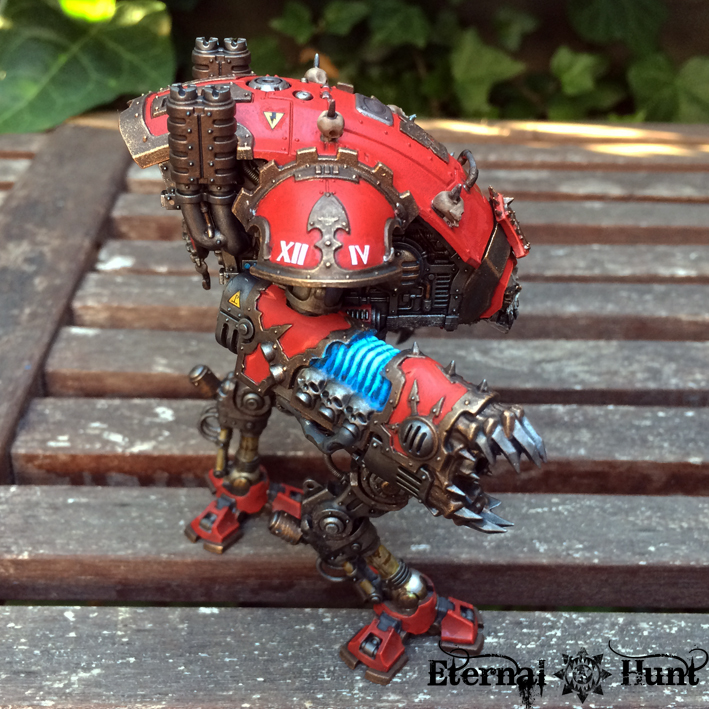
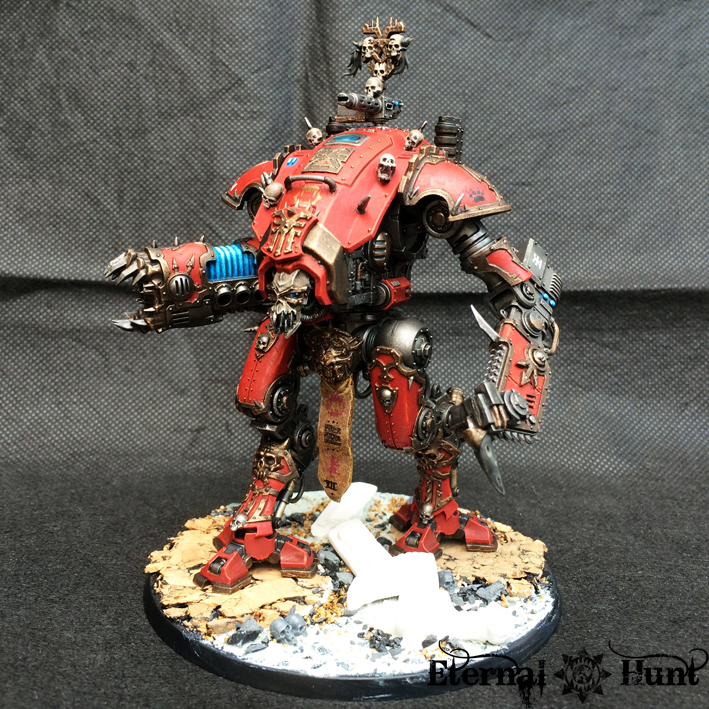
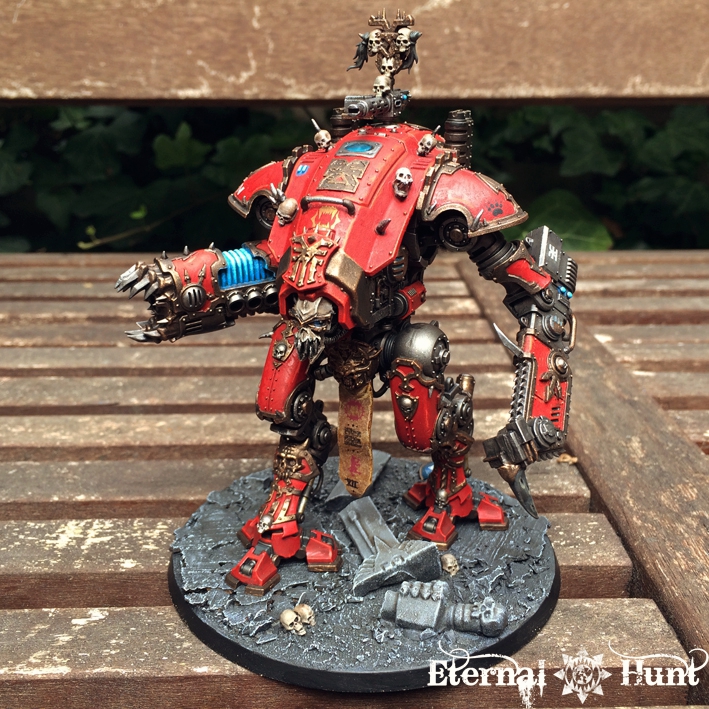
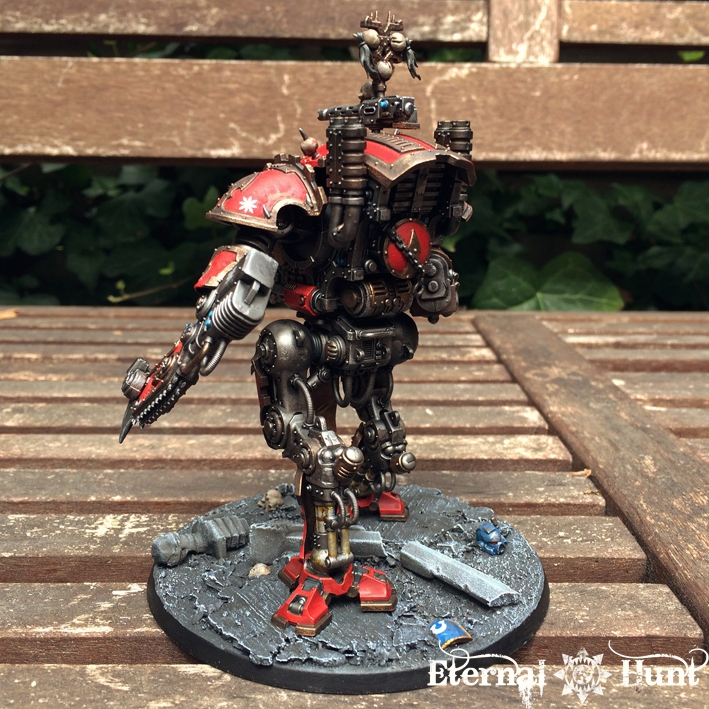
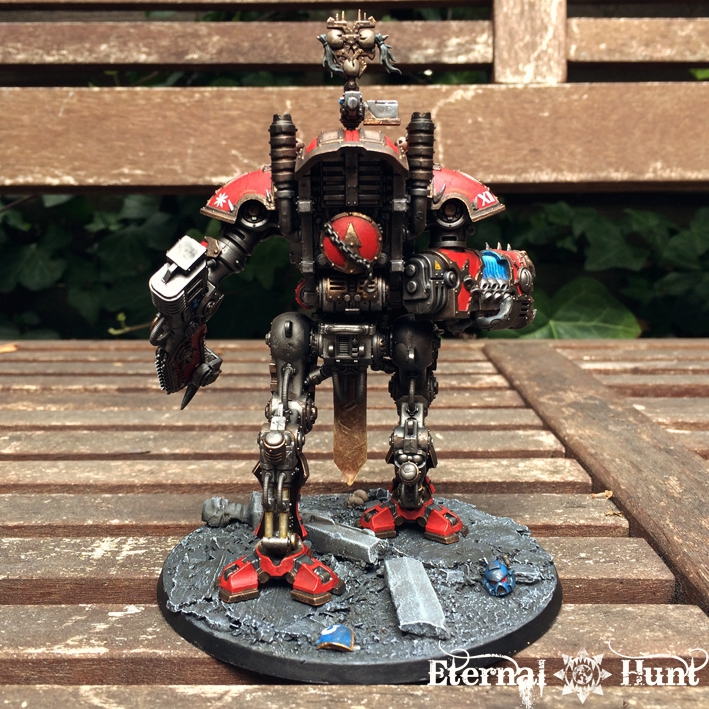
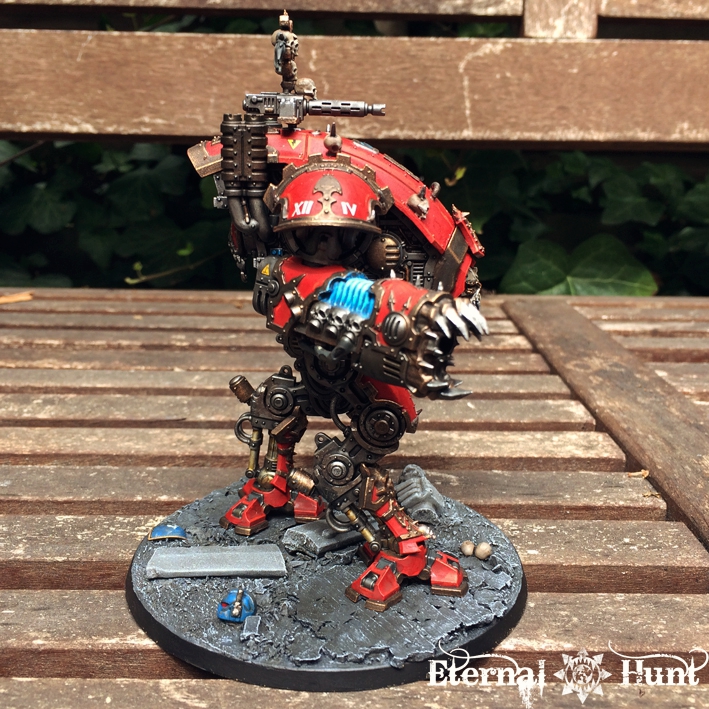
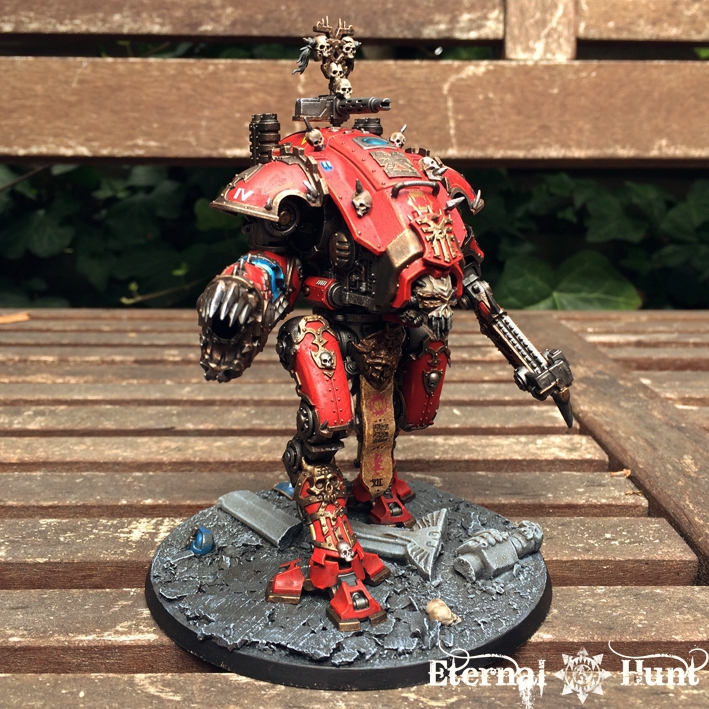
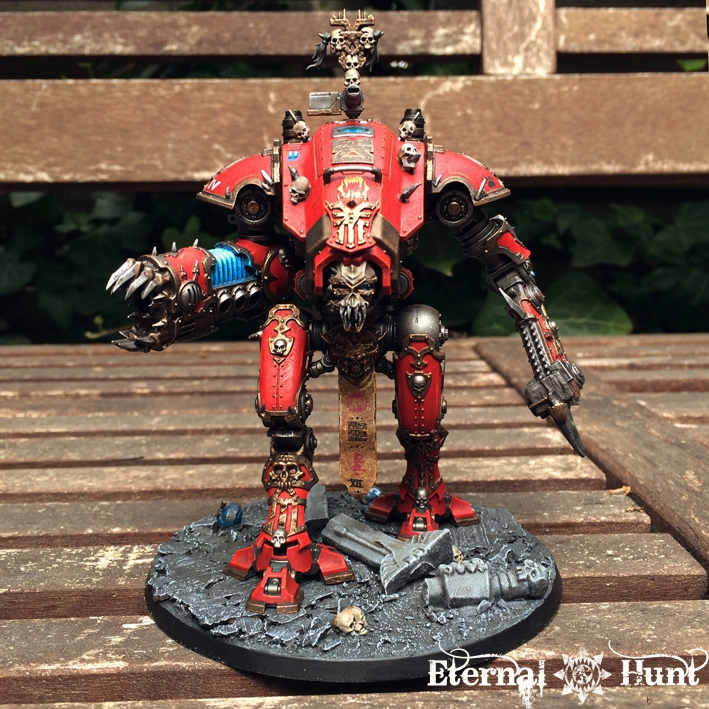
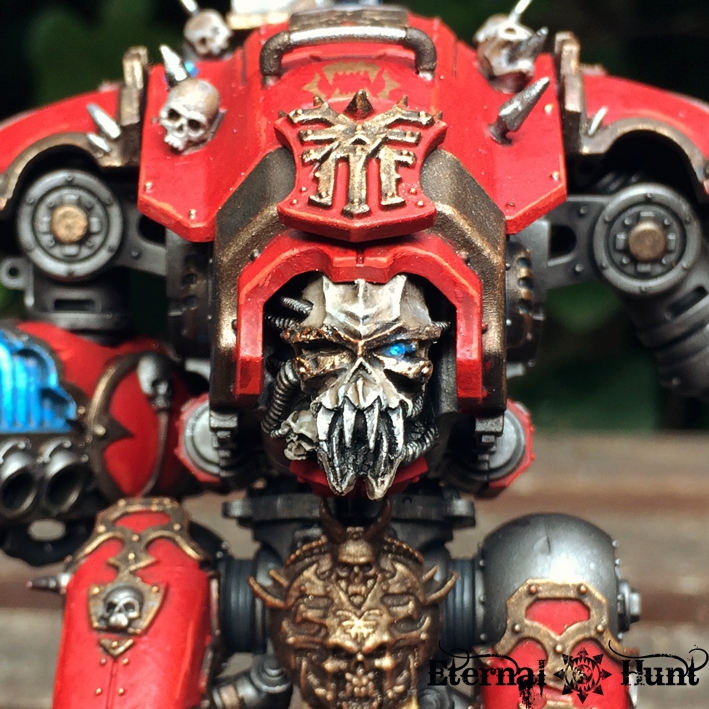
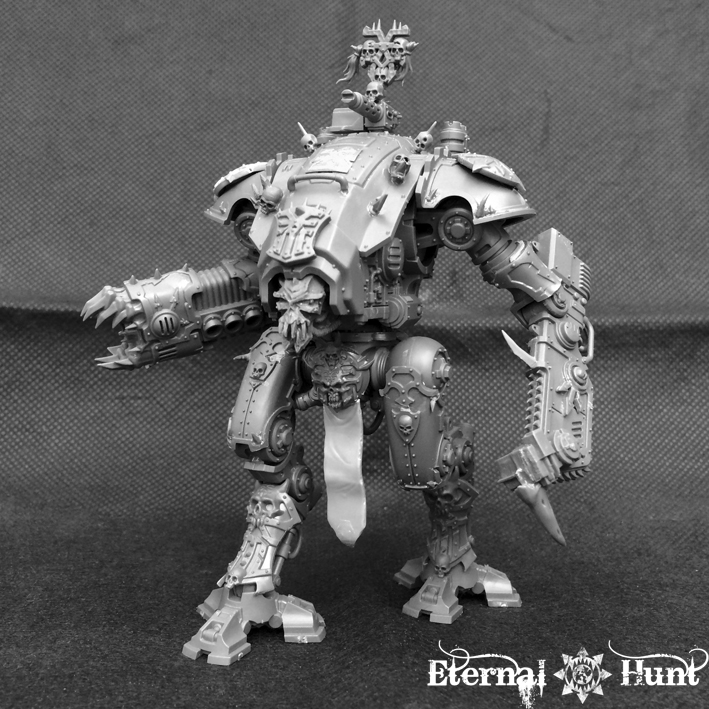
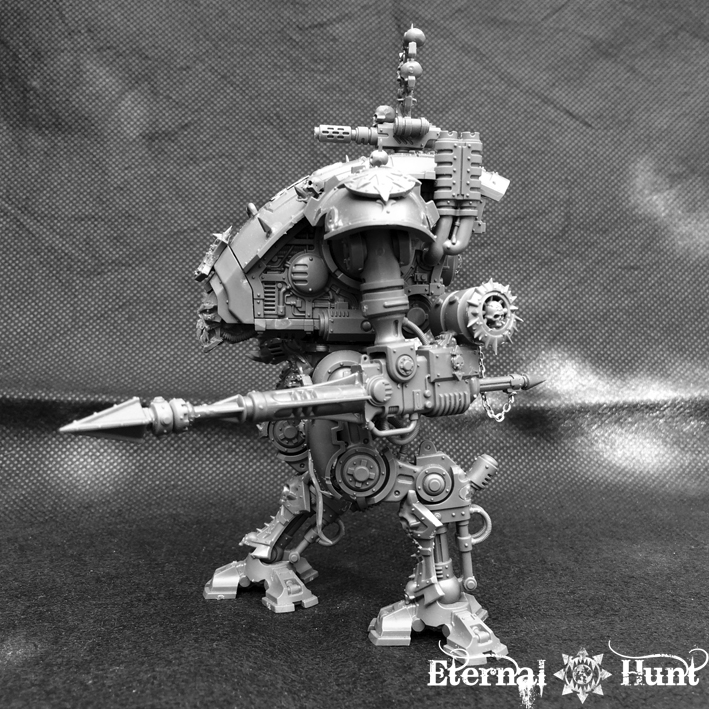
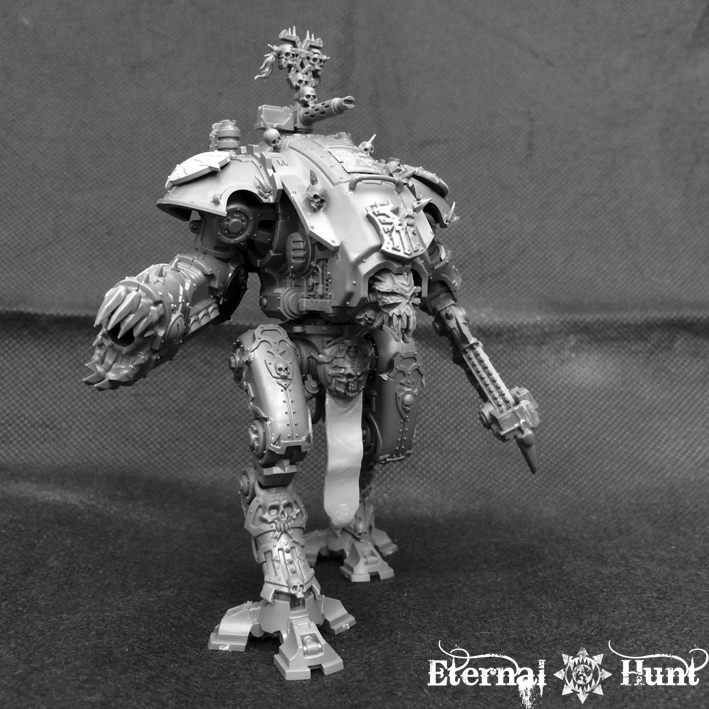
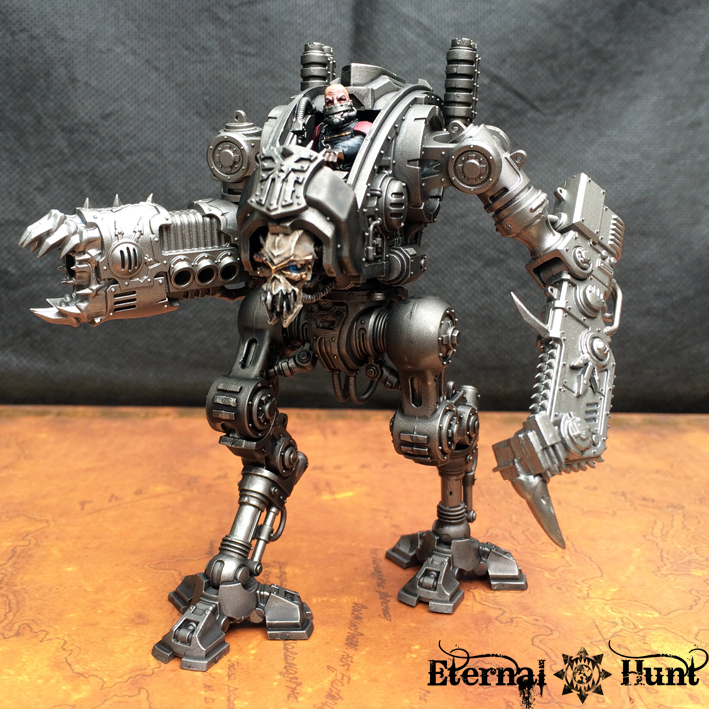
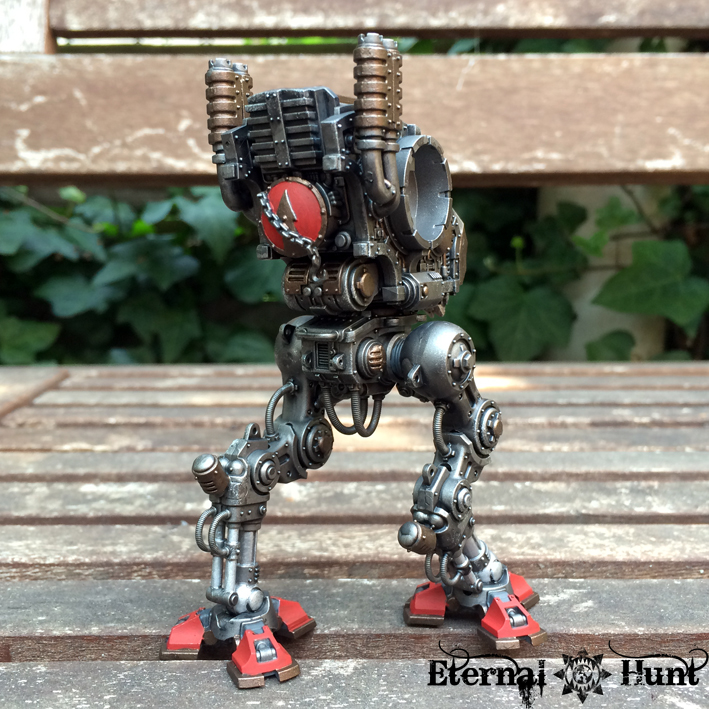
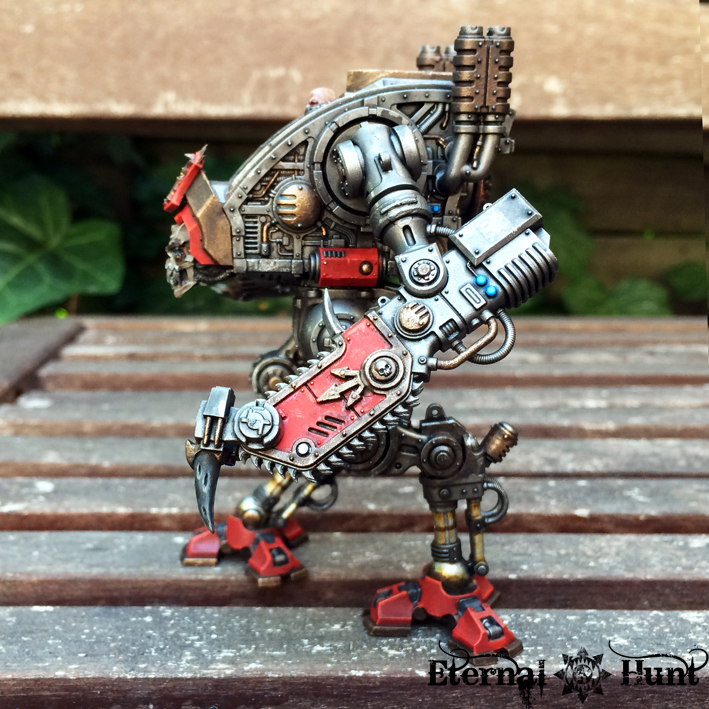
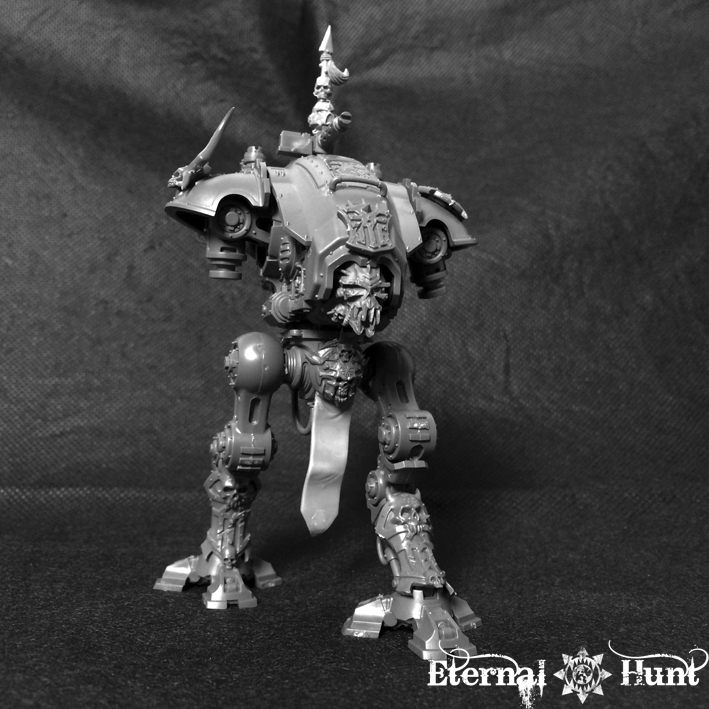
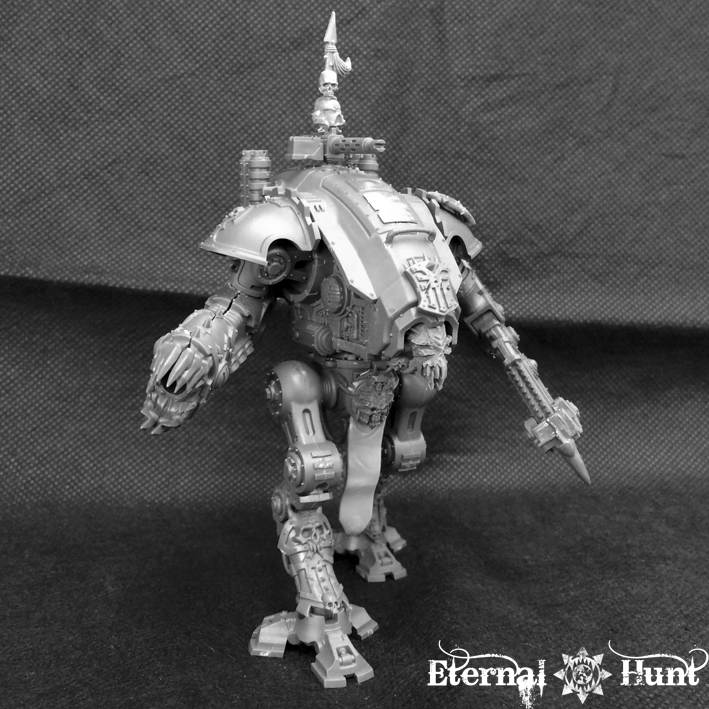
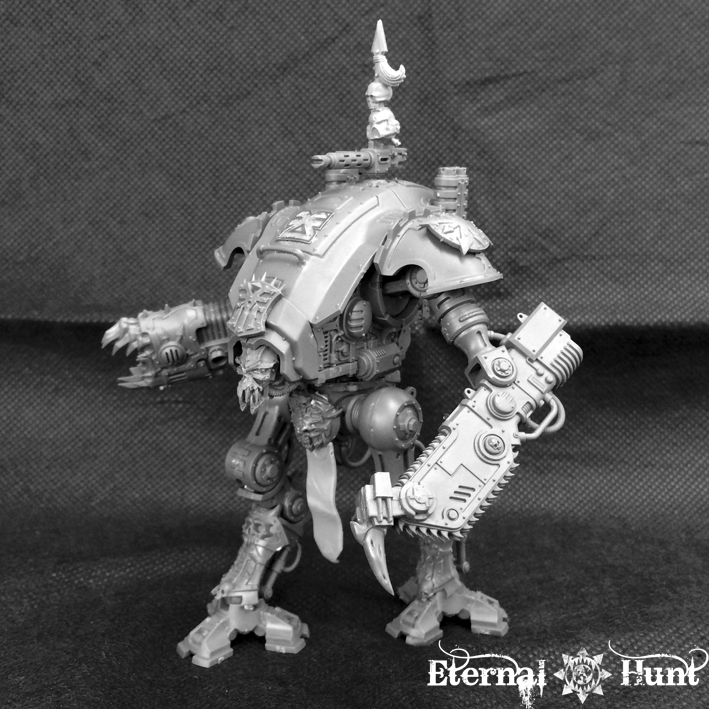
Beyond the arm, I only added one or two bitz to the rest of the model, not wanting to overpower what I think is a brilliant sculpt overall. So here’s a look at the completely built model, already in the intended pose, leaning into its next shot:


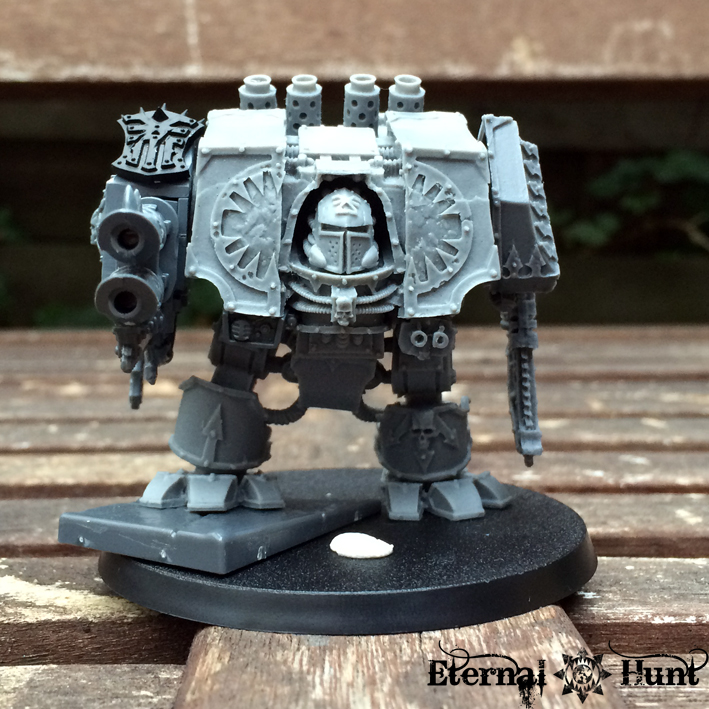
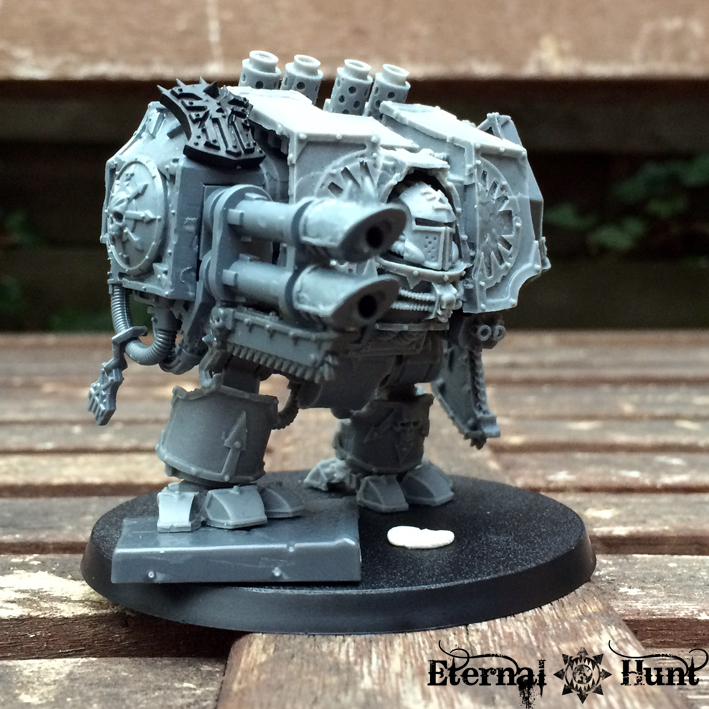
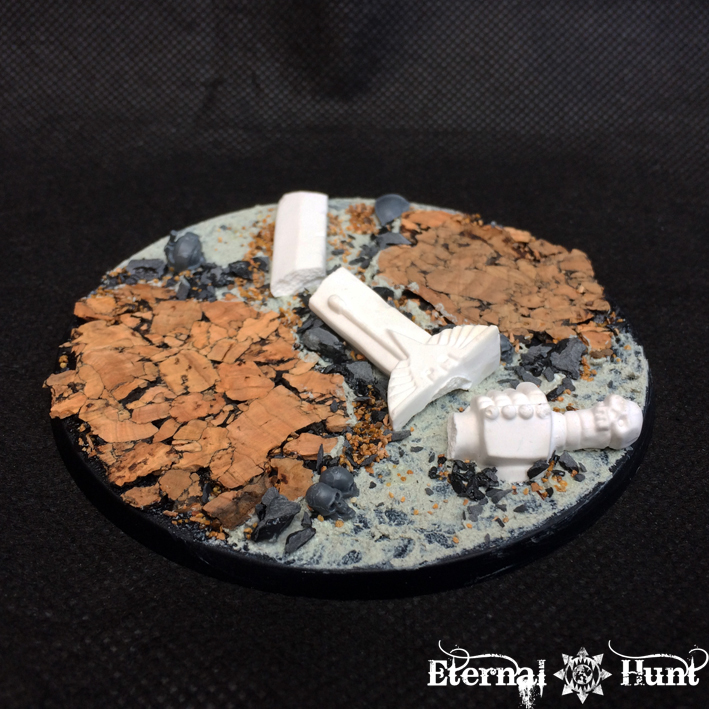
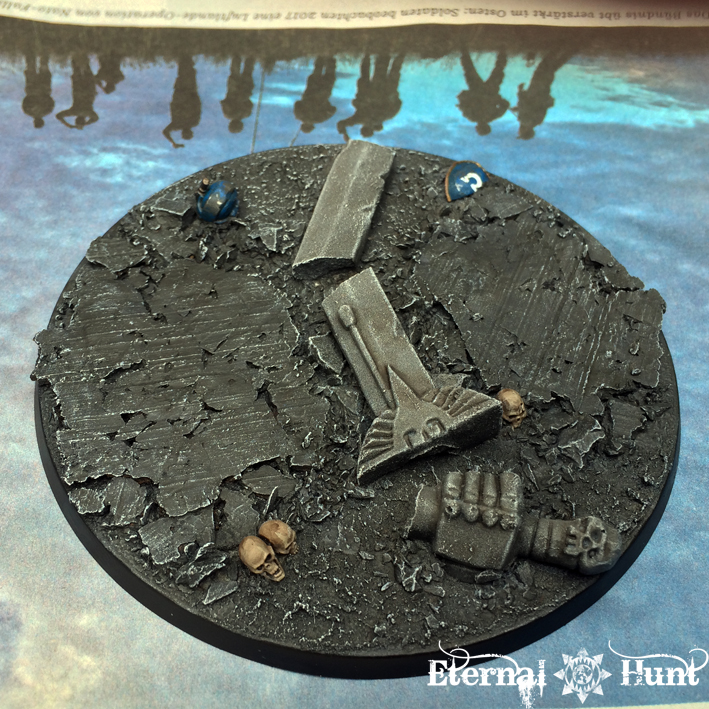
Only some cleanup and the base design left, and then I hope I can finally do this guy justice. Wish me luck! 🙂


III. Step into my parlour…

So is that all? Welll, when I said that I had resisted the lure of Shadowspear so far, I may not have been entirely honest with you…

So there’s also this:


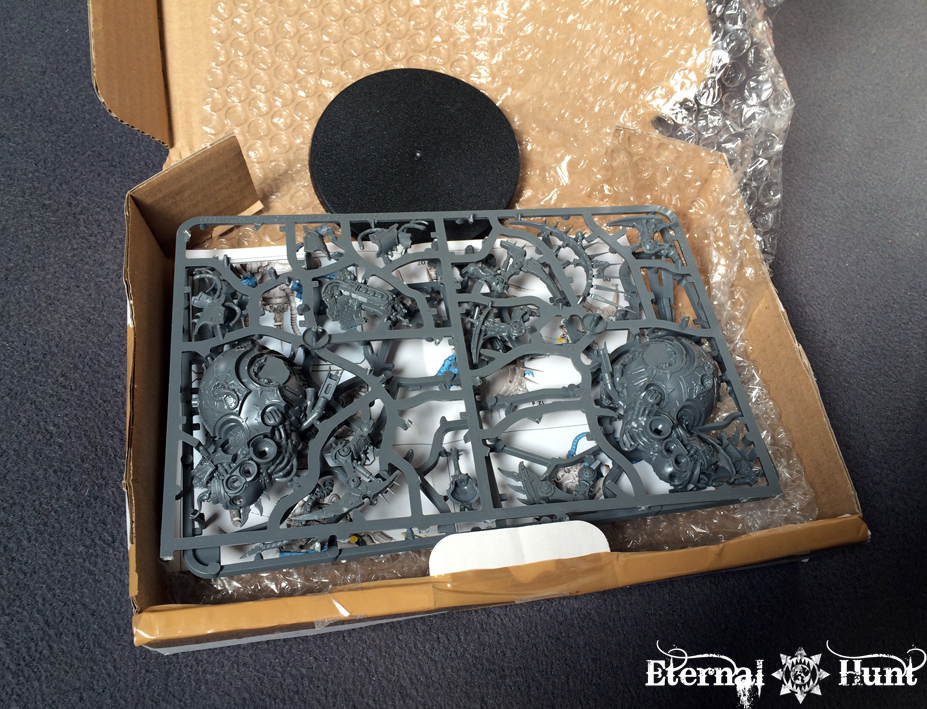
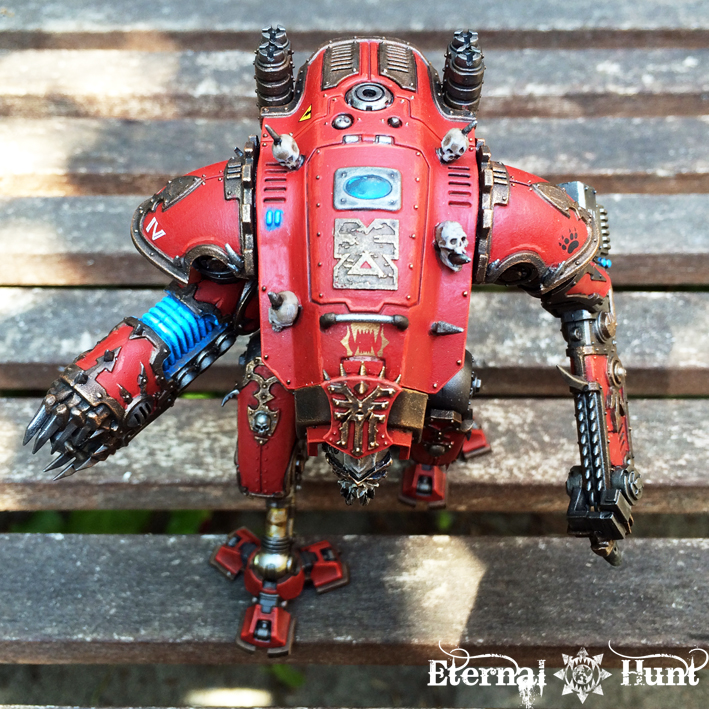
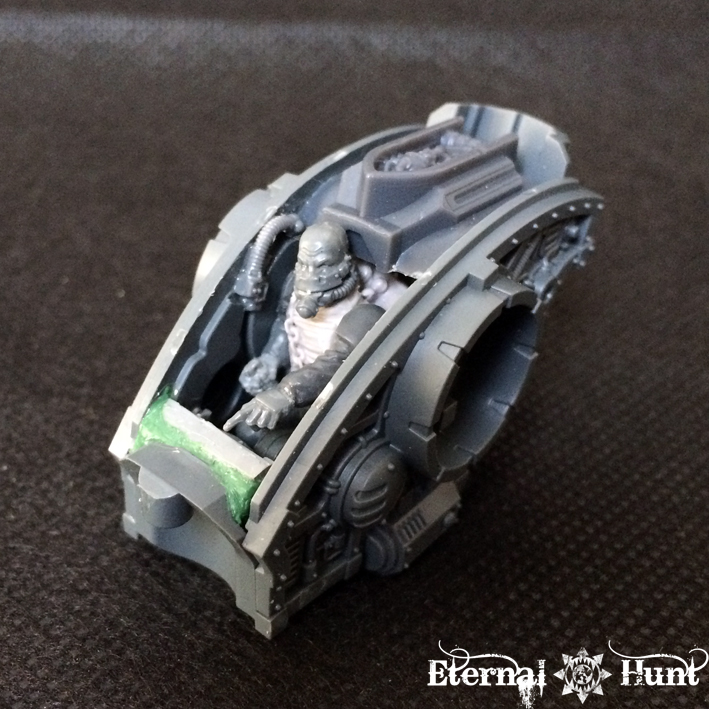
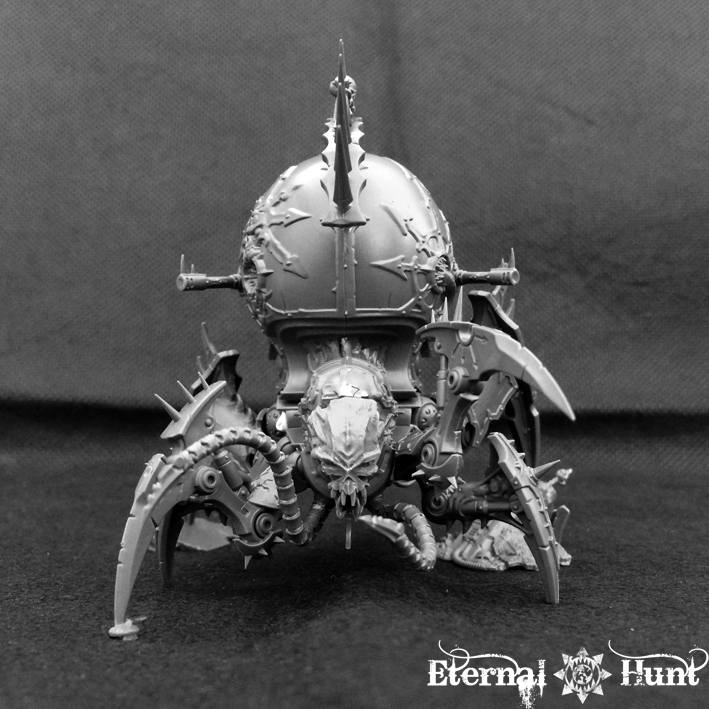
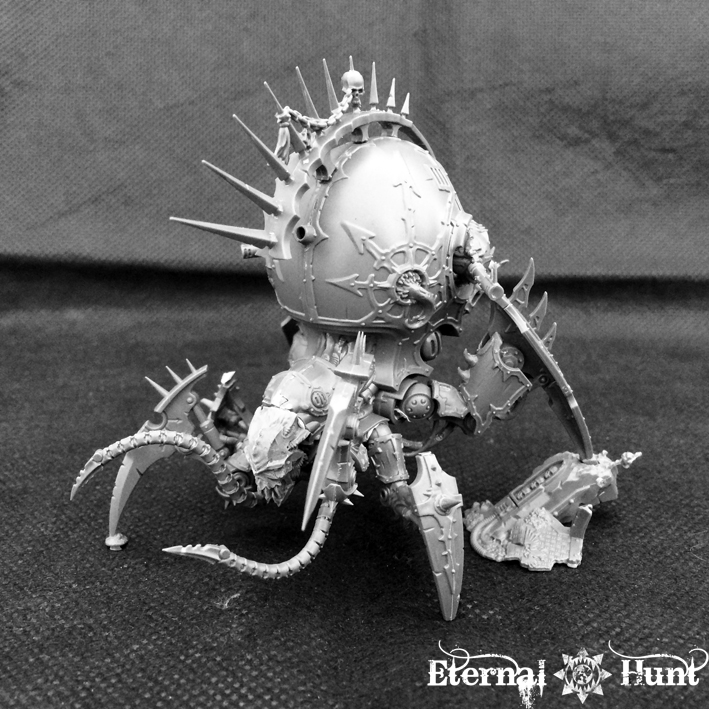
As some of you may have already realised, those are the sprues for the Chaos Venom Crawler, the daemon engine included with the Shadowspear boxed set:


I simply had to get my hands on one of those, as there is just so much about the model that I love: It’s a freaking monster spider from hell, for one. I also love how it has all those shared visual cues with various daemon engines: You’ll find little touches from the juggernauts, the Heldrake or the Forgefiend/Maulerfiend all over the creature’s jagged carapace. I love how lithe and deadly it looks (where some of those older daemon engines were a bit clunky). Anyway, I needed one to play around with a bit, so there.

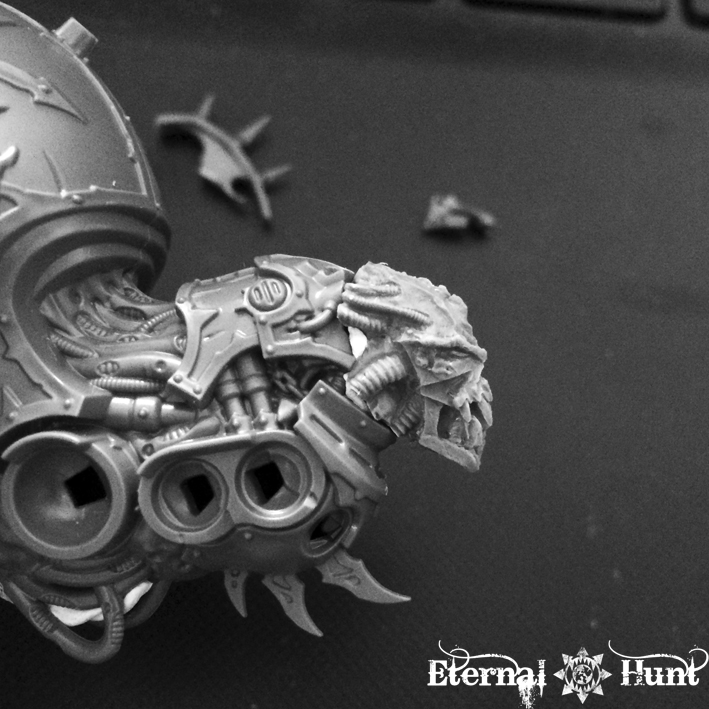
For all my love of the model, however, there was one area that I thoroughly disliked: The head. It was just a bit too weird for my taste (and not the good kind of weird, at that). And it definitely lacked that certain (Khornate) je-ne-sais-quoi. But I felt I had just the idea for that…


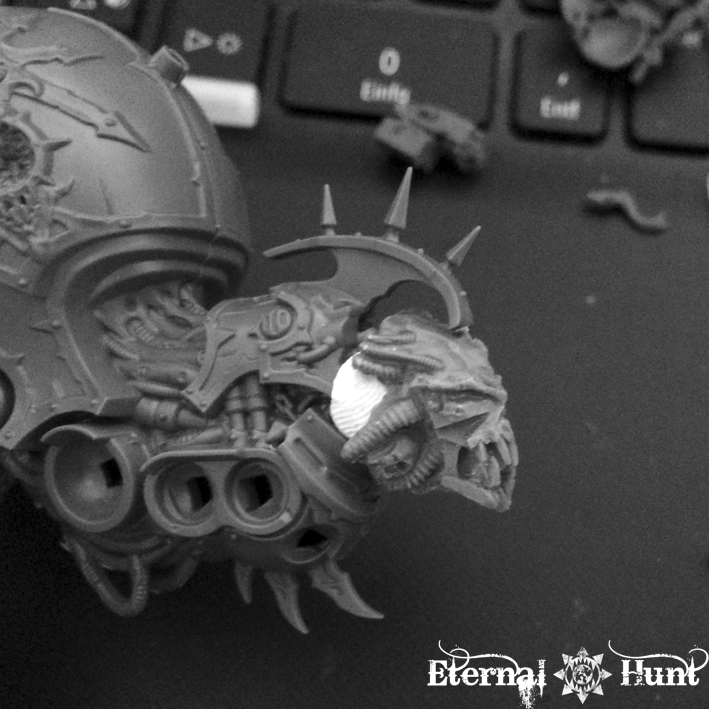
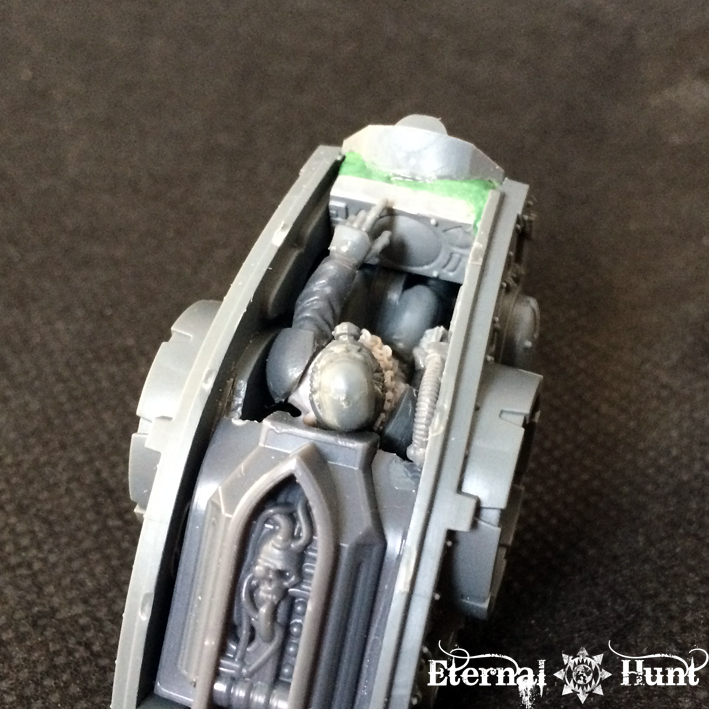
A head from the Blood-Slaughterer Impaler, carefully cut down to fit into the carapace. Of course with the first attempt, I was still trying to find my feet, getting the placement right while still keeping that spiked crest in place, just in case I didn’t want to commit to this solution.

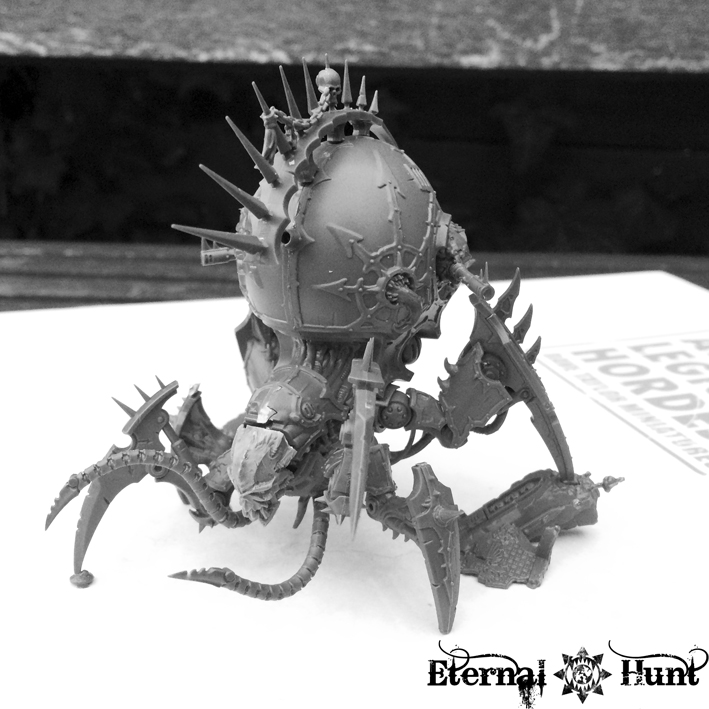
It quickly became clear to me that this was the way to go, however, and that getting the head to look right would mostly consist of shaving down the neck portion until it fit just so. So I did just that, and the reszlts ended up looking better and better:


In case anyone was wondering about the scale of the model, by the way: Here’s a comparison picture with the Venom Crawler next to a Myphitic Blighthauler:

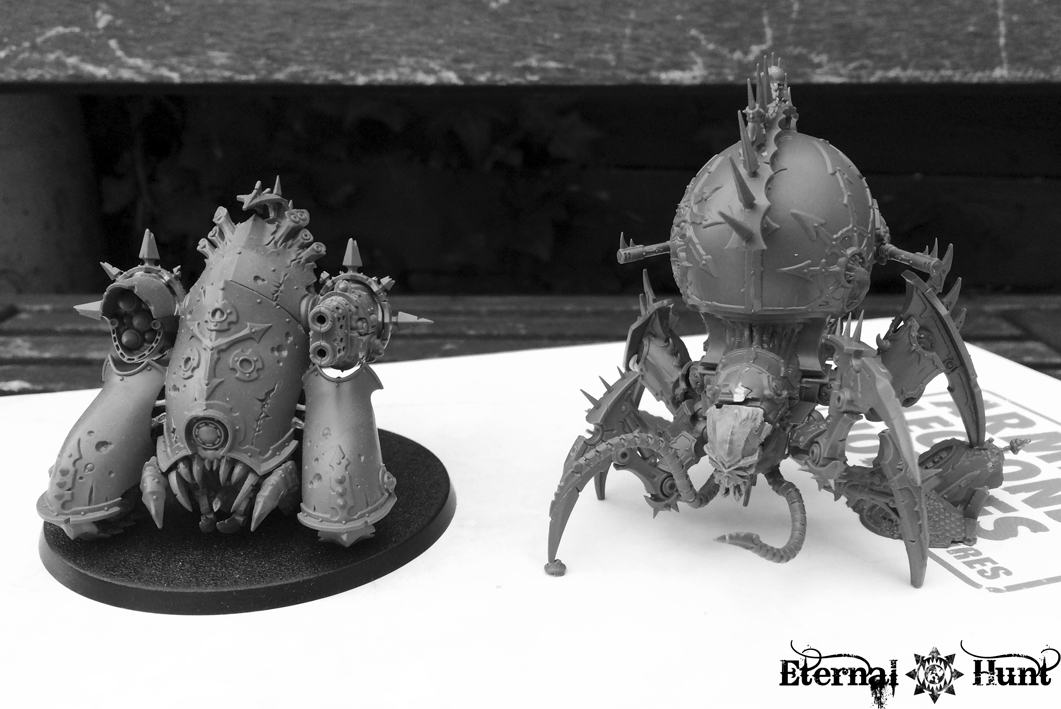
I can only commend whoever planned out the way this model should be assembled for an excellent job! It goes together like a dream, and the legs can be easily left off to have an easier time during the painting stage — excellent craftsmanship, this one! At the same time, the finished model looks far more delicate and complex than the relatively few parts would suggest. As for my replacement head, I kept shaving, millimetre by millimetre…

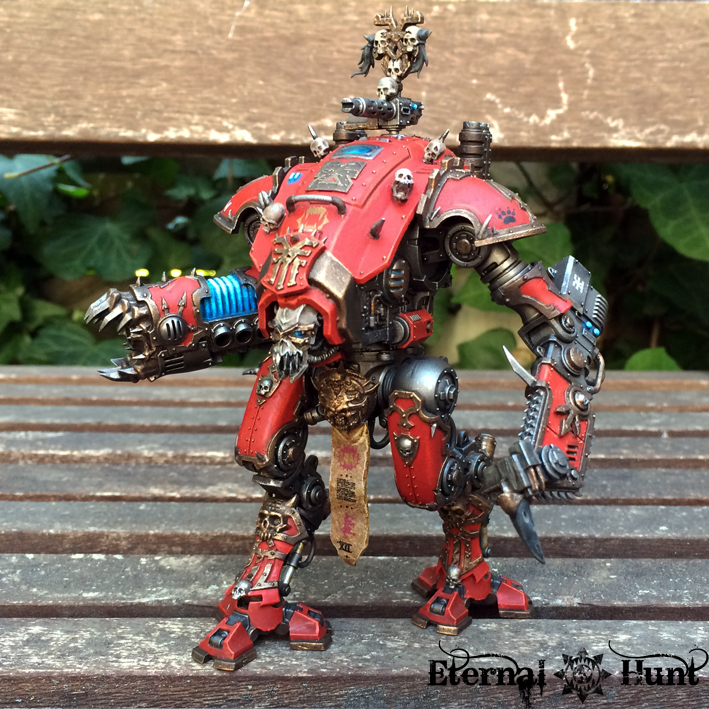
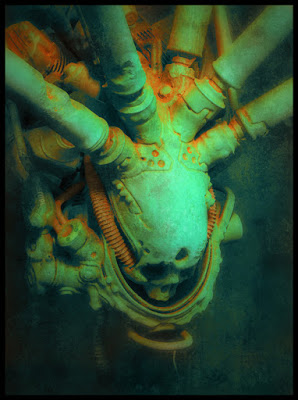
And after a few more sessions, I think I have the perfect setup:

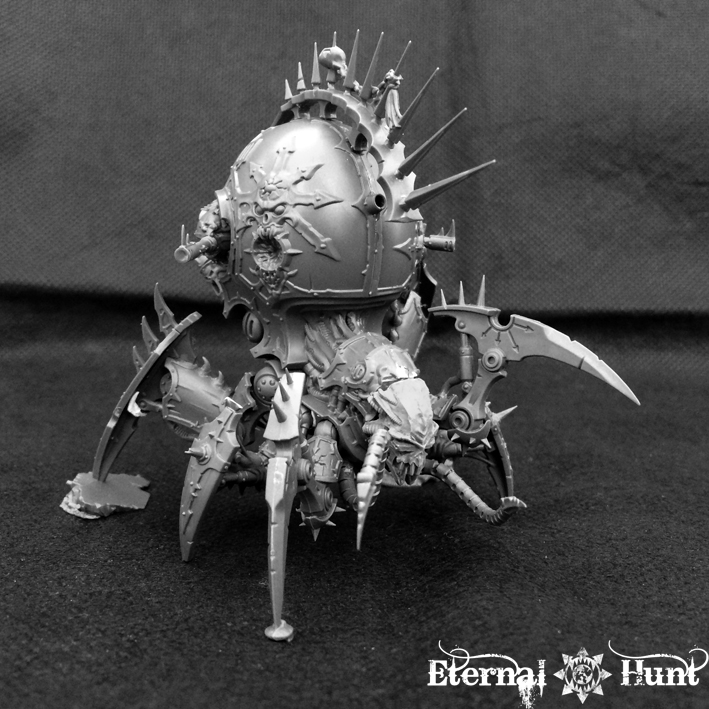
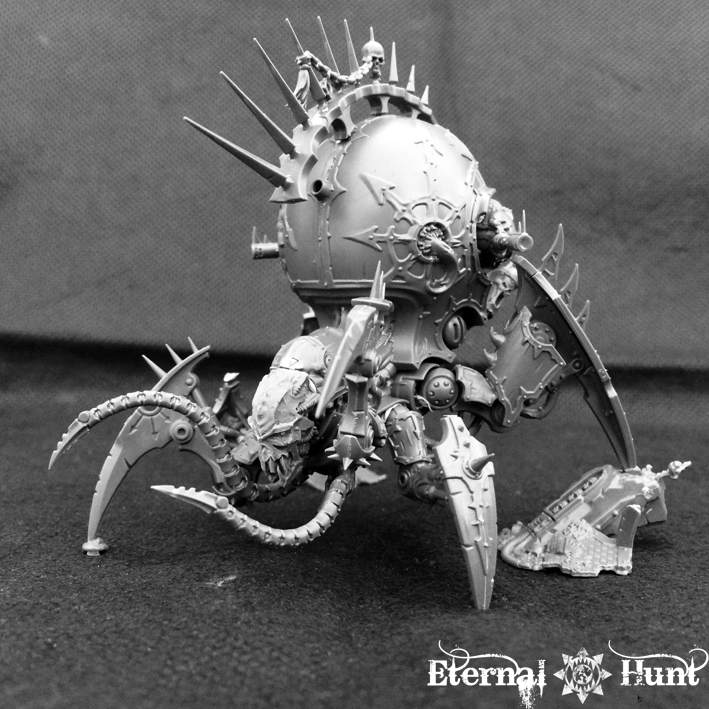
Of course the seam between both parts still needs a bit of cleanup, some additional cabling etc. — but I think the head works really well like that. In case anybody else is considering a headswap on this beast, let me just say that a Armiger head would be a perfect fit (and the cyclopean one makes for an excellent, sinister Dark Mechanicum look) — just sayin’ 😉


IV. A shout out in closing…

While you may actually have seen this elsewhere, just to be on the safe side: The first issue of 28 MAGAZINE, a free digital mag dealing with the wonderful world of INQ28 (and AoS28, for that matter) has been out for a while now, and you should definitely check it out and immediately download it here. It is the most extraordinary thing.

So that’s it for today’s update. If you have any thoughts about my small chaotic projects, I would of course be delighted to hear them! And, as always, thanks for looking and stay tuned for more! 🙂

State of the Hunt, Week 03/2019: Everything but the kitchen sink…

Posted in 40k, Chaos, Conversions, Inquisitor, Pointless ramblings, state of the hunt, Terrain, WIP, World Eaters with tags , , , , , , , , , , , , , , , , on January 15, 2019 by krautscientist

So here we are, with the old year firmly behind us. I have to admit that I am currently still at the stage, fairly early in the year, where I keep throwing around ideas and messing with different projects until something sticks and I find just the thing to re-start my proper creative process. So for now, I have decided to mess around with some neglected models, seeing how getting long neglected stuff painted was such a successful part of 2018. So let’s take a look at my laboratory:

I. Crash and burn

Here’s the first thing I am currently working on, a contribution for the monthly hobby challenge over at Azazel’s blog, Terrain is the name of the game this time around, which provided me with the perfect reason to tackle something I have wanted to do for ages: Finally getting some paint on the crashed aquila lander from the old Battle for Maccrage boxed set:

I’ve had those pieces for ages, courtesy of my cousin Andy, and as you can see, some of them have been subjected to a prior, mostly unsuccessful attempt at painting them — seriously, what was I thinking?

Now for the second attempt, I’ve made some small tweaks to the piece with the cockpit:

Something that has always bothered me about this otherwise cool terrain piece is its complete hollowness, so I knew I needed to add in a pilot as well as the suggestion of a cockpit, so I whipped something up with a couple of leftover bitz:


It’s not that easy to make sense of what the pilot looks like right now, but I took a lot of inspiration from the pilot morbäck built for his fantastic “Scarabée Intrépide” conversion a couple of years back — I didn’t sweat the details, though, knowing that only a part of the pilot would really be visible inside the finished cockpit. Oh, and while I was at it, I also glued in some bitz to suggest cockpit controls — I’ll show off the whole assembly once the model has been painted!

Anyway, the lander’s complete “hollowness” also leads to the rear of the piece ending in a massive hole. Of course I had to close that off as well, both to make it look less awkward overall and to camouflage the fact that there’s no fully realised interior, nor a full cockpit, as I merely built the parts that you can see from the outside. So I added in a hatch (from an old model truck kit) and tied it into the rest of the design with a few bitz:

While the whole ensemble looks pretty improvised when you look behind the curtain, so to speak,…

…the rear hatch has the added benefit of covering it all up, so when the terrain piece sits on a flat surface, you only really see the elements you are supposed to see.

Everything has already been undercoated, which ties it all together rather nicely:


Now to get it all painted in time for the challenge! I’ll be taking quite a few cues from Ian Wilson’s absolutely fantastic “re-assembled” Aquila lander here, among other sources. Wish me luck! 🙂


II. Big time!

And while I was already hard at work breathing some life into ancient projects, I came across another straggler from my cupboard of shame: A couple of years ago, I dug this out of a box of odds and ends over at my FLGS:


In case anyone’s wondering, this is half of one of the old 54mm Inquisitor models that GW released alongside the original game back in the late 90s. The character in question was Delphan Gruss, a Magos explorator of the Adeptus Mechanicus, basically the only AdMech model readily available back then, long before the AdMech became a playable 40k faction. Here’s the complete stock model:


As you can see, the parts I had were in a pretty sorry state (caked in the thick remains of a prior paintjob, and glued together with hell’s own superglue), and the model was also missing its legs. The problem with 54mm models is, obviously, that in order to replace missing parts, you either need a supply of 54mm bitz, or you need to get creative. In my case, I chose a solution in-between those two options, but the model still didn’t go anywhere for years. But after seeing PowerHungryMonkey’s recent Tech-Marine conversion, I somehow felt drawn back to the old model, and have managed to give him legs (and a pretty impressive gun to boot). Take a look:


Did anyone recognise those “new” legs? They actually came from the somewhat infamous vintage Nagash model, often seen as one of GW’s worst models of all time:


I have to admit, however, that I have a bit of a soft spot for the model: Nagash was actually the first big multipart metal model I ever bought from GW, and also the first model at that scale I have ever painted — and for a while there, I thought both the sculpt as well as my paintjob were absolutely rad! I blame my love for Masters of the Universe as a kid — those who grew up oving Skeletor as a villain had no choice but to like a character with a skull face.

And back when I got those Delphan Gruss bitz, I rediscovered the different parts of poor old Nagash in my bitzbox and thought the legs might work — as an added bonus, a conversion using Nagash as a base did indeed appear in the original rulebook…

Another fun fact: I’ve been keeping off this particular project for so long that I have actually managed to obtain a complete, boxed as new Delphan Gruss in the interim — all the more reason, however, to make sure this model looks suitably different from the stock model, eh?

I rather like the more subdued pose, to be honest. Oh, and the backpack is just the strangest amalgamation of bitz, to create something that looks suitably tech-y and AdMech, and at the right scale, no less: Underneath it all is actually a Space Marine plasma gun backpack (from the plasma gunner that came with Dark Vengeance), while the weapon system was simply made by combining half a Heldrake foot and one of the smaller gun arms from the Kataphron kit. And I added some suitable bits and bobs, such as an omnispex array from the Centurions, some cabling, stuff like that.

Even if thi should stay a one-off 54mm project, painting the Magos should still be a rather interesting experience — plus I am pretty sure I’ll get quite some mileage out of that modern AdMech decal sheet 😉

III. Daemonic desktop infestation imminent!

Waiiit, you didn’t think we’d bypass the ruinous powers, did you? No way! Because while I was wildly fluttering around in “crazy hobby butterfly mode”, something unwholesome from the warp has started to “manifest” on my desktop…


Still very early days, admittedly, but this should be interesting as well…


So as you can see, I am just trying different things before committing to the next bigger project. So keep watching this place to see those three projects – plus half a dozen others, I’d imagine – take shape. Or not. Anyway, I would love to hear your thoughts on these current “sketches”, so feel free to leave a comment!

And, as always, thanks for looking and stay tuned for more! 🙂

A Child for the Warrior King, pt.3: The Hound

Posted in 40k, Chaos, Conversions, WIP, World Eaters with tags , , , , , , , , , , , , , , , , , , , , , on July 30, 2018 by krautscientist

With the ETL VI deadline fast approaching, this last week was mostly given over to the task of completing my Renegade Armiger Warglaive, and I would very much like to share my progress on this project with you today! It wasn’t all smooth sailing, either, because Germany has been in the iron grip of a heat wave for quite a while now, with temperatures solidly in the mid-30s Celsius degrees for most of last week — certainly not unheard of in other parts of the world, but not something we are all that used to in my particular neck of the woods…

But I soldiered on regardless, so let’s take a look at what I have to show for my perseverance:

Here’s where we left off last time:

The biggest task at this point was to paint the bigger amour plates for the legs as well as the top carapace. In order to save myself some time, I decided to use GW’s Mephiston Red spray as an undercoat for the armour plates. But while it did end up laying down a nice, even coat of red, the red was also fairly flat and chalky — so I did end up re-painting all the red areas anyway…

In the end, it probably did save me some time, after all, but it was certainly not a game changer on par with, say, the Leadbelcher spray.

Anyway, I tackled the armour plates one after another, picking out the various details and blocking in the different colours. The biggest piece of work was the top carapace, of course, so that’s where I started. Here it is, with most of the detail already blocked in:

As you can see, I also added some decals during this stage: These days, I never save the decals until everything else has been painted, because that will invariable make them look tacked on, almost like an afterthought. By applying them sooner, they can be weathered and damaged along with the rest of the model, as needed, in order to actually make them look more realistic. Now in this case, this only really involved a subtle pass of sepia wash to make them look just a bit more natural, but it’s a habit I have picked up. Besides, none of them were in the way of the eventual highlighting, so that helped, too 😉


Some of the decals were actually chosen to tie the model into the lore of my World Eaters army: The paw print hints at Gilgamesh’s honorary membership in the Legio Audax, the “Ember Wolves” (while the Titan Legio is an actual part of the background, as of “Betrayer”, I did make up Gilgamesh’s membership in it as part of my own head canon).

Meanwhile, the numerals on the right pauldron stand for the XII Legion’s IVth company — mirroring a similar marking on Gilgamesh’s right shoulder guard:


So here’s what the carapace looked like at this stage:


And here it is, a short while later, with all of the missing detail painted and a pretty serious (at least for my standard) amount of highlighting in place:

The rest of the armour plates were given the same treatment, and while none of this is any award winning stuff, the subtly higlighted red ended up looking quite a bit deeper than the armour on Gilgamesh, while still fitting the overall look: While the Armiger should still look like it belongs, it also shows off how I have grown as a painter over the last couple of years, and I like that, to be honest 😉

So anyway, here’s the Armiger in its almost finished state:

At this point, I made a To Do list for myself listing all the small cleanup work and small tweaks I still needed to do before the model would be finished. I also made an eleventh hour decision to diverge from the original conversion, as the original plan had been to add some marauder shields on top of the Armiger’s pauldrons, for an even more baroque, chaotic look. Like so:

But when I added them to the pauldrons, I just couldn’t shake the feeling that the model actually worked better without them, so after hemming and hawing and asking for feedback over at the forums, I eventually decided to leave them off — something about them just didn’t quite click with me, while the model did seem complete enough without them.

So at this point it was mainly a matter of checking all of the boxes on my To Do list, one after another.

One area of notice was the detailing of the cockpit and reactor section, and I am pretty happy with how that area came out. Take a look:


For the cockpit displays, I chose an approach I had seen on a Knight by fellow hobbyist Noigrim — I really liked the idea of approaching enemies being visible as red dots on the radar 😉

And here’s a closer look at the reactor section:

This is how the whole assembly looks when seen from the side, by the way:

From a conversion perspective, this is probably the most involved customisation on the entire model, but I do think it has been worth it.

The other big thing to take care of was the base. Here’s the completed build I came up with:


Gilgamesh’s base uses several pieces of broken imperial statuary (courtesy of GW’s “Honoured Imperium” terrain kit), and I thought it would be cool to match that look, albeit on a slightly smaller scale. So the base was built around a shattered statue’s broken sword (once again, a very apt metaphor for the failing Imperium of Man, and all that), and I used different kinds of slate, sand and cork to build up a suitable amount of rubble and texture around it all. The main floor texture was, once again, created using Vallejo’s Sandy Paste.

I also did a preliminary dry fitting to find out wether the model would fit neatly onto the base:

And after that, it was off to the painting desk for one last time. Here’s the finished base, completed a short while later:

As you can see, some skulls and broken Ultramarines armour pieces were also added to the base, if only to tie the model into the 28mm scale a bit better (and make for smaller areas of visual interest).

And with that, my Renegade Armiger was finished. So let’s take a look at the model, shall we?


The Hound

Enkidu Lance
attached to the XII Legion’s 4th assault company


And a couple of detail shots, of course:

First up, the Armiger with its carapace removed and a closer look at the pilot:

The plan was to make the pilot look similar to Gilgamesh’s pilot, the Baron Harrowthorne:

At the same time, I wanted it to be fairly obvious that the Hound is below the Baron in rank, so his uniform is just a bit plainer. I think the finished look works pretty well:

The top carapace will – obviously – stay removable, if only because it allows me to show off the custom cockpit and pilot every once in a while 😉 In fact, the entire model retains a certain amount of modularity:


This should provide a nice extra bit of flexibility once the second Armiger (codenamed “The Huntress”) has been completed! Incidentally, the harpoon arm I shared with you in my previous post will actually serve as the Huntress’ stock armament…

Here’s a side view that gives you a better idea of the detail work on the undercarriage:

The amount of detail on the Armiger’s skeleton owes a lot to the “JeffTibbetts school of Knight painting”, as it were 😉

Another area of the model I want to showcase is the banner between the Armiger’s legs:


While loyalist Armigers appear a lot less draped in personal heraldry than their Imperial Knight masters, I wanted to invoke the impression that Armiger pilots may serve their lords for far longer in the Great Eye, so it seemed appropriate to include a banner showing the pilot’s battle honours: It shows both the World Eaters’ legion badge as well as the War Hounds’ old symbol — probably a shout out to the Hound’s epithet.

At the same time, I also wanted to make the banner look more rugged than the banner on the bigger Knight, so I painted it as some kind of roughly tanned hide. I used the approach outlined in Brandon’s tutorial here, with a couple of minor tweaks, and am pretty happy with the finished effect.

Oh, and I also finally managed to take a picture of the face that shows of the Armiger’s glowing eye:

The missing optical sensor on the right side was originally a consequence of a slight miscast of the face, but I think it gives the model an even more sinister and chaotic look, so it actually works in its favour, wouldn’t you agree? 😉

Oh, and here’s a picture of the Armiger and my Renegade Knight Titan, Gilgamesh, “The Warrior King” — “Father and Son”, so to speak:

In fact, I discovered that my older Wargrinder conversion could actually work as an Armiger fairly well, at least from a scale perspective:

And with that, I have managed to finish both my entry for this year’s ETL event as well as my contribution to Azazel’s “Jewel of July” challenge. Pretty nifty, eh? 😉 To be honest, I am immensely pleased with the finished model — I actually put this off as long as I could, and I really had to force myself to start painting, but I couldn’t be any happier with the result. That being said, this has been a pretty involved project, so I think I’ll allow myself a bit of rest and mostly focus on small fry for a bit 😉

But anyway, so far for my first Renegade Armiger Warglaive. It goes without saying that I would love to hear your feedback on the model, so leave me a comment! And, as always, thanks for looking and stay tuned for more!

A Child for the Warrior King, pt.2

Posted in 40k, Chaos, Conversions, WIP, World Eaters with tags , , , , , , , , , , , , , , , , , , , on July 24, 2018 by krautscientist

It has been a couple of months since the Forgebane boxed set provided us not only with a very cool – and entirely Space Marine-free – 40k starter set, but also with the Armiger Warglaive, a very interesting smaller pattern of Imperial Knight:

In the interim, we have seen a full release of the Imperial Knights as a faction, with new smaller and bigger Knight models to boot. And some of you may still remember my conversion of a Renegade Armiger from a while back:

Of course I just had to build some chaotic Armigers to accompany my Chaos Knight Titan, Gilgameshthe Warrior King – and the guy you see above was my first proof of concept — and one that I am still very happy with, it must be said!

However, with my recent focus on painting INQ28 characters, the poor Armiger has remained unpainted all through the recent Imperial Knights release — high time, then, to return to the model and finally give it some much needed attention!


I. “Fire the Ursus Claws!”

First up, something I have wanted to share with you for quite a while now, but the chance never presented itself:

After building my first Armiger, I realised that I wanted to get a bit more creative with the CC weapon on the second model — and there was also something about the way Armigers are portrayed in the fluff as support to bigger Knights in the fluff, helping their masters to bring down their prey and soften up bigger opponents, that drew me back to the World Eaters’ background and the armament of their warmachines in the lore — and then fellow hobbyist Augustus b’Raass put words to the vague idea I had been thinking about all along:

OOOH OOOOH this gave me an idea: how about the World Eaters Harpoon thingy whatsitcalled -you know, that traditional thing. Dammit, the name eludes me, but you must know what I mean!

And Augustus was perfectly right, of course: I really needed to build an Armiger-sized Ursus Claw harpoon!

I had already used the idea on my second World Eaters Contemptor, Raud the Hunter, a while ago, albeit at a smaller scale:

So for the sake of visual consistency, one objective would be to make the weapon resemble the Ursus Claw on my Contemptor, so they would at least seem to be variations of the same weapons system.

Now when it came to actually building an Armiger-sized Ursus Claw, Talarion’s approach to building a lance weapon for an Armiger served as invaluable reference material. So between his version and my own-Dreadnought sized proof of concept, here’s what I came up with:

This was just the basic setup, mind you, with very little chaotic decoration in place, and the weapon also still lacked the drum-fed chain attached to the harpoon (the drum bit is already visible in the picture, though). That being said, it was also a pretty simple conversion, really, spliced together from the Armiger’s stock chainblade arm and a couple of additional bitz.

In case you want to reproduce the design – or build something similar – here’s a mini-tutorial for you:

Tutorial: Building a Knight Armiger harpoon arm:

First of all, here are the bitz you will need (keep the red parts for the conversion, while the grey parts go back into the bitzbox): 

  • I. the stock Armiger Warglaive chainweapon arm — just carefully get rid of the blade (and of that one small, greyed-out area towards the back!).
  • II. a lamp post, either from the 40k basing set for big models or from the old City of Death terrain. I used two parts from this piece, although the foot is by far the more important one, as it makes up most of the actual harpoon.
  • III. The spiked tip from another small terrain piece, that is – again – available both in the aforementioned basing kit or the City of Death terran kits.
  • IV. a small piece from the Adeptus Mechanicus Kataphron kit — I only really chose this for visual balance and because it makes the harpoon look as though it might actually be a bit more sophisticated (and able to carry an electrical current, for instance).
  • V. The shaft from the Blood Angels Librarian Dreadnoughts psi-weapon — although there are probably many bitz that would work just as well. You could even use a piece of plasticard to fill the same role.

All you have to do is to carefully line up these bitz and glue them together (of course you can always pin the entire thing, if you want to make sure it’s ultra-straight and stable): I’ve made you a diagram about what goes where:

As an aside, I actually love the fact how part IV. – coincidentally – mirrors a very similar part on the Knight Valiant’s Thundercoil Harpoon, even though my design predates the release of the new model by a couple of months 😉

I also chose to include a chain drum, made mainly from a leftover Imperial Knight weapon part (if I recall correctly). You can basically use any round, hollow shape for this, though — even any kind of (half-)barrel might do. I added a piece from a WFB plastic spear to the centre of the drum, then carefully wound some Gale Force Nine model chain around it and attached the end to the harpoon, in an attempt to actually suggest a mechanism.

Here’s a look at the finished arm, with a bit of chaotic decoration in place.

Two additional remarks about the conversion:

One, I do realise a more ornate, spiky tip would probably have made for a more Khornate look, but I kinda wanted to retain a certain sense of internal consistence across my collection. Well, that and I also like the idea that the weapon itself is so blunt and brutal that it’s mostly designed for efficiency, and less for show. If you decide to build your own harpoon/lance weapon, however, swapping in a tip of your liking should be the easiest thing in the world.

Two, elsewhere on the blogosphere, it has been pointed out how the chain mechanism could never work from a mechanical perspective. That is probably correct. I went with a setup that seemed at least a bit logical to me, while also looking visually balanced. But I definitely did not get into the actual engineering of a working mechanism, so feel free to make any necessary adjustments on your own version, especially if you have a better grip on mechanics than I have! 😉

If nothing else, I do think the finished arm looks pretty cool when mounted on an Armiger:


Here’s a closer look at the chain and mechanism:


Since my first converted Armiger will be going with the chainsword arm shown at the beginning of this post, the harpoon arm serves as a bit of a teaser for the second Armiger I am going to convert. That being said, I’ll definitely leave the arms interchangeable, so they can be swapped between models as needed.


II. Gearing Up!

The building optional Ursus Claws notwithstanding, there was still the matter of the unpainted Armiger to deal with — even moreso since I have vowed the model as an entry for this year’s ETL event over at The Bolter & Chainsword. So it was time to finally get this bad boy painted. Just to remind you, here’s what the conversion looked like:


Unlike the last time I had to undercoat a Knight, there were no spraying mishaps this time around, fortunately enough, so here’s what I started with:

Now the first painting session was mostly spent on the – rather thankless – task of darkening down the body with black wash:

In order to make things a bit more challenging – and rewarding – for myself, however, I did sneak in some painting on the Armiger’s head (which I finished in one go)…

And on the pilot, laying down the base colours and the first pass of washes:

Since then, the paintjob has mostly consisted of chipping away at the model one area at a time so far. Starting with the Armiger’s metallic base structure and leaving the armour plates for later seemed, once again, like the obvious way to go.

So here’s the Armiger’s “skeleton” with most of the base colours blocked in:

While this may not seem like riveting stuff, the extra depth provided by the bronze detail should make quite a bit of difference on the finished model, I hope. Plus this also allowed an early idea of how the bone faceplate would eventually contrast with the red armour:

I’ve learned from JeffTibbetts’ absolutely amazing “Queen Bee” project that it pays to take some extra time on a Knight’s metallic skeleton, adding areas of grime, scratches and all kinds of wear and tear for that extra bit of realism (or rather, plausibility) and texture — true, most of it will be covered up by the various armour plates later on, but being able to glimpse something that resembles an actual, working machine underneath it all makes the whole war machine, preposterous as it may be, more grounded in realism.

With this preamble out of the way, here’s a side view at the mostly finished “skeleton”, showing off some of the carefully applied dirt, grime and lubricant 😉

The same process was then repeated on the arms, finally making the model look as though it were actually going somewhere:

And the pilot has also been finished (after another round of highlights and the application of a decal to his shoulder pad):

So here’s the current status of the model:


As you can see, the arms are basically done at this point — including the plasma “special effect” on the right arm, obviously. This also means that, with the exception of a bit of cleanup and some minor finishing touches, the Armiger’s “skeleton” is now finished, and I’ll be focusing on the armour plates next.

In fact, here’s a sneak peak of the model with the undercoated top carapace provisionally mounted in place:

The ETL event ends on August 1st, so that leaves me with about a week to paint the rest of the armour, perform all the necessary cleanup and add the finishing touches, then maybe add a base — while I am definitely going to base the model with all bells and whistles, it is not something that’s required for finished models that are part of the ETL, so if I have to cut some corners, it’ll be there. All in all, in spite of my general laziness, it seems like a realistic task. However, my neck of the woods is also currently in the midst of a heat wave that renders painting more complicated than it needs to be — so wish me luck! 😉

Oh, and in addition to being my first (and probably only vow) for this year’s ETL, this guy also counts as an entry for Azazel’s “Jewel of July” challenge.

So keep your fingers crossed for me, as I brave the hot weather in an attempt to get this guy finished in time! It goes without saying that I would love to hear any feedback you may have! And, as always, thanks for looking and stay tuned for more!

A Child for the Warrior King, pt.1

Posted in 40k, Chaos, Conversions, WIP, World Eaters with tags , , , , , , , , , , , , , , , , , , , , , on May 7, 2018 by krautscientist

Most of my recent hobby time has been spent working on characters for my INQ28 collection — and rightly so, because I have been having a blast powering through all of those neglected models that have sat in the cupboard of shame for ages.

But the ruinous powers demand observance every once in a while, so to prove that my allegiance still lies firmly with the pantheon, let me show you something related to my other big ongoing hobby project – Khorne’s Eternal Hunt – again. So what is this about?

Long time readers of this blog might remember this guy: Gilgamesh, the Warrior King:

Building and painting an allied Renegade Knight for my World Eaters easily remains one of my most complex and involved hobby projects so far — and one that, incidentally, even got me mentioned on the GW page.

In fact, if you want to read up on Gilgamesh, a comprehensive collection of posts on the project can be found if you follow the link above this picture.

But why bring Gilgamesh up yet again? Don’t I have anything new to show you? The reason is that I immediately had to think of the Warrior King when the Forgebane boxed set was released fairly recently:

Arguably the star of the set are the two smaller knights – Armiger Warglaives – that come with it. They are intended as smaller men-at-arms to escort and protect the bigger Imperial Knights, and in that function, they make for a rather exciting addition to the severely limited options of an Imperial Knight player (Forgeworld variants notwithstanding). The models are also rather lovely, which made me feel that I would need at least one of those Armigers in my collection at some point…

But I decided to hold off on yet another boxed set purchase — until a recent visit to Berlin not only provided me with the opportunity to visit the massive temple of hobby goodness that is Battlefield Berlin, but also presented the chance of getting the AdMech half of the Forgebane set for a pretty good price — and I caved in, of course, taking all of those lovely sprues home and poring over them. The fact that the other AdMech models from the set are also rather lovely did, of course, help 😉

But back to the Armigers, because it was clear to me that I would have to turn them to the service of the ruinous powers: They would become servants of the Warrior King, accompanying him in battle, scouting ahead and softening up his enemies.

Meanwhile, with fellow hobbyists extraordinaire Biohazard and Jeff Tibbetts (of Queen Bee fame) already on the game as well, I knew I needed to give it my best shot to come up with something suitably cool 😉


So where to start? In a slightly weird parallel to my approach when originally building Gilgamesh, I actually focused on a slightly unexpected question that nevertheless fascinated me: How to add a pilot to the Armiger Warglaive interior?

Then again, I am in love with the thoughts of these machines actually being defined, to some degree, by the pilots that ride them to battle, and seeing how adding a pilot and a cockpit to the model remains one of my favourite parts of my Imperial Knight project, it probably shouldn’t surprise you to learn that I was feeling just the same way this time around.

That being said, the Armiger is a fair bit smaller than the Imperial Knight, making for an even bigger exercise in managing real estate inside that torso. The good news was that fellow hobbyist Biohazard had already come up with a supremely clean and elegant solution for building a cockpit for the Armiger, using Sentinel and Storm Talon cockpit bitz. The bad news was that I didn’t have access to any of the bitz he used, so I had to cobble something together with the bitz I had.

So here’s what I have to show for my efforts:


As I had already expected, lack of space was even more of a problem this time around. I managed to get it all weged in there somehow, but it was a close thing. From a structural perspective, the Armiger cockpit basically mirrors my build for the bigger Knight’s cockpit, albeit in a slightly stripped down fashion. Here’s a side view, showing you the basic setup, warts and all:

Admittedly, it all looks pretty messy, but once both side walls are in place, all the rough bits of the conversion actually get covered up rather nicely. And while I initially regretted not even building an actual seat underneath the pilot, it turned out the entire area’s not even visible anyway, after everything has been assembled — in fact, it’s such a tight fit that I even had to file the side of the pilot’s right arm flat in order for him to fit flushly into the cockpit.

As for the bitz I used, the part used to represent the engine was a bit of a surprise discovery: It’s a part from the vox relay that comes with the Sector Imperialis Objectives kit. All it needed was a bit of shaving down, and it fit like a charm, and even provided a bit of a headrest. The pilot was mainly assembled around a sentinel pilot body — the torso seemed too pedestrian for me, so I cut it off and replaced it with a Vraksian Renegade Militia torso that had the added benefit of looking a bit like a flight jacket, which seemed like an excellent fit for a pilot 😉 I used some Cadian arms and spliced together a head from a Skitarii Vanguard helmet and an Empire flagellant head (for that slightly unhinged look I thought matched a follower of chaos). My overall aim was to come up with a pilot that resembles Barron Harrowthorne, Gilgamesh’s pilot, to a certain degree, while also looking like his subordinate:

I think the finished pilot works rather well in that respect — I regretted not actually having built a seat underneath him at first, but it turned out you don’t really see anything except for the actual pilot once the whole cockpit is assembled:

In fact, I even had to file the side of the pilot’s right arm flat in order for him to fit into the cockpit 😉 Oh, before I forget, the controls for the Armiger are actually a shaved down console from a Space Marine Rhino interior panel:

So with the pilot out of the way, I only had the entire rest of the model left to build, right? 😉

I started by simply working on the Armiger’s basic assembly. It’s astonishing how much the Armiger works like a smaller Imperial Knight, from a structural perspective, with the whole assembly process eerily familiar, yet slightly simplified. So in addition to actually getting the model’s basic structure built, I was also able to start throwing bitz at the model to see what would stick:

I quickly discovered that some vambraces from the plastic Bloodthirster made for almost perfect leg armour, both because they were a perfect fit and because they provided some instant Khornification 😉 In fact, decorating the Armiger is quite a bit easier than working with the Imperial Knight, as far more Dreadnought (or even infantry) bitz are rendered viable for the conversion by the slightly smaller scale.

As a fun surprise, the head from the FW World Eaters Dreadnought Augustus b’Raass gave me last year (and that is rapidly turning into one of my favourite 40k bitz, see here and here) worked rather nicely here as well, although there were several alternatives I also wanted to look at (the simplest option seems to be to just use Defiler face masks on top of the stock Armiger head).

I also decided to add a “mini-banner” between the legs as an opportunity to include some personal heraldry and battle honours. Granted, Armigers are only men-at-arms, but I still think it’s a nice touch for a machine that has probably been serving the ruinours powers for a couple of centuries, at the very least.

During further experimentation, I actually found an even better head for my first renegade Armiger — the one from Forgeworld’s Blood-Slaughterer Impaler:


I think the head adds an istant “Khornate Daemon Engine” feel to the model, plus it’s also a really cool bit in its own right.

The next thing was to figure out what to do with the weapon arms. After giving it a bit of thought, I decided that I would choose a fairly conservative approach for the first round of weapon arms, then try some more adventurous options (like another Ursus Claw, maybe?!) for the second Armiger — just as Talarion has done with his truly stunning Armiger Warglaives.

That being said, I realised that the extosplasma cannons from the Forgefiend kit were a pretty good match for the thermic lance from a scale perspective, so I wanted to try and use one of those for the gun arm.

Here’s my first mockup for the weapon arms:

A chain weapon is a no-brainer for a Khornate Knight, so I decided to keep it. At the same time, I did want to make the weapon look quite a bit more vicious, so I added a spiky bit that also has the added benefit of making the sword look less stubby 😉 Since the chainblade completely lacks a cover, I had to come up with a solution that seems at least slightly plausible from a mechanical standpoint. And while the entire element was added purely based on its visual impact, fellow hobbyist TURBULENCE actually came up with a really cool explanation for its presence: Maybe the spike hammers down into an armored vehicle and keeps it in place as the chainblade keeps grinding into the hull?

For the gun arm, it turned out the Forgefiend plasma cannon was really easy to graft to the Armiger’s upper arm by simply cutting a matching hole into the upper side of the gun — it even retains the full mobility and poseability of a stock Armiger arm!

While the weapon is surprisingly close in proportion to the Armiger’s stock thermic lance, it is just a little bit clunkier — I do think the pose helps mitigate the added mass, though.

So with both the basic assembly as well as the weapons taken care of, all that was really left was the final round of cleanup and detailing. It was tempting to go overboard with decoration, but when all is said and done, this is just a man-at-arms for Gilgamesh and his pilot, the Baron Harrowthorne, so it was important to both make the machine look suitably chaotic, but to also know when to stop adding detail before the model ended up looking more ostentatious than the bigger Knight. Keeping that in mind, here’s the finished look I settled on, some minor cleanup work notwithstanding:


It’s not that easy to make out in the pictures, but I’ve added teeth to all the armour plates, mirroring a design element you see often on the more recent chaos plastic kits. I also tried to replicate the battle damage you see on the Bloodthirster vambraces on the upper leg armour, to tie both elements together.

Oh, and while I was at it, I changed the one element that I really don’t like about the stock Armiger: Those weird twin coils/stabilisers/whatever on the back of the legs. I think it works much better like this:


What’s really great about the kit is that, as has been the case with the bigger Imperial Knight, it’s possible to keep the top carapace plate detachable, so we can still get a good look at the pilot and cockpit:

In fact, such a setup is actually preferrable, because it also allows access to the arms. So whatever crazy weapons options I come up with for the second Armiger could theoretically also be swapped in on the first model — I really like added flexibility like that!

So that’s it — my first Renegade Armiger Warglaive. To be honest, it took me quite some time to find the right approach for the model, and I am all the happier for it with the finished conversion! This model was originally planned as yet another entry for Azazel’s Assembly April challenge, but then I ran a bit too late to make it, and I am actually glad to have taken some extra time to get it just right — maybe I’m at least in time for this year’s ETL event over at The Bolter & Chainsword…?!

Until then, however, I would love to hear your thoughts on the model! And, as always, thanks for looking and stay tuned for more!