Archive for scatter terrain

#HeroQuest2019: Finishing touches

Posted in heroquest, old stuff, paintjob, Terrain with tags , , , , , , , , , , , on April 29, 2019 by krautscientist

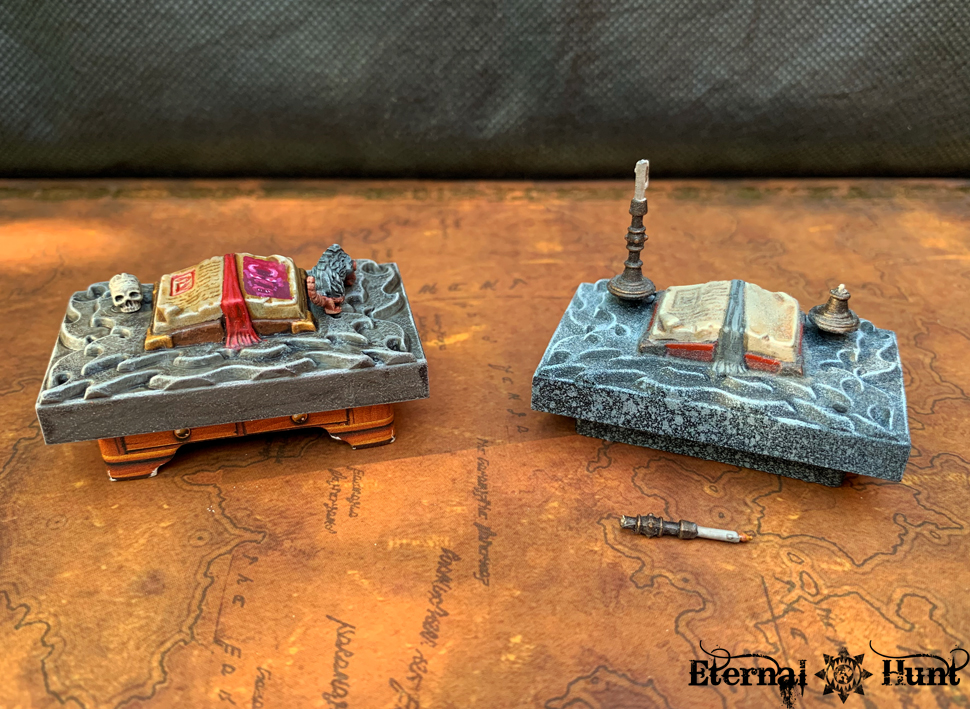
With the Sorcerer’s Table and Alchemist’s Bench now officially done and dusted, I was left with two final pieces of HeroQuest furniture from this original set of four models left to paint:

It goes without saying that I remained committed to making each of these pieces as cool as I could — after all, the furniture is one of the things that makes the original HeroQuest boxed set such a classic!

I started with the weapon rack. Now this piece was interesting in that it’s really easy to make it look really dull — after all, the weapons stacked on the rack should be mostly silver, right? And you could even paint the rack itself silver as well and be home in time for dinner…

This was obviously the biggest possible pitfall to avoid here, so I chose to use a few spot colours to make a nice contrast with all of those silver blades. I also decided to paint the rack itself as wood, seeing how the sculpt itself suggested a bit of a wooden texture to the entire thing. I would be remiss not to mention how RemyT’s paintjob once again served as a major point of reference, although I chose to swap around a few colours.

Anyway, here’s the weapon rack with the first couple of base colours blocked in (and most of the wood already finished):

And a bit later, with all of the base colours in place:

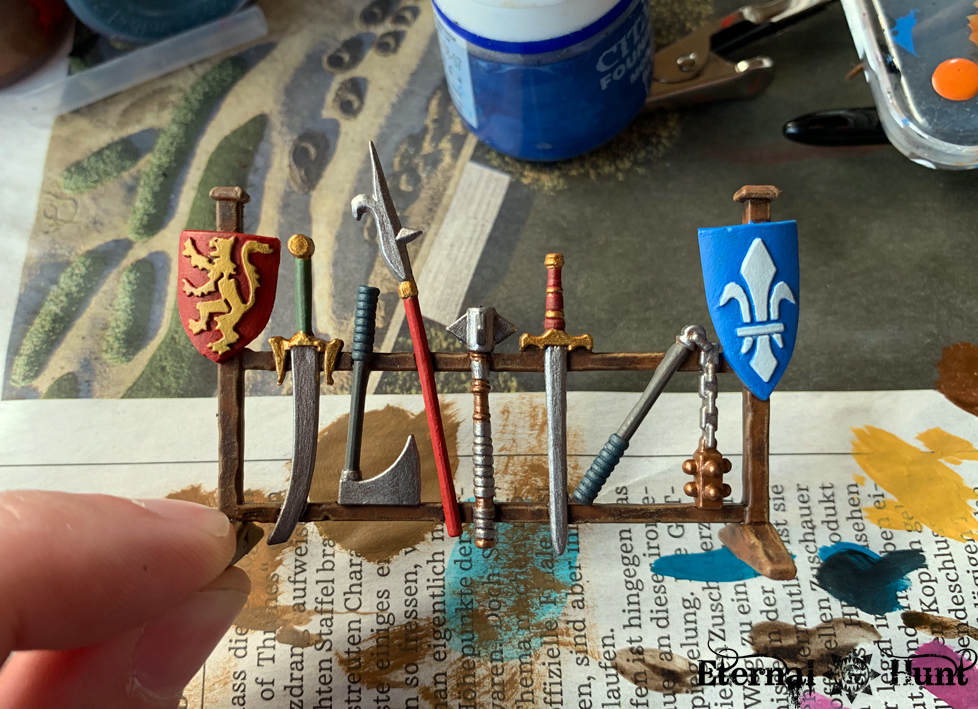
This already gave me a good idea of the colour balance, so all that remained were some finishing touches. Unsurprisingly, the whole thing really came to life after the washed had been applied, especially when it came to making the metallic parts look more like metal and less like painted plastic:


From here on out, it was all a question of adding a few finishing touches and higlights, and I took my sweet time with this step.

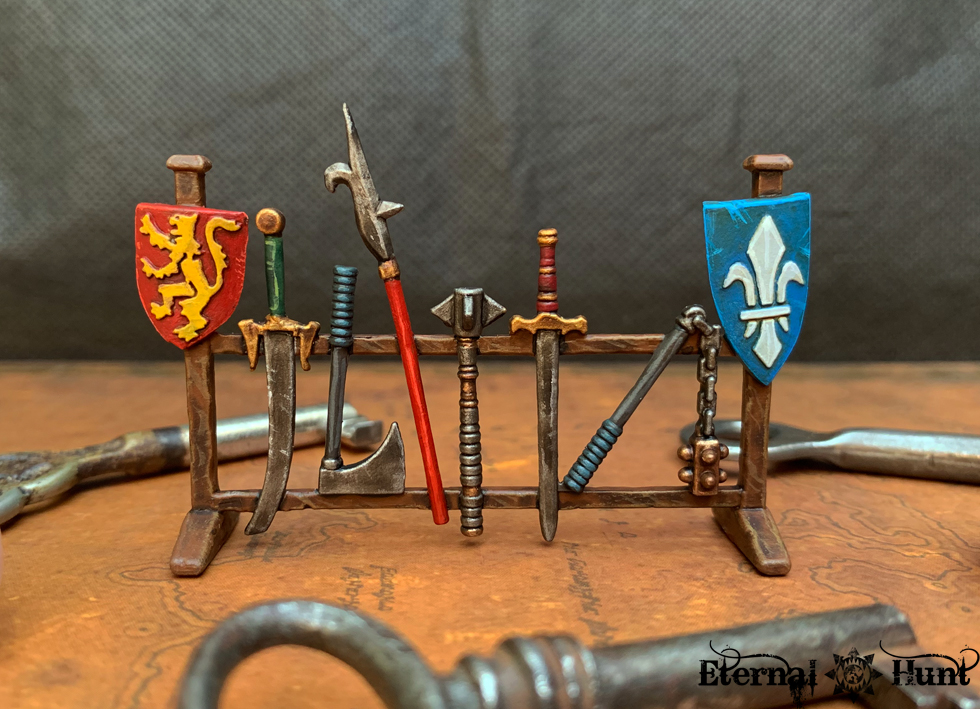
The obvious problem with the weapon rack, as was pointed out to me by fellow hobbyist Anderas, is that it’s completely out of whack with the rest of the HeroQuest set when it comes to scale: Those weapons are really far too big to be wielded by any model appearing in the game, except maybe for the Gargoyle 😉 But I still cannot stop myself from liking the weapon rack immensely: It’s an interesting and fairly unique addition to HeroQuest’s set of furniture, and it was also fairly enjoyable to paint because it provided the perfect excuse to work with different colours in order to make all those weapons look suitably interesting and exotic.

Anyway, without further ado, here’s the finished weapon rack:


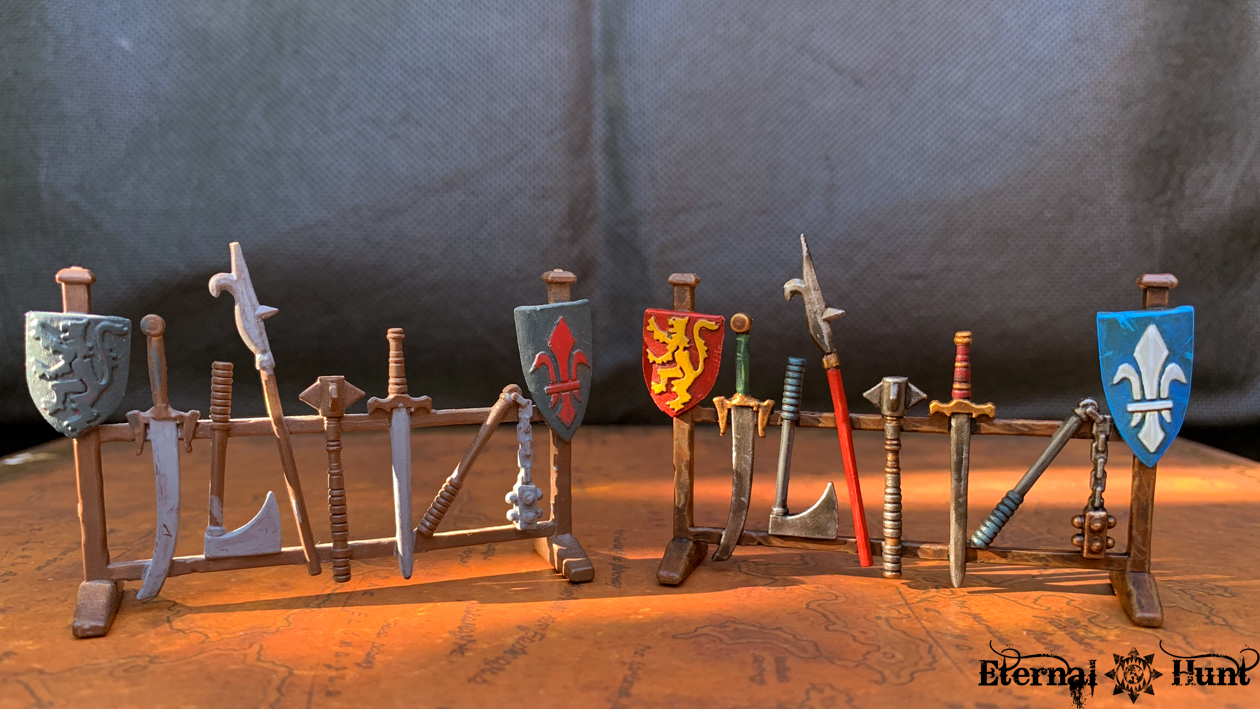
And, as an extra little bit of fun, here’s a comparison with my newly painted weapon rack and an older piece still sporting the earlier paintjob from elementary school days:

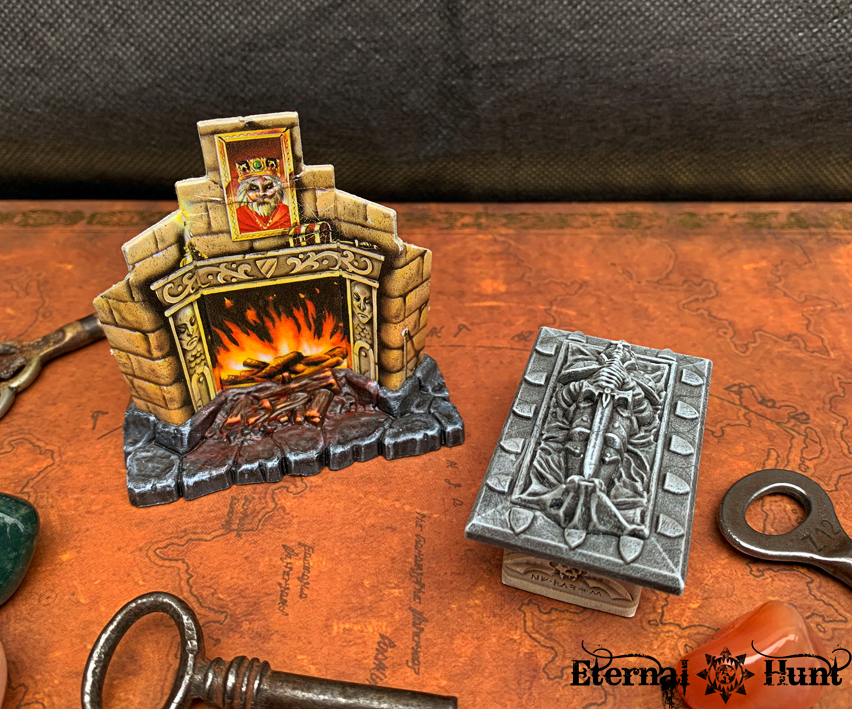
So, just one piece to go, and this last one represented a bit of a challenge: the Torture Rack:

So what was the challenge I mentioned? Well, as you can see, the stock torture rack has these weird handles that come as separate pieces. Those were missing on my version, long lost to some unremembered calamity (or, more likely, my general tendency for messiness). So I needed to think of a replacement while, at the same time, I really didn’t like the stock version: Those handles have always seemed so weird to me. So why not kill two birds with one stone (or rather, one torture rack) and work on a replacement that would seem more believable (and mechanically sound).

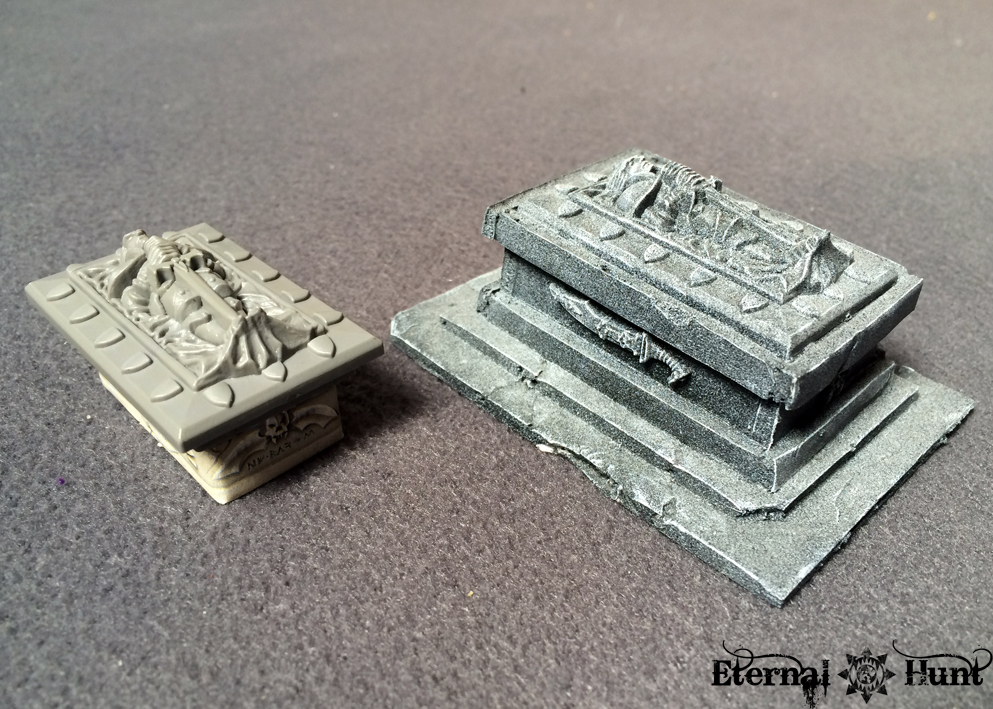
After a bit of scrounging around, I came up with this solution, thanks to some some leftover bits and bobs from my bitzbox:

Those handwheels somehow seemed far more believable to me, and they were really easy to make, too: The actual wheel can be any round slice of plastic, while the handles were made from cut-down spikes from one of those spike racks from the CSM vehicle sprue that any chaos player is sure to have dozens of 😉

The parts where the stock handles normally attach was carefully cut off before the handwheels were glued on, then reattached to work as a kind of spoke for the whole assembly.

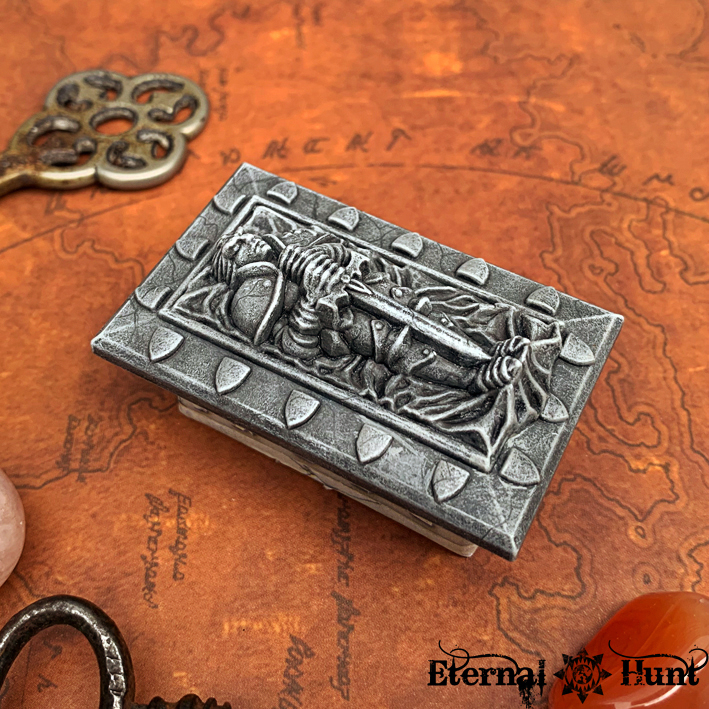
I was pretty happy with this solution, and everything came together rather nicely when I undercoated the piece:

The paintjob itself was a fairly straightforward affair, because it was mostly about creating a suitably weathered wood effect on the rough planks of the torture rack, with some metallic accents here and there:

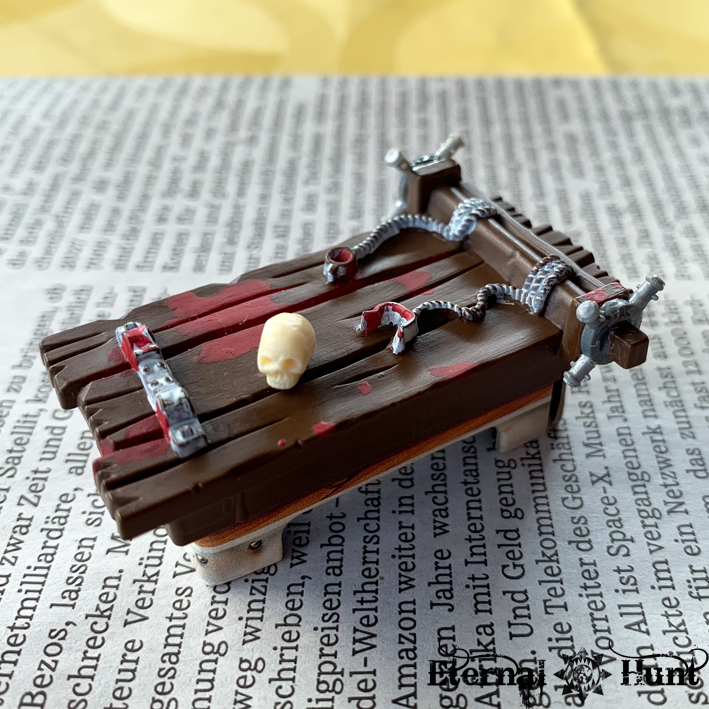
Of course the obvious fun came when the rack had been painted and it was time to crack open the Tamiya Clear Red for some added blood spatter. Take a look at the finished torture rack:


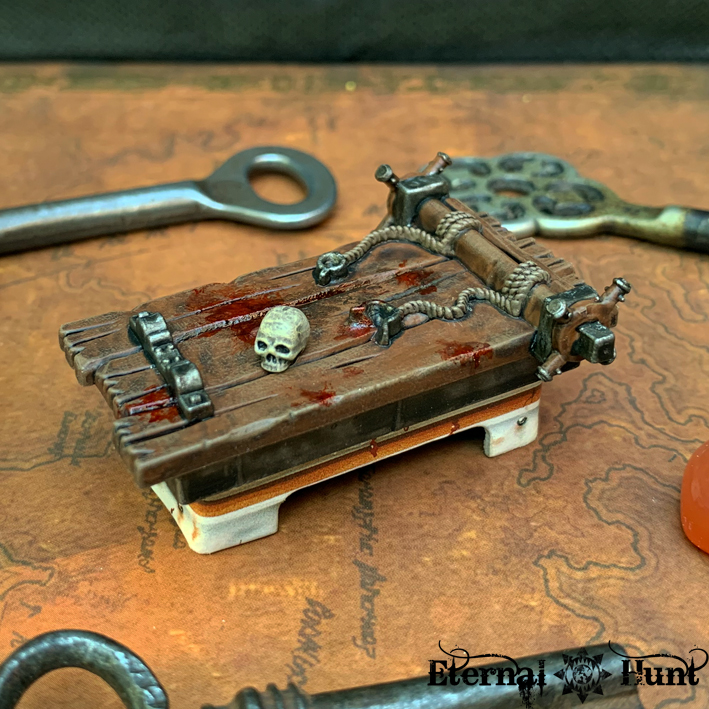
As a tribute to the older “paintjob”, I decided to place the bloodstains in almost exactly the same locations as before, only with a slightly more realistic look.

Before going for the bright, glossy look, I created a deeper layer of stains that look more faded and matte, mostly to hint at the fact that this torture rack has probably been in use for quite some time — brrrr…. 😦


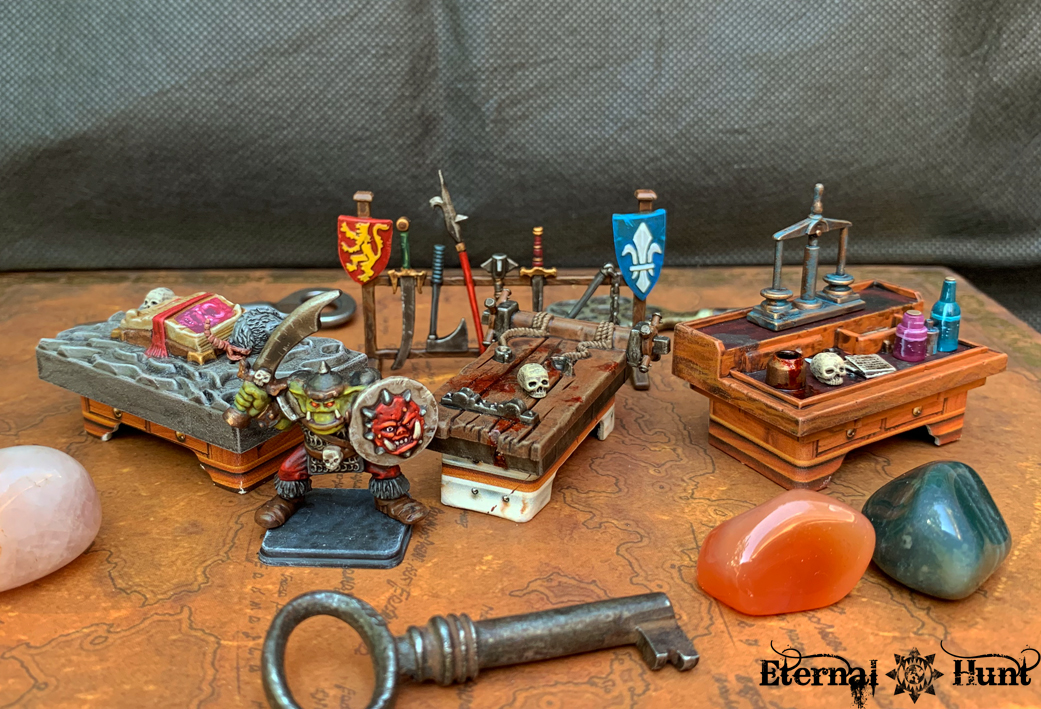
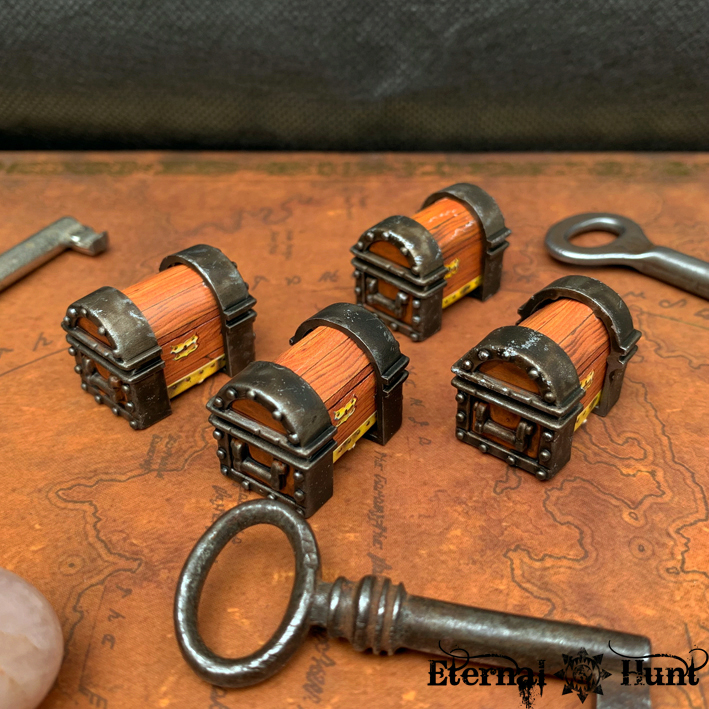
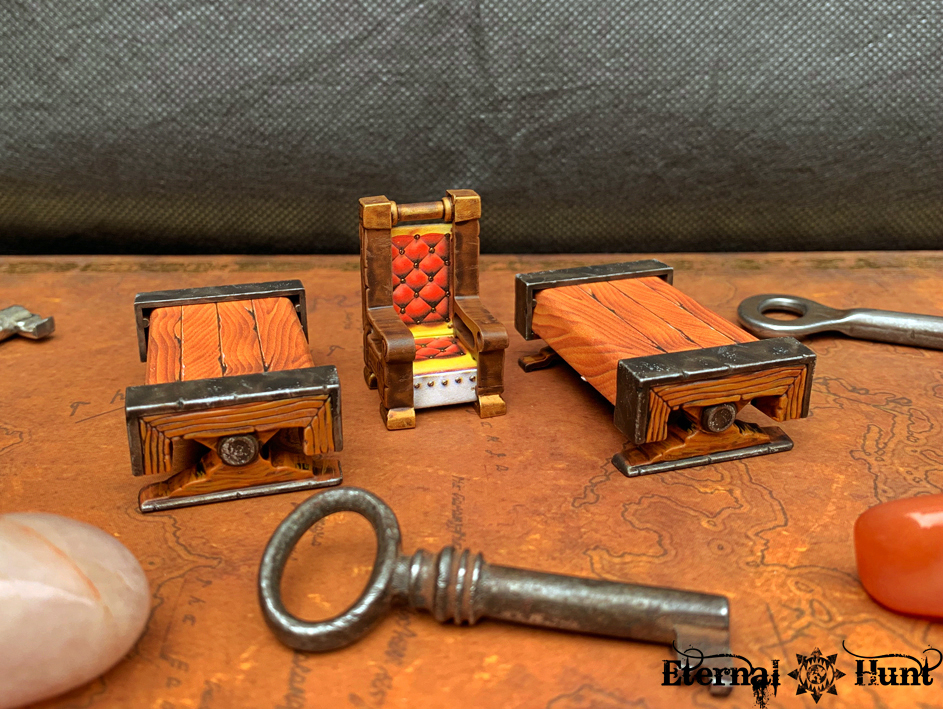
And with that, the four missing pieces of furniture were finished. And I am honestly pretty chuffed with each and every one of them, to be honest:


All of this also makes for a pretty productive Easter holiday, if I do say so myself:

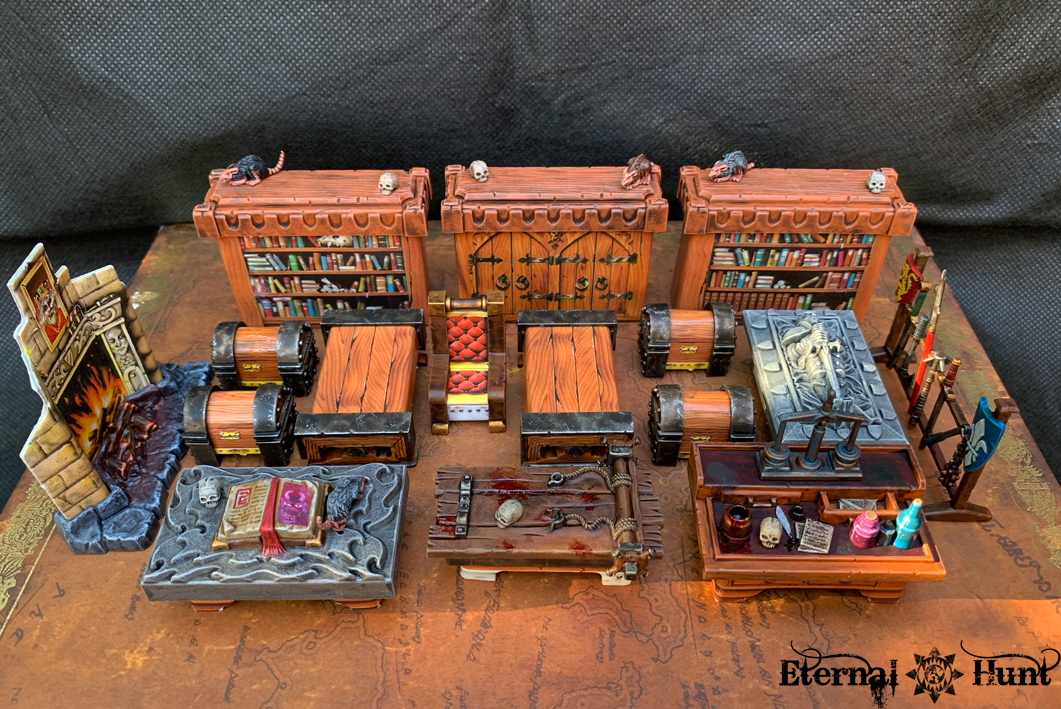
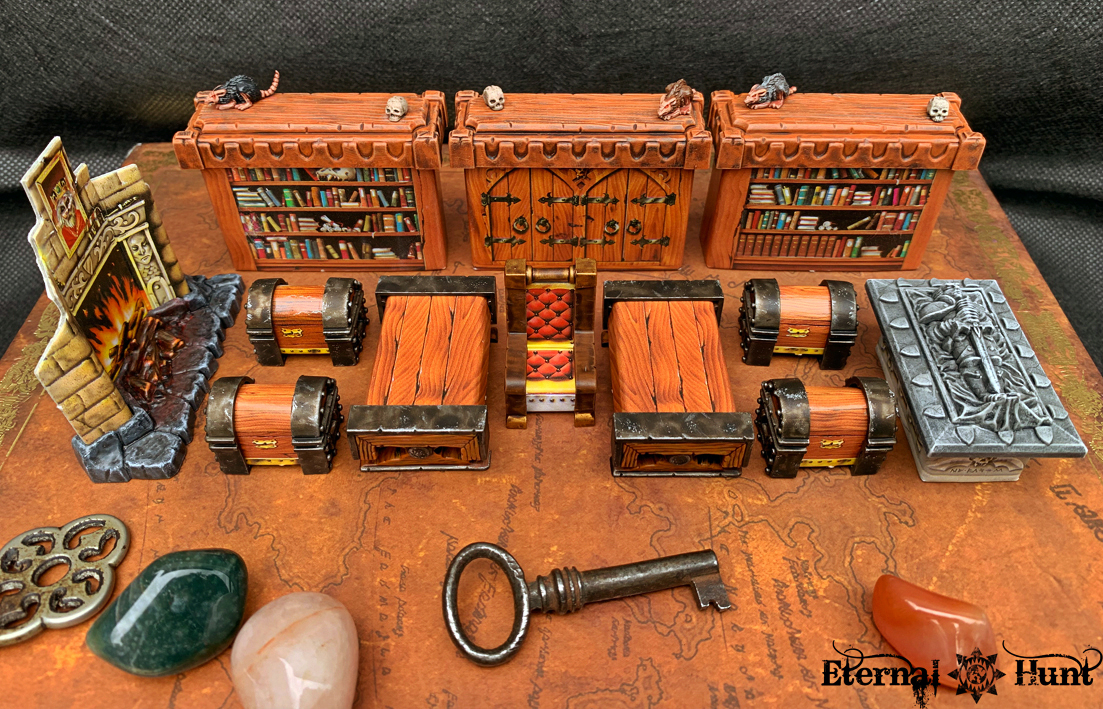
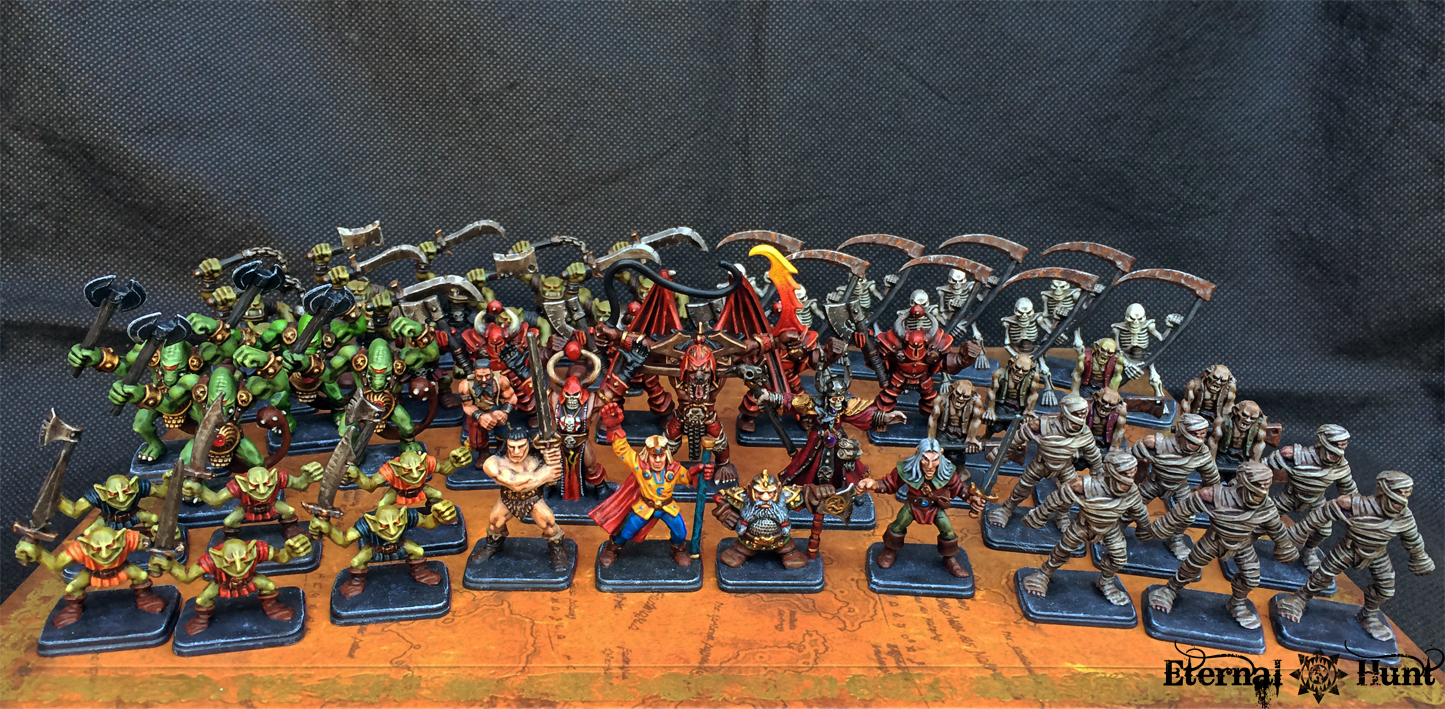
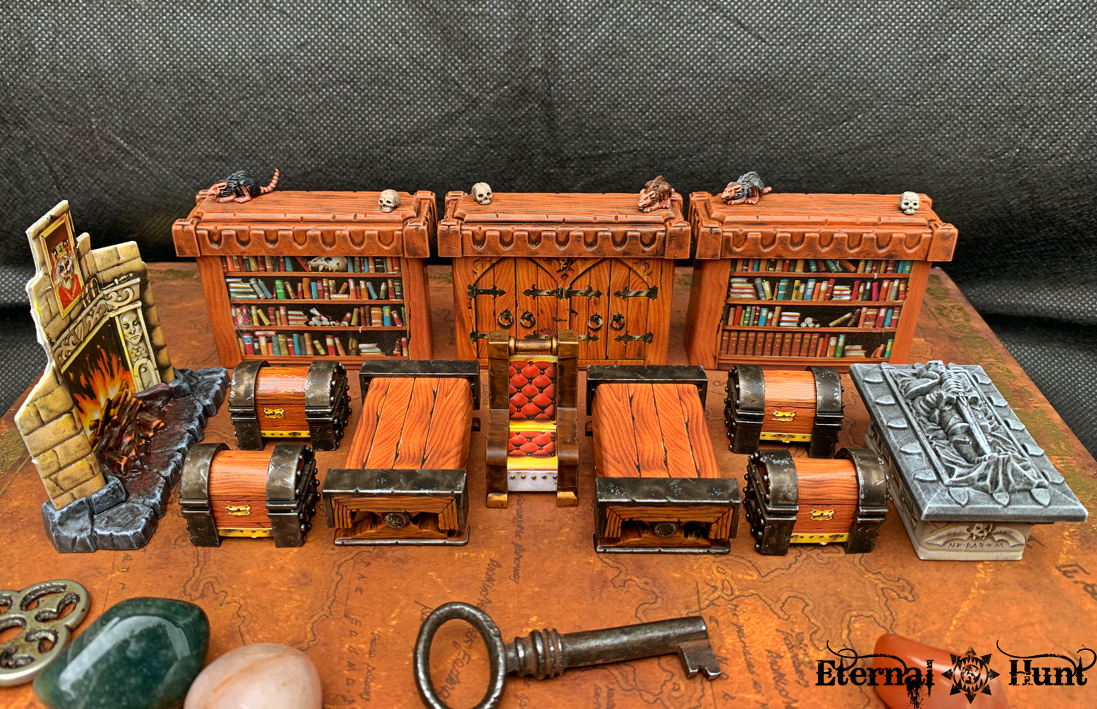
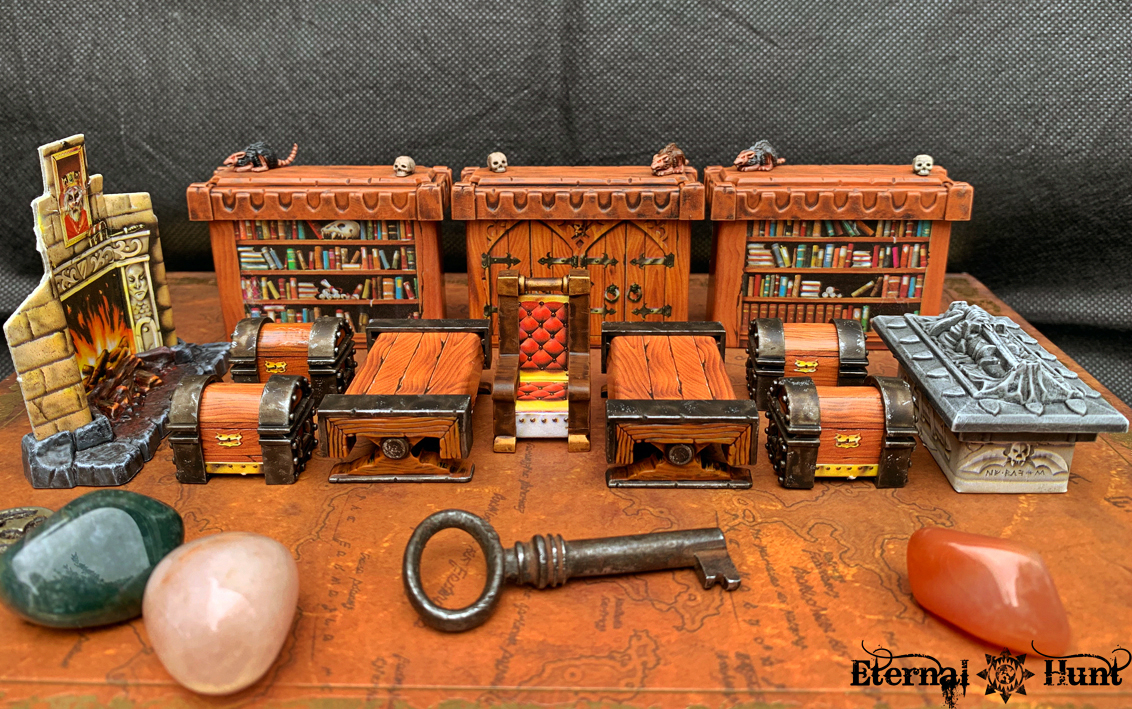
Even better, yet, this also marks the completion of the entire set of HeroQuest furniture. Here’s the complete collection, assembled for your viewing pleasure:

The prospect of getting to paint the furniture was what kept me going through some of the more grueling parts of this project — and rightly so, because I truly had a blast with those pieces! If you still have some of these somewhere in your cupboard of shame, I can only recommend giving them a spin — it’s highly enjoyable, and it taught me more about painting wood than my entire 30 years in the hobby that came before 🙂

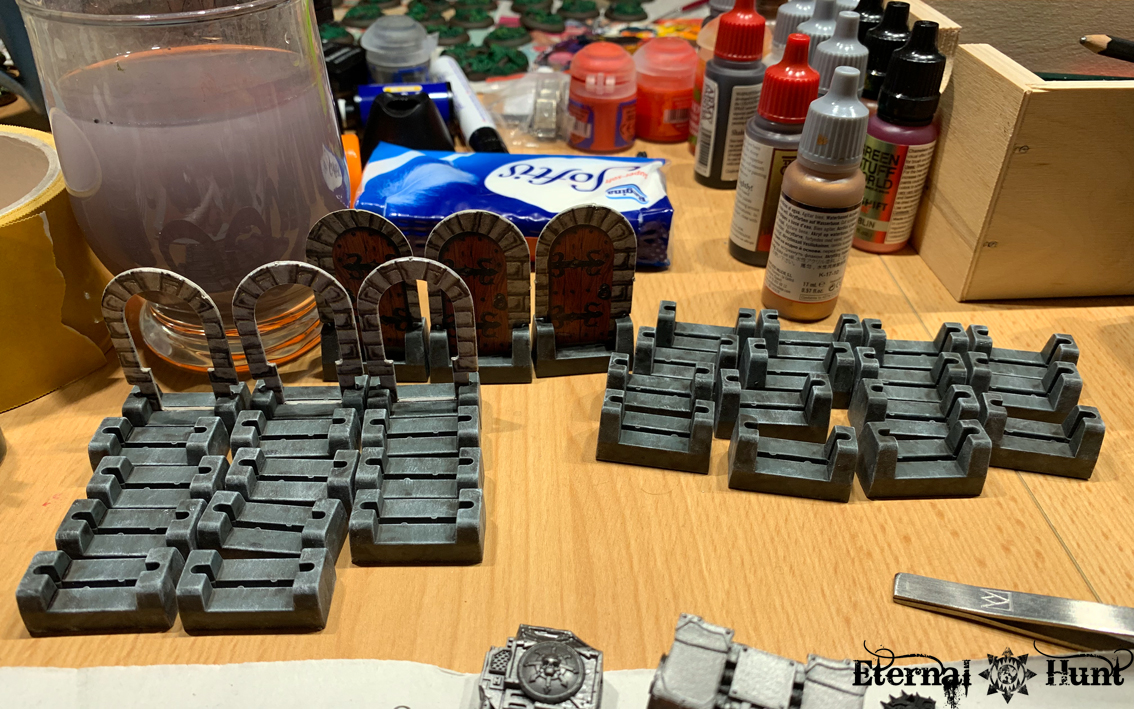
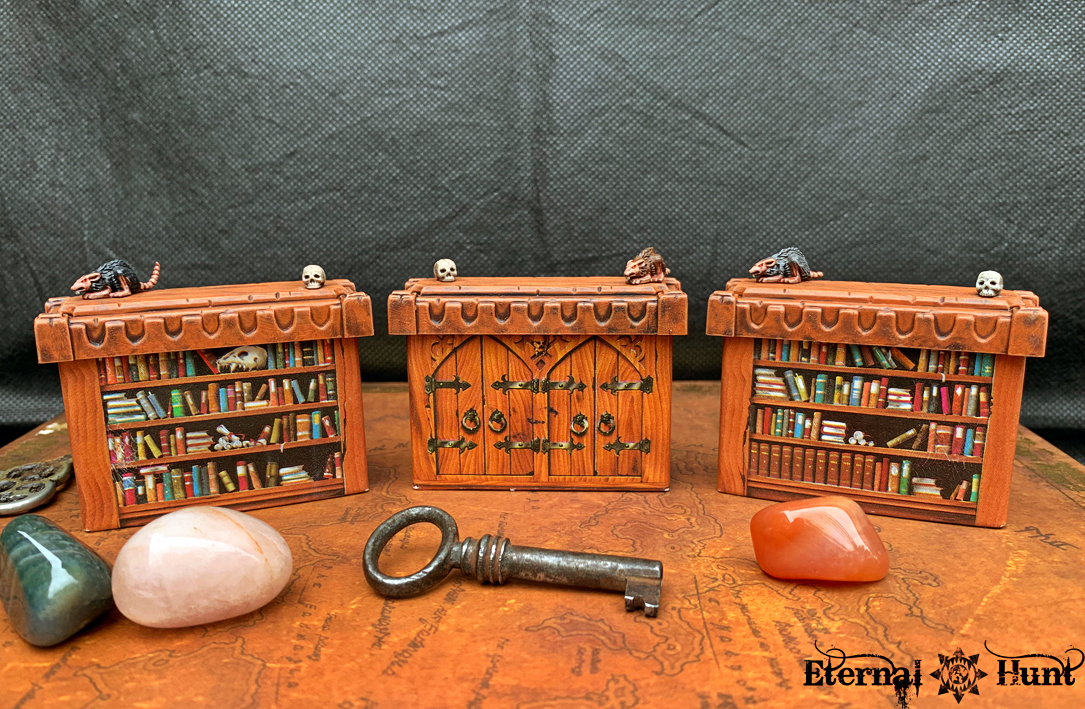
However, I was so happy with myself about all that painted furniture that I almost forgot a sizeable part of the HeroQuest boxed set that still needed to be painted — the doors!

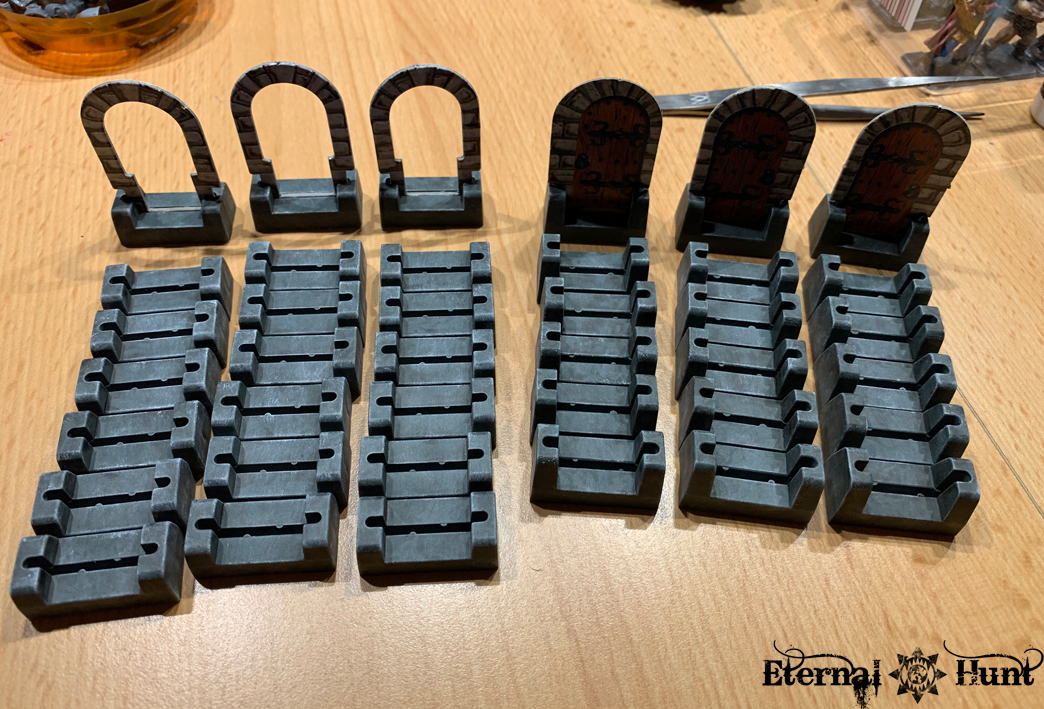
Because the game comes with 21 bases for the cardboard doors that are such an integral part of the HeroQuest experience, and while those are hardly the flashiest part of the game, I would still need to paint them in order to be able to call my copy of HeroQuest truly painted.

I chose to go for the same stoney look I also used for the bases on all of the hero and monster models:

And while this made for a fairly quick and dirty approach, painting over almost 40 of those bases (because I still own almost two complete sets) took a bit of doing. A fair bit of my last hobby session at my friend Annie’s place was actually given over to the somewhat thankless task of painting, washing and drybrushing door bases:

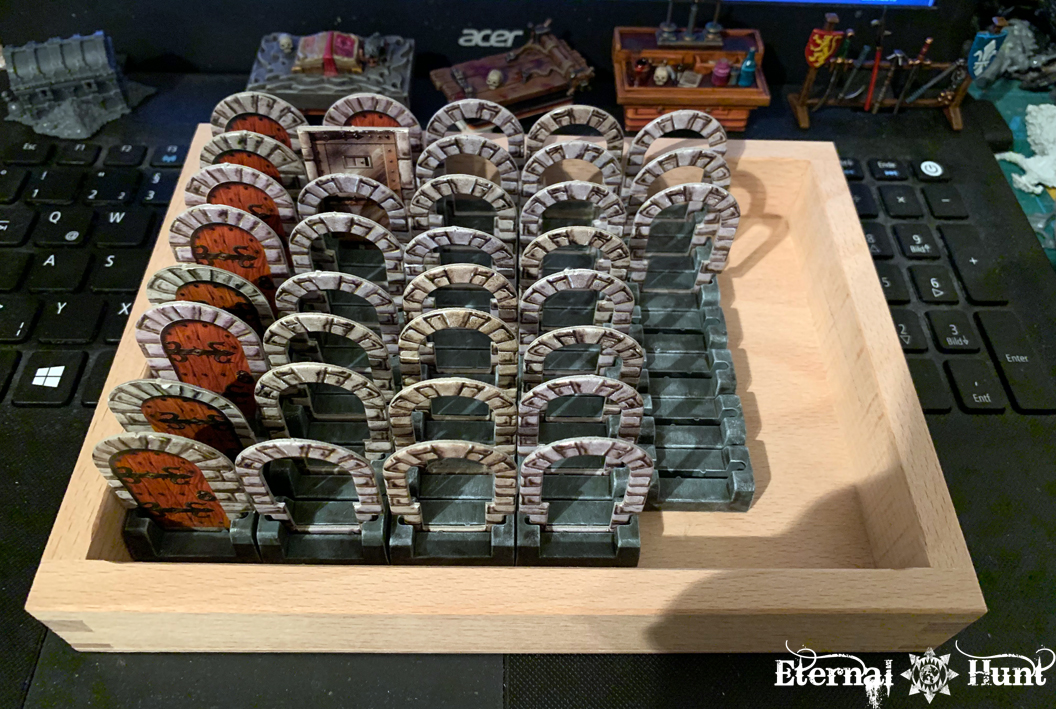
But I soldiered on, and now the doors are done as well — including quite a few spares:

And last but not least, I was finally able to get my hands on the last component of the game that was still missing from my copy: the four character boards:

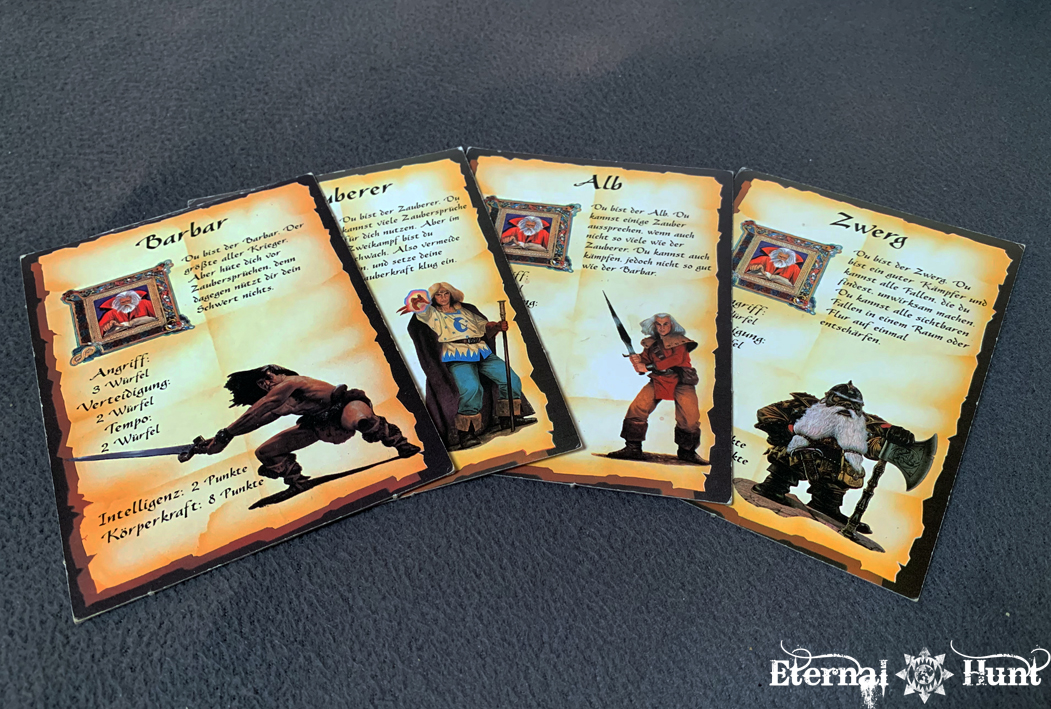
Now this was the one instance where I had to venture into the den of madness that is trying to buy HeroQuest items off ebay, but I got an okay deal, the boards got here without further damage, and they are in fairly good condition, considering their age, so all’s well that ends well.

And with that, I have actually completed my HeroQuest set (minus the twelve Men-at-arms, but those will have to wait for a bit yet). And of course I am not entirely without ideas for future additions to my collection.

That will have to wait for a bit, however, as does a proper photographic exploration of the finished set — that’s what you can look forward to for next week’s update. For now, I would love to hear your thoughts about this week’s update, so please feel free to leave a comment! And, as always, thanks for looking and stay tuned for more!

#HeroQuest2019: The end is nigh…

Posted in heroquest, old stuff, paintjob, Terrain with tags , , , , , , , , , , , , , , on April 23, 2019 by krautscientist

Not much longer before I finally own a completely painted HeroQuest set — and it’s probably for the best, too, because my readers are likely getting bored with all of the HeroQuest content of late… 😉

Anyway, last time I blazed my way through some of the more pedestrian parts of HeroQuest’s furniture, painting a whole lot of bookcases, chests and tables:


This left me with some of the more original pieces, and I was really looking forward to getting started. So here’s a look at the four missing pieces of furniture I still needed to paint at this point:

I decided to start with the sorcerer’s table, a nice and straightforward beginning. Blocking in the base colours, then working with washes and a heavy drybrush to create the table’s stone texture was relaxing work.

But that blank page on the right kept teasing me, because I knew I wanted to do something fun with it — on the one hand, simply leaving it blank would have been such a wasted opportunity, but on the other hand, simply adding more scripture also seemed like a somewhat bland solution, so I went for something a little more involved: I figured that whoever the owner of the table might be, they could possibly be trying to summon a dastardly monster to sic it on the heroes, so I did this…

Do you recognise what this is supposed to be…?

Quite right, it’s a miniature version of the Gary Chalk illustration that appears on the back of the monster cards (incidentally, the same creature also makes another appearance on the cards for “wandering monsters”).

If you are familiar with HeroQuest related trivia, you may also be asking yourself: “What about the candles?” Because each sorcerer’s table originally came with two candles (complete with flames) that were, invariably, the first parts to break or be lost, apparently: Nearly every owner of a HeroQuest set has to mitigate the fact that those chandles are likely to be lost or incomplete.

The funny thing is, I actually do have another sorcerer’s table with the candles …mostly intact:


As you can see, it was subjected to an earlier, less sophisticated paintjob, and I really wanted to start fresh with an unpainted piece. Plus I also chose the skull and rat setup for nostalgia reasons: You see, when I received my first copy of HeroQuest, the table never had the candles — either they weren’t included in the box for some reason or (equally likely) my dad didn’t realise what they were and threw them out when he assembled the original game for me. Anyway, I only realised the candles were a thing when buying my second copy years later, so I thought it would be a nice shout out to those golden days of yore to build the table with the rat and skull 🙂

I also made sure to paint the rat with light grey, almost white, fur, as a shout out to the Skaven race, because their Grey Seers mostly have light grey/white fur as well 😉

Anyway, here’s my finished sorcerer’s table:


Next up was the alchemist’s bench, easily one of the most interesting parts of HeroQuest’s furniture set — oh, sure, it may look all boring and angular, but as we’ll be seeing in a minute, this is a piece where you can really give it your best shot as a painter.

Anyway, it was easy enough to get started by blocking in the base colours, especially the wood: Once again, using Vallejo’s Parasite Brown made for an excellent match with the colour on the cardboard part of the bench. Here’s the piece after basecoating and a first pass of washes:


The next step was to take care of the wooden parts of the bench, and I did so with a mixture of drybrushing and freehanding, trying once again to suggest the texture of woodgrain. This was even more important here than on the tables and bookcases, because the alchemist’s bench has some large, flat surfaces that really profit from that extra bit of detailing:


When it came to the desktop, I picked it out in a dark red, to suggest that the surface of the bench has been covered in some kind of felt, leather or rubber, the better to serve as a support for all kinds of chemical shenanigans. By the same token, I made sure to paint on lots of dirt stains and scuff marks, to show how the bench is suitably dirty and grimy:


With that out of the way, the actual bench was mostly done:


This was were the fun started, however, because there were still those nifty extra parts: The scales that go on top of the bench were painted in a heavily verdigrised bronze/copper colour, always a nice little touch:

Most time was actually spent on the little potion flasks, though, in order to turn them into a bit of a eye catcher. This part was also an excellent way of introducing a bit of bold colour to the entire piece:

After everything was assembled, the bench was varnished with matte varnish. Then the flasks received a thick coat of gloss varnish, for fairly obvious reasons. And I also added a last round of glossy “special effects”: Some blood effect on and around the receptacle on the left side of the bench, and some ink splatter around the inkwell, papers and quill. Those last touches really sell the model, if you ask me, because they create that slightly chaotic look that really fits the desk of a mad alchemist. Take a look at the finished piece:


When all is said and done, this was one of the most rewarding pieces in the entire set to paint, and it’s also one of my favourite parts of my HeroQuest collection now.


Before we pack up for the week, there’s one last model I want to share with you today — and it has nothing whatsoever to do with furniture. So what is this about?

Of course I do realise that, technically speaking, the hero and monster models are all done and dusted. But there was still one last addition I wanted to make to my collection: You see, there are two quests in the HeroQuest quest book that call for an Orc character, namely an Orc warlord named Ulag and, slightly later, his son Grak. And while the quest book advises players to just use an Orc model with a longsword to represent either of the two, this didn’t sit right with me: I wanted a proper model I could use for whenever the game called for an Orc warlord!

My search for a period appropriate (GW) model led me to this guy:

One of the old Battle Masters Orcs, released only a couple of years later than HeroQuest (and cast in the same green plastic, incidentally). The Battle Masters Orc won out against a monpose Warhammer plastic Orc by virtue of looking a bit more similar to the HeroQuest Orcs, while at the same time boasting a slightly more heavily armoured look that made him seem more formidable.

Now the Battle Masters models are ever so slightly less detailed than the HeroQuest miniatures, but I hoped that a suitably involved paintjob would still make the model look cool enough for the job — oh, and I also spliced in an Evil Sun shield emblem from a slightly more modern plastic Orc kit, for good measure 😉

Applying the same greenskin skin recipe I had used for the rest of my Orcs, albeit with another higlight layer or two thrown in, I was able to create a model that looks similar in hue to my other HeroQuest greenskins, yet ever so slightly stands out as a more important character due to its more sophisticated paintjob.


And something pretty funny happened during the painting process: When I checked out the HeroQuest cover artwork for the umpteenth time, I discovered this guy lurking in the background:

It’s a huge coincidence, obviously, but I still feel kinda vindicated by this discovery 😉

So I So here’s my stand-in for Ulag, Grak or any other Orc Warlord I may need in games of HeroQuest:


Like I said, I think the model works fairly well as a leader for the HeroQuest Orcs: The pose and overall look are close enough, whereas the added armour really makes him look like a leader figure for the lesser orcs. Here’s a comparison picture:


And here are all of my HeroQuest Orcs with their new leader:

This also means that I have completed three “bonus models” for my HeroQuest set: Sir Ragnar (Manfred), The Orc Warlord and the Witch Lord:


It pleases me that I actually have models for these characters now, and it’s certainly a little touch that makes my HeroQuest set just that little bit more unique.

So just a few more pieces left to paint, and then I’ll have completed a project that has been thirty years in the making! For now, however, I would love to hear any feedback or thoughts you may have concerning today’s update! And, as always, thanks for looking and stay tuned for more!

#HeroQuest2019: Dungeon interior design 101

Posted in heroquest, old stuff, paintjob, Terrain with tags , , , , , , , , on April 15, 2019 by krautscientist

Time for another update from the depths of the dungeon: With the hero and monster models for my HeroQuest set now accounted for,…

…it was time to turn my attention to the furniture that comes with the game.

Now I have been looking forward to this particular part of my #HeroQuest2019 project for quite a while, both because the little furniture was always one of the coolest parts of HeroQuest, but also because the pieces provide an interesting challenge:

At first glance, the task of painting the furniture seems straightforward enough — even moreso since there isn’t even that much to be painted in the first place: Nearly all of the pieces, save the weapons rack, are made up of a foldable cardboard part and a plastic part that holds everything together and provides some sculpted detail. However, therein lies the challenge: While you may or may not choose to make the monsters and heroes resemble the in-game art (or the Mike McVey paintjobs on the box, for that matter), that choice doesn’t really matter all that much during the actual game, where the models basically stand on their own.

Not so with the furniture, because the art on the cardboard parts is always there, so it makes sense to ensure that the paintjob of the plastic part actually fits the art — or even matches the colours employed. This added a fun little wrinkle to the whole exercise, and one that doesn’t usually occur during 40k painting.

Now you could obviously choose a different approach and replace all of the cardboard with new parts made from wood, foamcore or GS — and, indeed, back when I made a short previous attempt at painting my HeroQuest set, that was exactly what I wanted to do, prompted by Damien Thevenin’s fantastic work, among others (his blog is unfortunately defunct, but photos of his work can still be found on various forums, Google, Pinterest and, in fact, on his Facebook page).

These days I feel a little differently about the cardboard parts of the furniture, however: They are really charming, for one. And the match the high level of the rest of HeroQuest’s graphical presentation. So I decided the cardboard parts deserved to be preserved — which, in turn, would require a bit of “Trompe-l’œil painting”, so to speak, to make sure everything fit together from a visual standpoint.

I started with something that I knew would be fun, namely the fireplace and sarcophagus:

I actually made a previous attempt at the Sarcophagus, inspired by a similar piece created by the aforementioned Damien Thevenin. Here’s the stock (unpainted) sarcophagus next to the one I built up using foamcore and some extra bitz:


I still think the built-up piece works rather well — I am only a bit miffed in hindsight that I didn’t give more care to the actual paintjob…

So my second attempt at painting the sarcophagus ended up being a bit more conventional — but also more involved, with the actual paintjob carefully built up over several instances of careful drybrushing. Take a look at the finished piece:


When I was happy with the colour, I added a few lines here and there that might be cracks, veins or fault lines in the stone — they were simply drawn on using a pencil, an idea stolen from a marble base my buddy DexterKong created using a pencil a while back.

The technique worked pretty well and seems like it should warrant further exploration at a later date…

The fireplace was great fun in that it contained a bit of a “special effect”. Seeing how the logs that are part of the sculpted plastic bit are actually a bit farther away from the roaring fire burning in the background, as it were, I decided to go for the look of logs that are starting to catch fire, with their edges beginning to glow. It’s an effect I’ve had to improvise, but I am still happy with the outcome:

I also added several layers of Bloodletter glaze to the stone floor, making it look as though there were heat radiating outwards from the fire — an effect that already came in handy back when I built the base for my Daemon Primarch Angron conversion.

So with the first two pieces successfully completed, I decided to jump right into a bigger task and tackled the bookcases, cupboard, treasure chests and tables next. All of these use the exact same wooden tones for the carboard artwork, so it definitely made sense to paint them back to back:

Now seeing how the plastic parts on these pieces of furniture are so relatively small, you wouldn’t suspect them to be a lot of work, right? I thought so too, but finishing those pieces did take quite some doing!

Fortunately enough, my friend Annie helpfully pointed out that Valllejo’s Parasite Brown is a surprisingly close match for the wooden tone appearing on the cardboard pieces — this made my life much easier during the painting process!

So let’s take a look at the results. We’ll start with the bookcases and cupboard:


The Parasite Brown basecoat really did most of the work here. After adding some Strong Tone wash, the wood on those bookcases was drybrushed, although by being very careful and deliberate about it, I made sure that the bristles of the drybrush actually created an effect similar to woodgrain — a bit of a happy accident, admittedly 😉


The relatively straightforward way of painting the wood left me with enough time to focus on some of the smaller details, such as adding some character to the rats perched on top of the bookcases and cupboard:

Next up were the treasure chests, which should have been the easiest part of painting the furniture, but did take far longer to complete than they had any right to. Once again, I used Parasite Brown for the wood and contrasted it with heavily blackened and worn metal fittings (created by undercoating the metallic area with Leadbelcher, then going to town on it with a heavy wash of Dark Tone and Vallejo Smokey Ink. Some scratches were then sponged and painted on).


The tables followed the same formular, although they were interesting in that they allowed me to experiment with painting on some freehand suggestion of woodgrain. You should even be able to make it out in the pictures below if you squint 😉


Oh, and as you can see, I also painted the little throne. This has always been one of my favourite pieces of HQ furniture, but it turned out to be really straightforward to paint (a small accident with a pot of brown paint notwithstanding…):

Working with these pieces has also made me (re-)discover what HeroQuest already taught us in the gender-stereotypical toy landscape of the 80s and 90s: That it’s perfectly okay to play around with little furniture if you feel like it. Seriously, those pieces are just begging to be used for little vignettes:

Ah, yes: There’s nothing like a comfy chair next to a roaring fire, and with treasure to plunder already in sight — this is the life!


Now all of the above actually adds up to quite a collection of finished furniture, if I do say so myself. Take a look:


This leaves only four unpainted parts, and seeing how each of the remaining pieces is one-of-a-kind, this should make the home stretch of the project rather enjoyable. At least that’s what I hope! 🙂


On a partially related note, I have recently upgraded to a new phone, and of course one of the more important things was to figure out whether it was any good at taking miniature photos — so what better test run than to set up some mock HeroQuest game situations? Anyway, I thought you guys might enjoy these as well, and they seem like a nice capstone for today’s post:


For now, these shots are merely a staged affair, but at this rate, it won’t be long before I actually get to experience the fully painted game in earnest — keep your fingers crossed for me! 🙂

And with that, it’s back to the painting table for me! Please feel free to let me hear any feedback or comments you may have! And, as always, thanks for looking and stay tuned for more!

Barricades – quick and easy

Posted in 40k, DIY, Inq28, Terrain with tags , , , , , , , , on October 26, 2012 by krautscientist

In between all the painting and kitbashing, let’s take time for a quick and easy recipe for building your own scatter terrain for games of 40k, Necromunda, Inquisitor 28 (or any other skirmisher, for that matter). This is something for slow days, when you want to get something done on the hobby front, but don’t feel like breaking out all the colours and really going to town on a model. Let’s take a look at barricades.

For me, everything started when I saw this picture on DRommel’s Savlar Chem-Dog plog (very much worth visiting, by the way!) over at Throne of Skulls. There I saw this:

Image appears courtesy of DRommel

This barricade looked quite excellent and fairly easy to duplicate at the same time to me. So, full of inspiration, I sat down to reverse-engineer DRommel’s recipe and build my own barricades in very short time with nothing but leftover stuff. Here’s how:

I. What we need:

Here are all the ingredients. The good news is that you will probably have most of this lying around anyway 😉


Some pieces of foamcore. For this you can basically use all the leftovers from other projects. You’ll need a couple of longer cuts, though, to make the bases for the brarricades.

Some corrugated cardboard. This comes in all shapes and measurements. Be sure to use cardboard that’s easy enough to cut. This will make for very convincing corrugated metal and help to break up all the otherwise smooth foamcore surfaces.


A couple of bitz. Anything goes here. Choose whatever you find at the bottom of your bitz box. Vaguely technical looking parts are best. I used some parts from an old model truck and some stuff from an old military terrain kit. Oh, and pieces of leftover sprue make for great sharpened stakes! And we all have tons of that stuff lying around, don’t we?

If you want to follow this recipe, you’ll also need some basing materials. Sand, cork, whatever you like.

Right, let’s get started, shall we?

II. What to do:

I started by drawing the outlines for the bases on some bigger pieces of foamcore, using a 40k bike base as a template. You can make all of the bases the same lenght, although it may be a good idea to make some longer and some shorter ones for added flexibility. I cut out the bases using a craft knife.


Then I beveled the edges of the bases with my knife. I did this so they would look more natural on the tabletop. Don’t worry if your bases – like mine – do look rather messy at this point: We’ll be able to fix that shortly!


I cut smaller pieces from the leftover foamcore and corrugated cardboard. These pieces form the main body of the barricade, so make sure to have a nice selection of different lenghts. The less rectangular the shape, the better.


I then glued the smaller pieces onto the bases using wood glue. I tried to make this basic construction look pretty haphazard, like random pieces had been collected and thrown together.


Then I added the corrugated cardboard to add some additional variety…


..and repeated the same step with the leftover bitz, sharpened pieces of sprue etc. At this point, the basic construction was finished.


Then I added my basing materials to the bases, using wood glue to glue them down. In this particular case, I used a mix of GW modelling sand and small pieces of cork. I also used the glue to seal all open areas of foam, so the foam wouldn’t disintegrate during the next step.


Then everything was painted using cheap spray paint from the craft store. I chose brown as a basecoat because I wanted the barricades to have a rusty, dilapidated look.

As you can see, the unified paint did a great job of tying together all the disparate parts. I then stippled GW Vermin Brown onto the barricades, creating patches of rust. Then I drybrushed the edges of the barricades with GW Boltgun (also stippling on some more Boltgun Metal). Then I painted thinned down Vermin Brown into the recesses — especially on the corrugated cardboard! The sand and cork on the bases were drybrushed with GW Bleached Bone. And lastly, I used GW Nuln Oil to paint on patches of oil, grime etc.

Here are the finished barricades:


This was the easiest recipe I could think of. These barricades come at basically no cost, and you’ll be able to churn out a ton of them in no time at all! Of course you can add some more variety by adding different colours, propaganda posters and all kinds of bitz. Ultimately, this may be the easiest terrain project I have ever done (and probably the one with the most bang for the – nonexistent – buck!).

Let’s wind up this post wit some shots of the barricades and some models. These photos also show you how flexible the barricades are:

Some twists behind a single barricade

A gang of twists defending their ramshackle fortifications

Scatter terrain like this will come in handy during games of Inquisitor or Necromunda. And, as I have tried to show you in this post, it’s ridiculously easy to built, at basically no extra cost!

Thanks to DRommel for the inspiration, and as always, thanks to you for looking! Stay tuned for more!